> ## Documentation Index
> Fetch the complete documentation index at: https://docs.nimbleway.com/llms.txt
> Use this file to discover all available pages before exploring further.
# Plugin Installation
> Install the Nimble plugin and turn your AI coding assistant into a web data expert
Install the Nimble plugin and turn Claude Code or Cursor into a web data powerhouse. Search, extract, scrape, and build reusable extraction agents, all from your AI coding assistant.
The plugin bundles two skills and an MCP server connection into a single package.
## What's Included
| Component | Description |
| ------------------------------ | --------------------------------------------------------------------------- |
| **nimble-web-expert** skill | Get live web data instantly. Search, extract, map, and crawl via Nimble CLI |
| **nimble-agent-builder** skill | Create, test, refine, and publish reusable extraction workflows |
| **MCP server config** | Pre-configured connection to the Nimble MCP server |
## Skills Overview
**Build durable, reusable extraction workflows.** Create, test, validate, refine, and publish an agent for a specific domain (e.g., "build an agent for extracting Amazon product data"). Multi-step process, not for getting data right now.
**Triggers:** "set up extraction for X site", "build an agent for...", "create a reusable scraper"
**Get web data immediately.** Fast, one-off extractions. Scrape pages, fetch URLs, search the web, crawl site sections. This is the only way your AI coding assistant can access live websites.
**Triggers:** Fetching any URL, scraping data, web search, bulk crawling, running pre-built agents
| | **agent-builder** | **web-expert** |
| ------------ | -------------------------------- | ---------------------- |
| **Goal** | Reusable workflow | Immediate data |
| **Speed** | Slower (build/test/refine cycle) | Fast, direct |
| **Output** | Published agent | Extracted data |
| **Use when** | "I'll need this repeatedly" | "Get me this data now" |
## Prerequisites
1. **Nimble CLI**: Install globally:
```bash theme={"system"}
npm i -g @nimble-way/nimble-cli
```
2. **Nimble API Key**: [Sign up](https://online.nimbleway.com/signup) and generate a key from your [Account Settings > API Keys](/nimble-sdk/admin/account-management#api-keys)
3. Set the environment variable:
```bash theme={"system"}
export NIMBLE_API_KEY="your-api-key-here"
```
Or add to `~/.claude/settings.json` (Claude Code):
```json theme={"system"}
{
"env": {
"NIMBLE_API_KEY": "your-api-key-here"
}
}
```
## Install by Platform
### Nimble Marketplace (recommended)
```bash theme={"system"}
claude plugin marketplace add Nimbleway/agent-skills && \
claude plugin install nimble@nimble-plugin-marketplace
```
This installs both skills and configures the MCP server automatically.
### Local Plugin Directory
Clone the repo and load it as a local plugin:
```bash theme={"system"}
git clone https://github.com/Nimbleway/agent-skills.git
claude --plugin-dir /path/to/agent-skills
```
Install the Nimble plugin from the Anthropic & Partners directory inside Claude. Authentication is handled via OAuth — no API key required.
### One-click install
 ### Step-by-step
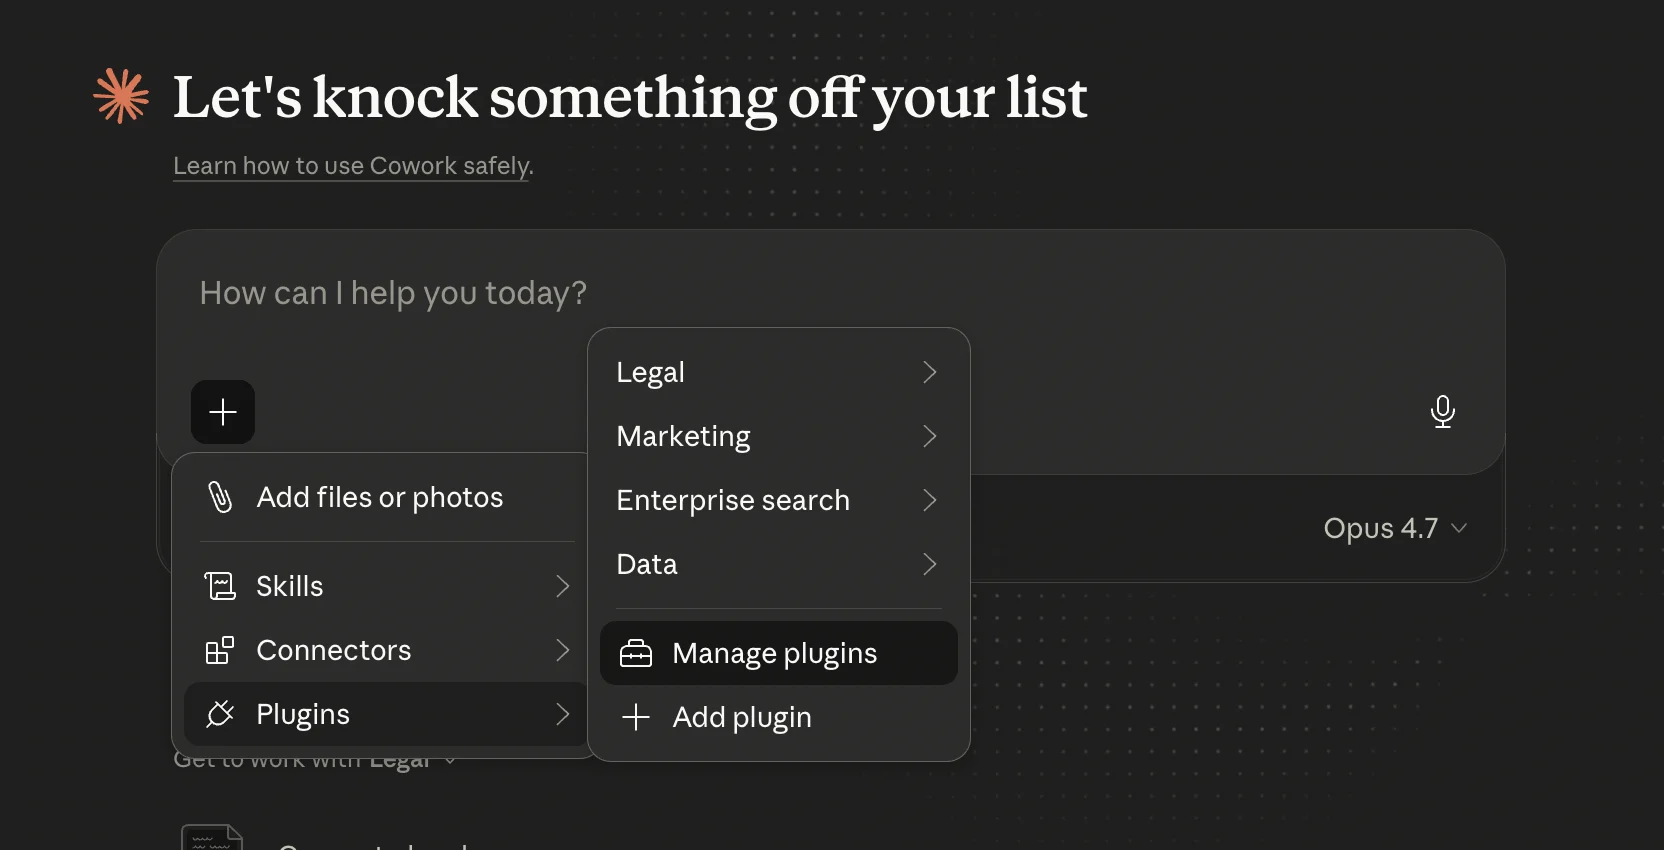
In a new Cowork task, click the **+** button, hover **Plugins**, then click **Manage plugins**.
### Step-by-step
In a new Cowork task, click the **+** button, hover **Plugins**, then click **Manage plugins**.
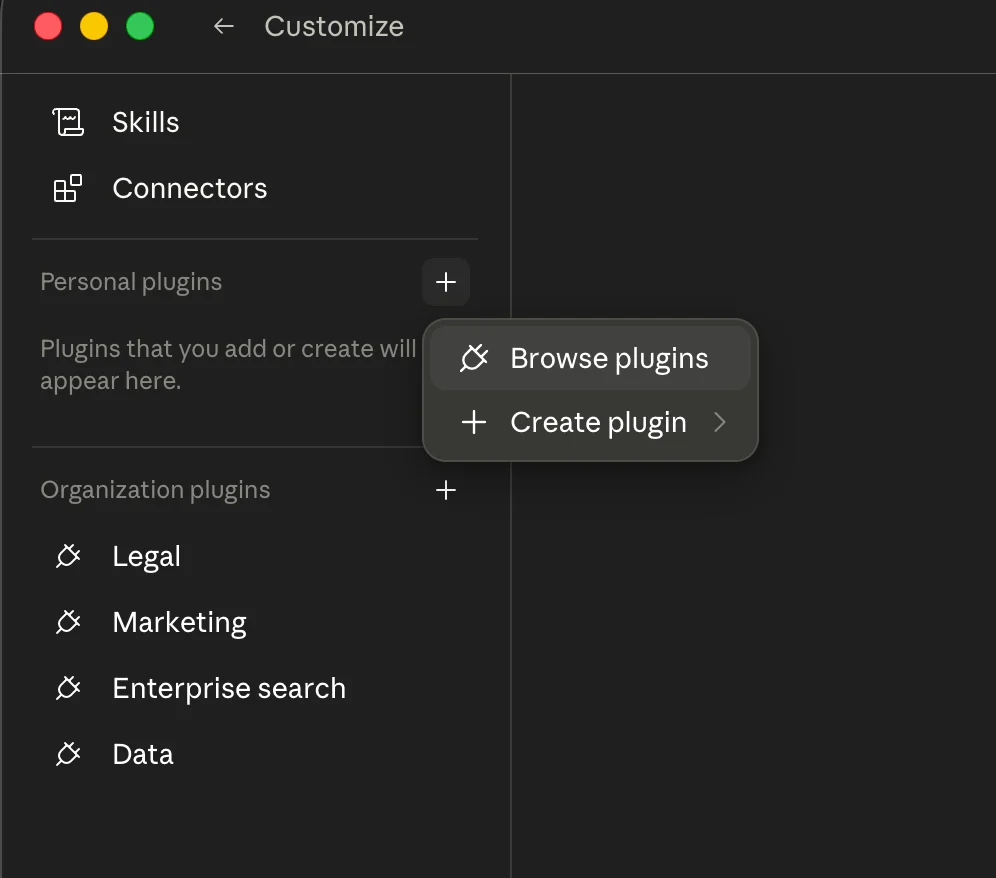
 Alternatively, from the **Customize** screen, click **+** next to **Personal plugins** and choose **Browse plugins**.
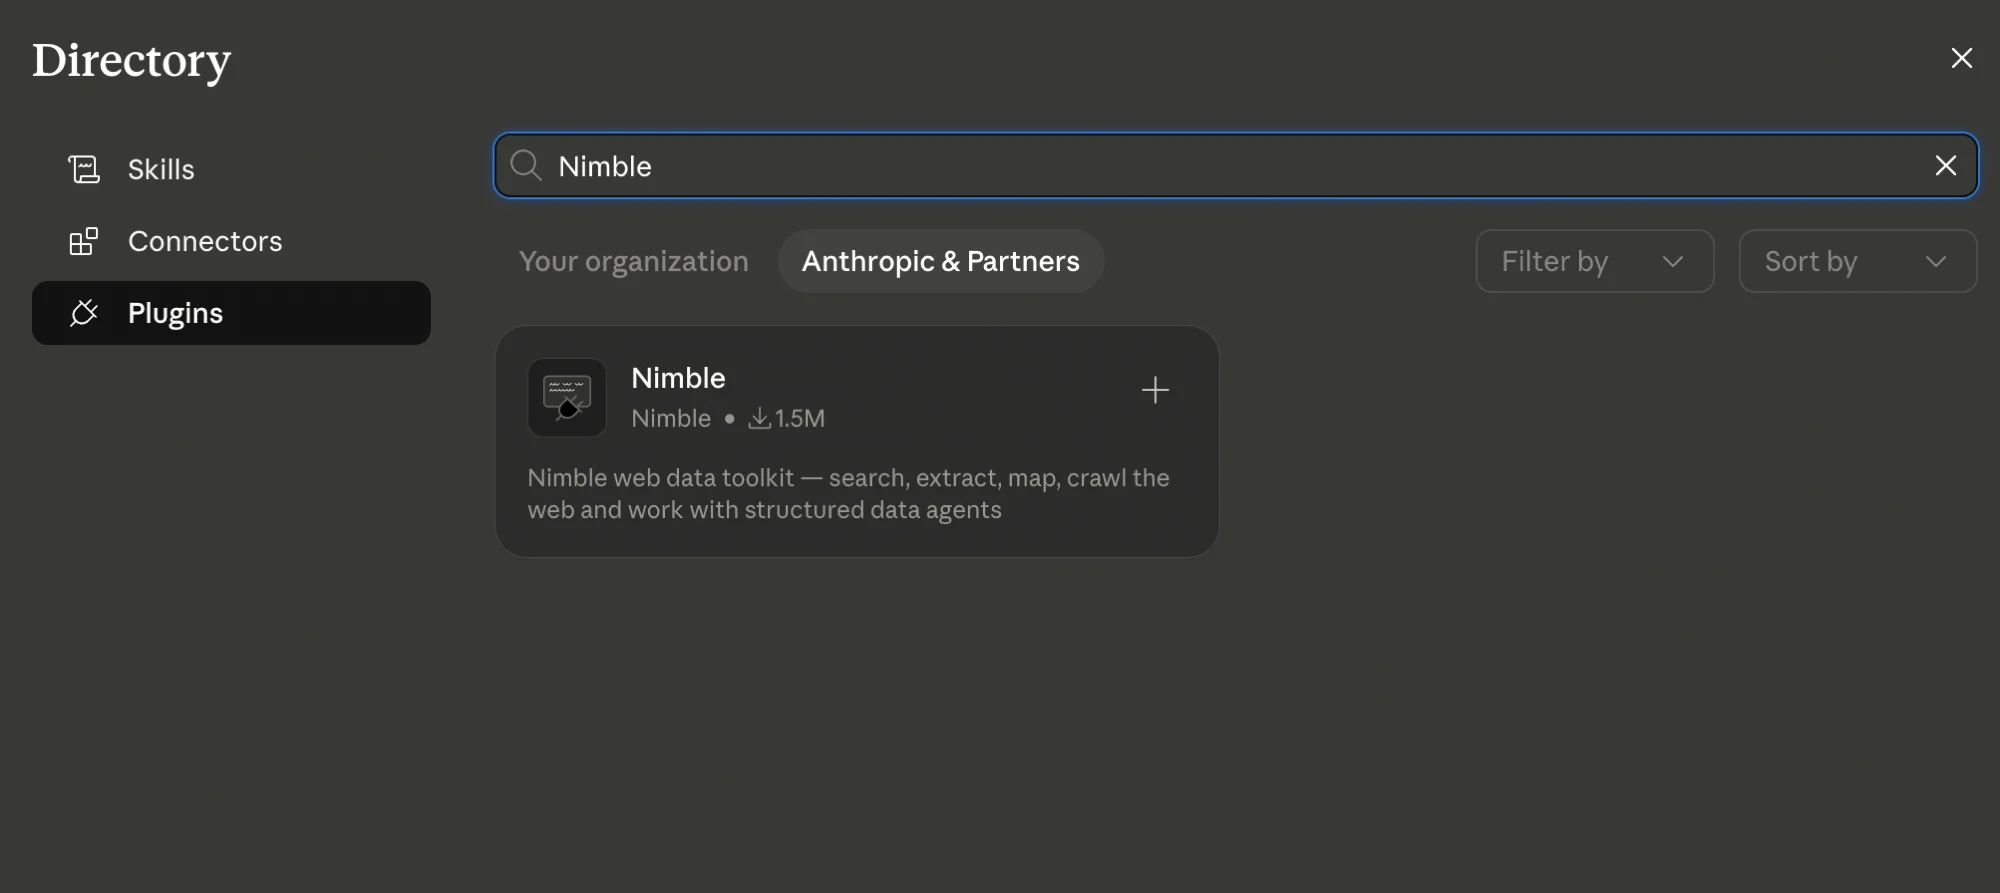
 Switch to the **Plugins** tab, select **Anthropic & Partners**, and search for `Nimble`.
 Open the Nimble plugin and click **Install**. The plugin's skills, agents, and MCP connector register automatically.
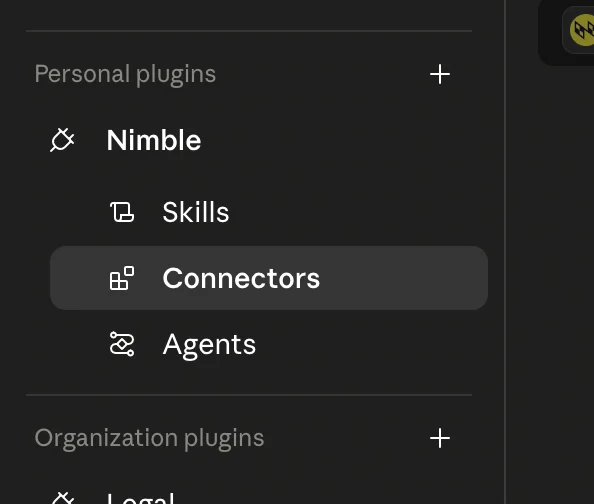
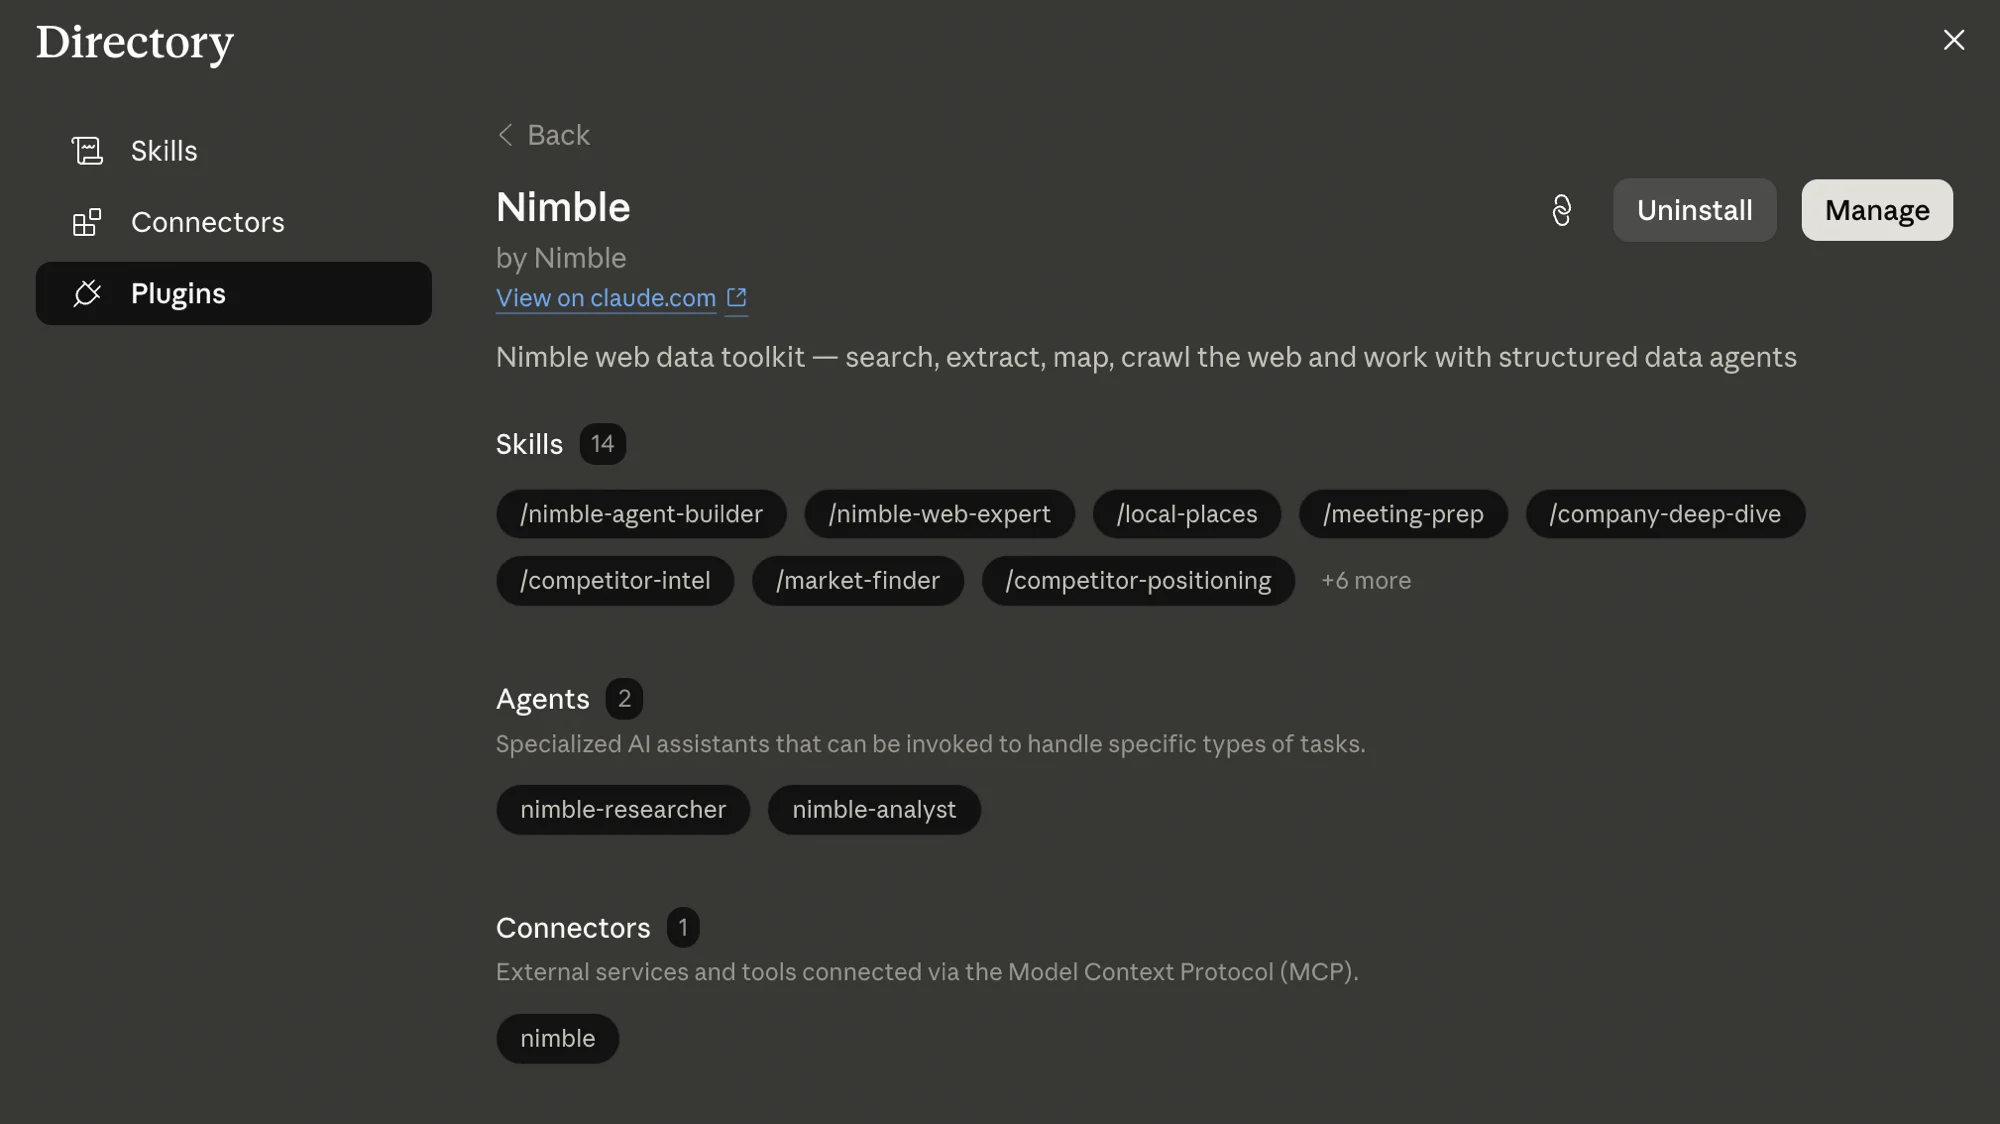 Nimble now appears under **Personal plugins** in Customize, with **Skills**, **Connectors**, and **Agents** sub-sections.
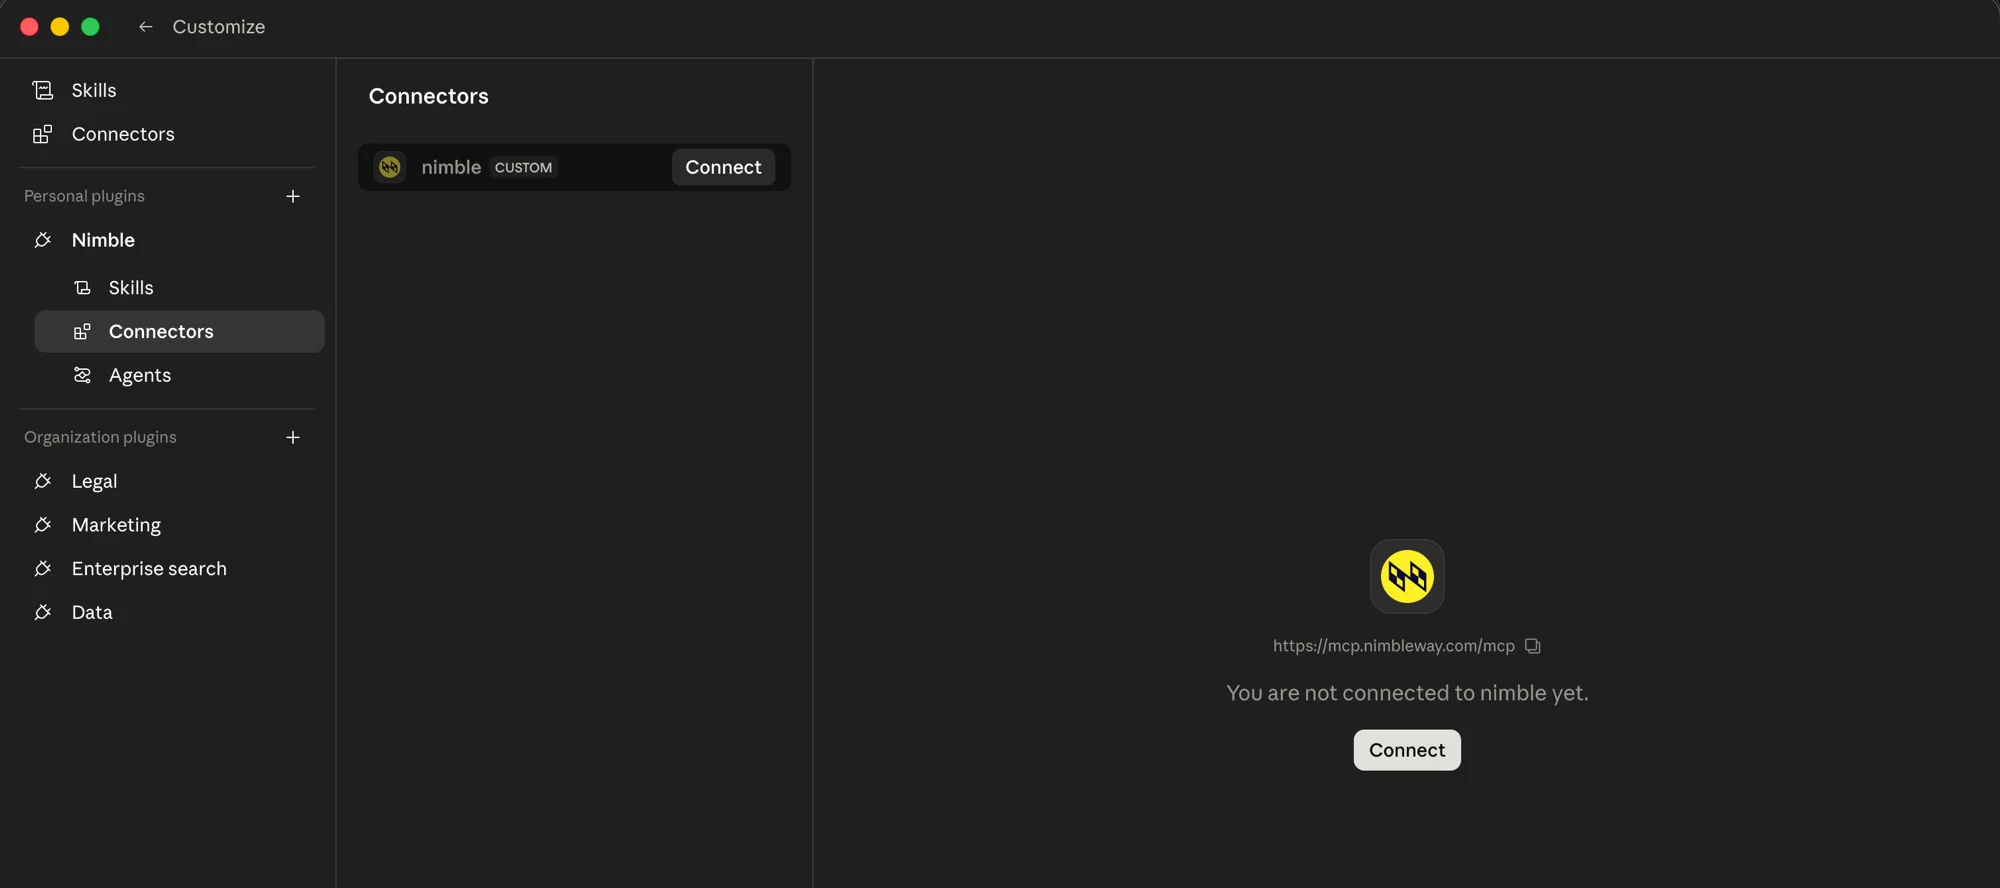
 Open **Connectors**, then click **Connect** to start OAuth.
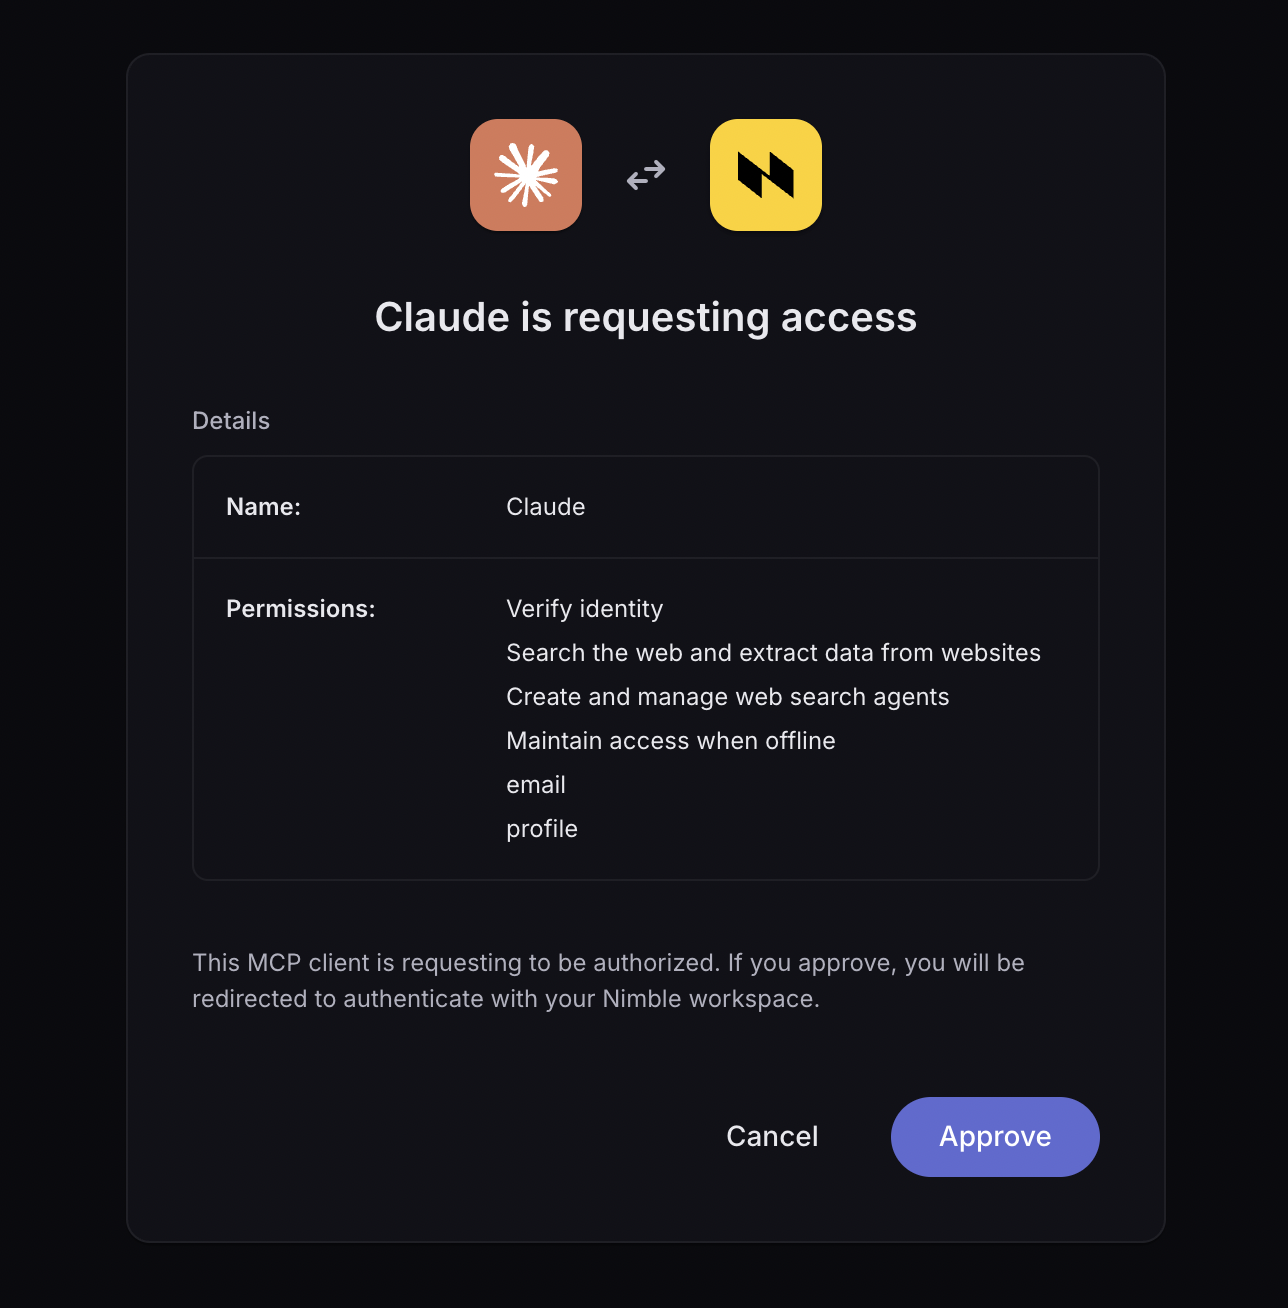
 Review the permissions Claude is requesting and click **Approve** to authenticate with your Nimble workspace.
 Once approved, the Nimble skills, agents, and MCP tools are live across your Cowork conversations.
For more on connecting Nimble to other Claude surfaces, see the [Claude AI Connectors guide](/integrations/connectors/anthropic/claude-connectors).
### Step 1: Add the MCP Server
Click the button below to add the Nimble MCP server to Cursor instantly:
Once approved, the Nimble skills, agents, and MCP tools are live across your Cowork conversations.
For more on connecting Nimble to other Claude surfaces, see the [Claude AI Connectors guide](/integrations/connectors/anthropic/claude-connectors).
### Step 1: Add the MCP Server
Click the button below to add the Nimble MCP server to Cursor instantly:
 After installing, replace `NIMBLE_API_KEY` in **Cursor Settings > MCP Servers > nimble-mcp-server** with your actual [Nimble API key](https://online.nimbleway.com/account-settings/api-keys).
Add to `.cursor/mcp.json` (project) or `~/.cursor/mcp.json` (global):
```json theme={"system"}
{
"mcpServers": {
"nimble-mcp-server": {
"url": "https://mcp.nimbleway.com/mcp",
"headers": {
"Authorization": "Bearer NIMBLE_API_KEY"
}
}
}
}
```
Restart Cursor for changes to take effect.
### Step 2: Add Skills and Rules
Install the skills using the Vercel Agent Skills CLI:
```bash theme={"system"}
npx skills add Nimbleway/agent-skills -a cursor
```
This copies both skills (`nimble-web-expert` and `nimble-agent-builder`) and Cursor rules into your project.
Clone the repo and open the `agent-skills` folder in Cursor:
```bash theme={"system"}
git clone https://github.com/Nimbleway/agent-skills.git
```
Cursor auto-discovers:
* `skills/` both skills
* `rules/` Cursor rules (auto-loaded)
* `mcp.json` MCP server connection
### Step 1: Add the MCP Server
Codex stores MCP configuration in `~/.codex/config.toml` (or a project-scoped `.codex/config.toml`). Add:
```toml theme={"system"}
[mcp_servers.nimble-mcp-server]
url = "https://mcp.nimbleway.com/mcp"
bearer_token_env_var = "NIMBLE_API_KEY"
```
Codex reads `NIMBLE_API_KEY` from your environment at runtime — never hardcode the key. Verify the server is registered with `/mcp` inside the Codex TUI.
### Step 2: Add Skills
```bash theme={"system"}
npx skills add Nimbleway/agent-skills -a codex
```
Installs both skills into Codex's skill discovery paths (`~/.agents/skills/`). Restart Codex if `/skills` doesn't show `nimble-web-expert` and `nimble-agent-builder`.
[Cortex Code](https://docs.snowflake.com/en/user-guide/cortex-code/cortex-code), Snowflake's native AI coding agent for the terminal, installs the Nimble MCP server with a single command. OAuth handles authentication — no API key required.
### Add Nimble as an MCP server
```bash theme={"system"}
cortex mcp add nimble https://mcp.nimbleway.com/mcp --transport http
```
Cortex Code writes the server to `~/.snowflake/cortex/mcp.json`. On first connection, your system browser opens for OAuth sign-in; tokens are stored in your OS keychain and refreshed automatically.
### Verify the connection
```bash theme={"system"}
cortex mcp list
cortex mcp start
```
Once `nimble` shows as connected, its tools are namespaced as `mcp__nimble__search`, `mcp__nimble__extract`, `mcp__nimble__map`, and `mcp__nimble__crawl`.
For organization-wide rollout via managed settings, see the [full Cortex Code integration guide](/integrations/partnerships/snowflake/cortex-code).
```bash theme={"system"}
npx skills add Nimbleway/agent-skills
```
This installs both skills into your project. To verify:
```bash theme={"system"}
npx skills add Nimbleway/agent-skills --list
```
The agents skill requires the MCP server. After installing via `npx skills`, connect the server manually:
```bash theme={"system"}
claude mcp add --transport http nimble-mcp-server https://mcp.nimbleway.com/mcp \
--header "Authorization: Bearer ${NIMBLE_API_KEY}"
```
## What's Next
End-to-end tutorial: competitive price analysis across Amazon, Walmart, and
Nike, from a single prompt
Prefer a visual interface? Create agents in the browser
Need enterprise scale or managed delivery?
View the full plugin source on GitHub
After installing, replace `NIMBLE_API_KEY` in **Cursor Settings > MCP Servers > nimble-mcp-server** with your actual [Nimble API key](https://online.nimbleway.com/account-settings/api-keys).
Add to `.cursor/mcp.json` (project) or `~/.cursor/mcp.json` (global):
```json theme={"system"}
{
"mcpServers": {
"nimble-mcp-server": {
"url": "https://mcp.nimbleway.com/mcp",
"headers": {
"Authorization": "Bearer NIMBLE_API_KEY"
}
}
}
}
```
Restart Cursor for changes to take effect.
### Step 2: Add Skills and Rules
Install the skills using the Vercel Agent Skills CLI:
```bash theme={"system"}
npx skills add Nimbleway/agent-skills -a cursor
```
This copies both skills (`nimble-web-expert` and `nimble-agent-builder`) and Cursor rules into your project.
Clone the repo and open the `agent-skills` folder in Cursor:
```bash theme={"system"}
git clone https://github.com/Nimbleway/agent-skills.git
```
Cursor auto-discovers:
* `skills/` both skills
* `rules/` Cursor rules (auto-loaded)
* `mcp.json` MCP server connection
### Step 1: Add the MCP Server
Codex stores MCP configuration in `~/.codex/config.toml` (or a project-scoped `.codex/config.toml`). Add:
```toml theme={"system"}
[mcp_servers.nimble-mcp-server]
url = "https://mcp.nimbleway.com/mcp"
bearer_token_env_var = "NIMBLE_API_KEY"
```
Codex reads `NIMBLE_API_KEY` from your environment at runtime — never hardcode the key. Verify the server is registered with `/mcp` inside the Codex TUI.
### Step 2: Add Skills
```bash theme={"system"}
npx skills add Nimbleway/agent-skills -a codex
```
Installs both skills into Codex's skill discovery paths (`~/.agents/skills/`). Restart Codex if `/skills` doesn't show `nimble-web-expert` and `nimble-agent-builder`.
[Cortex Code](https://docs.snowflake.com/en/user-guide/cortex-code/cortex-code), Snowflake's native AI coding agent for the terminal, installs the Nimble MCP server with a single command. OAuth handles authentication — no API key required.
### Add Nimble as an MCP server
```bash theme={"system"}
cortex mcp add nimble https://mcp.nimbleway.com/mcp --transport http
```
Cortex Code writes the server to `~/.snowflake/cortex/mcp.json`. On first connection, your system browser opens for OAuth sign-in; tokens are stored in your OS keychain and refreshed automatically.
### Verify the connection
```bash theme={"system"}
cortex mcp list
cortex mcp start
```
Once `nimble` shows as connected, its tools are namespaced as `mcp__nimble__search`, `mcp__nimble__extract`, `mcp__nimble__map`, and `mcp__nimble__crawl`.
For organization-wide rollout via managed settings, see the [full Cortex Code integration guide](/integrations/partnerships/snowflake/cortex-code).
```bash theme={"system"}
npx skills add Nimbleway/agent-skills
```
This installs both skills into your project. To verify:
```bash theme={"system"}
npx skills add Nimbleway/agent-skills --list
```
The agents skill requires the MCP server. After installing via `npx skills`, connect the server manually:
```bash theme={"system"}
claude mcp add --transport http nimble-mcp-server https://mcp.nimbleway.com/mcp \
--header "Authorization: Bearer ${NIMBLE_API_KEY}"
```
## What's Next
End-to-end tutorial: competitive price analysis across Amazon, Walmart, and
Nike, from a single prompt
Prefer a visual interface? Create agents in the browser
Need enterprise scale or managed delivery?
View the full plugin source on GitHub