LogoLogo
Nimble HomeLoginCreate an Account
  • Home
  • Quick Start Tutorials
    • Tutorial Library
      • Track SEO and SEM Ranking
      • Reddit as a Guerilla Marketing Strategy
  • Nimble Platform
    • Nimble Platform Overview
    • Online Pipelines
      • Supermarkets
        • ASDA
        • Tesco Groceries
        • Sainsbury’s
        • Morrisons
      • eCommerce
      • Restaurants
        • Yelp
        • Tabelog
        • Uber Eats Japan
        • Demaecan
        • Uber Eats US
      • Real Estate
        • Zillow
  • Nimble SDK
    • SDK Overview
    • Web API
      • Web API Overview
      • API Product Specs
      • Nimble Web API Quick Start Guide
        • Introduction
        • Nimble APIs Authentication
        • Real-time URL request
        • Delivery methods
        • Batch processing
        • Response codes
        • FAQs
      • Nimble Web API Functions
        • Realtime, Async & Batch Request
        • Geo Location Targeting
        • Javascript Rendering
        • Page Interaction
          • Wait (delay)
          • Wait for Selector
          • Wait and Click
          • Wait and Type
          • Scroll
          • Scroll to
          • Infinite Scrolling
          • Capturing Screenshots
          • Collecting Cookies
          • Executing HTTP Requests
          • Operation Reference
        • Network Capture
          • Filter by URL Matching
          • Filter By Resource Type
            • Real World Demo: Capturing Ajax Requests
          • Wait for Requests
          • Capturing XHR without Rendering
          • Operation Reference
        • Data Parsing
          • Parsing Templates
          • Merge Dynamic Parser
        • Custom Headers & Cookies
        • General Params
      • Vertical Endpoints
        • SERP API
          • Real-time search request
          • Getting local data
          • Browsing SERP pagination
          • Delivery methods
          • Batch Processing
          • Endpoints and Response Codes
        • Maps API
          • Searching for places
          • Getting information about a place
          • Collecting reviews
          • Delivery methods
          • Batch processing
          • Endpoints and Response Codes
    • Web Retrieval API
      • Web Retrieval API Overview
    • Proxy API
      • Nimble IP Overview
      • Nimble IP Quick Start Guide
        • Send a request
        • Nimble IP Autentication
        • Geotargeting and session control
        • Response codes
        • FAQs
      • Nimble IP Functions
        • Country/state/city geotargeting
        • Controlling IP rotation
        • Geo-sessions: longer, stickier, more accurate sessions
        • Using IPv6 Proxies
        • Response Codes
      • Integration Guides
        • Incogniton
        • Kameleo
        • VMLogin
        • AdsPower
        • FoxyProxy
        • Android
        • Multilogin
        • iOS
        • SwitchyOmega
        • Windows
        • macOS
        • Proxifier
        • MuLogin
        • Puppeteer
        • Selenium
        • Scrapy
    • Client Libraries
      • Installation
      • Quick Start
  • AI Agents
    • LangChain Integration
    • MCP Server
      • Available Tools
  • Technologies
    • Browserless Drivers
      • API Driver-Based Pricing
    • IP Optimization Models
    • AI Parsing Skills
  • Management Tools
    • Nimble Dashboard
      • Exploring the User Dashboard
      • Managing Pipelines
      • Reporting and Analytics
      • Account Settings
      • Experimenting with the Playground
      • Billing and history
    • Nimble Admin API
      • Admin API basics
      • Admin API reference
  • General
    • Onboarding Guide
      • Getting started with Nimble's User Dashboard
      • Nimble IP Basics
      • Nimble API Basics
      • Helpful Resources
    • FAQs
      • Account Settings and Security
      • Billing and Pricing
      • Tools and Integrations
      • Nimble API
      • Nimble IP
    • Deprecated APIs
      • E-commerce API
        • E-commerce API Authentication
        • Real-time product request
        • Real-time product search request
        • Delivery methods
        • Batch Processing
        • Endpoints and Response Codes
      • Unlocker Proxy Overview
        • Unlocker Proxy Quick Start Guide
          • Real-time request
          • FAQs
        • Unlocker Proxy FAQ
Powered by GitBook
On this page
  • Installing Proxifier
  • Adding Nimble’s pipeline
  • Check the proxy connection
  • Controlling proxy session behavior
  • Adding proxy rules
  • DNS Resolution
  1. Nimble SDK
  2. Proxy API
  3. Integration Guides

Proxifier

PreviousmacOSNextMuLogin

Proxifier is a network gateway that allows applications that do not support working through proxy servers to operate through a SOCKS or HTTPS proxy, without having to re-route all traffic through the proxy network. Using Proxifier, it’s possible to route applications through a single entry point on Nimble IP and direct each one to the relevant IP pipeline.

Installing Proxifier

To begin working with Proxifier, download and install the application from the Proxifier website.

Adding Nimble’s pipeline

In this guide, we will be using Windows as an example, although setting up on macOS is very similar and follows the same configuration steps.

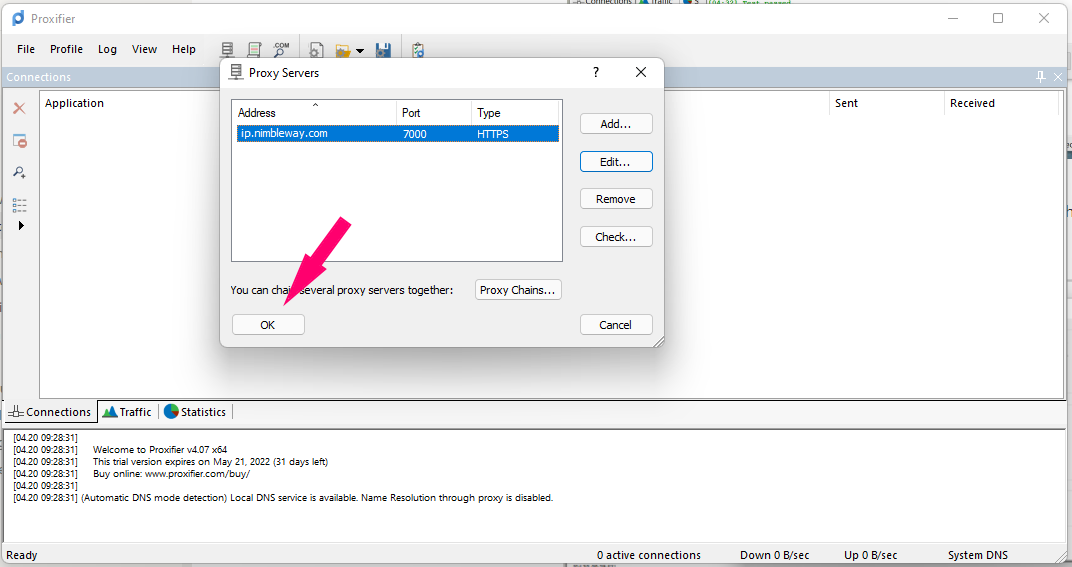
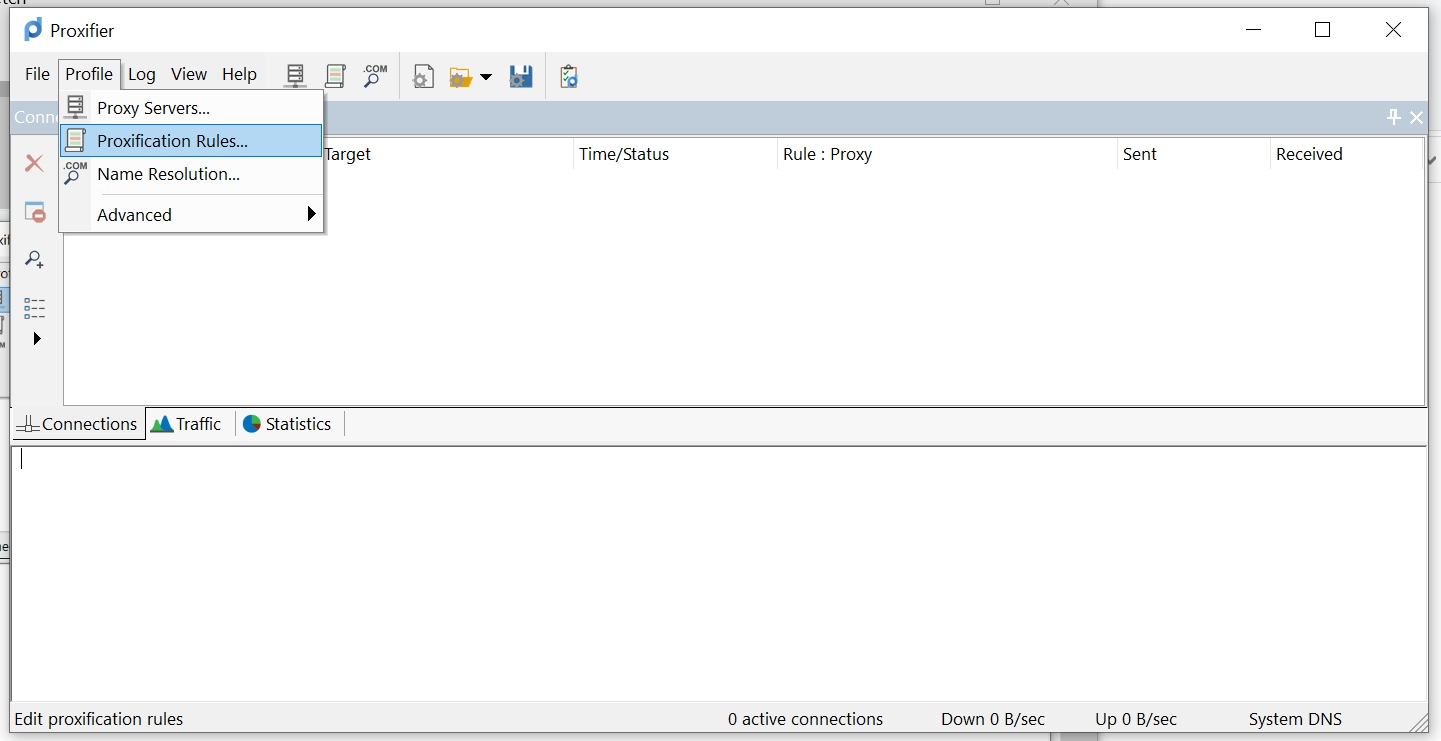
  1. To connect Proxifier with Nimble IP, you will need to create a profile - click on the ‘Profile’ tab at the top left, and from the drop-down menu select ‘Proxy Servers’.

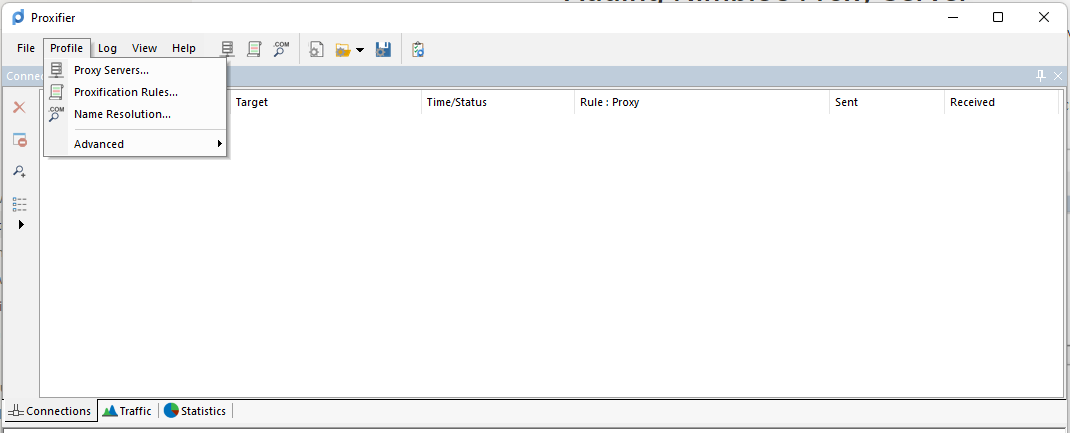
2. Click “Add” to set Nimble IP as a proxy server.

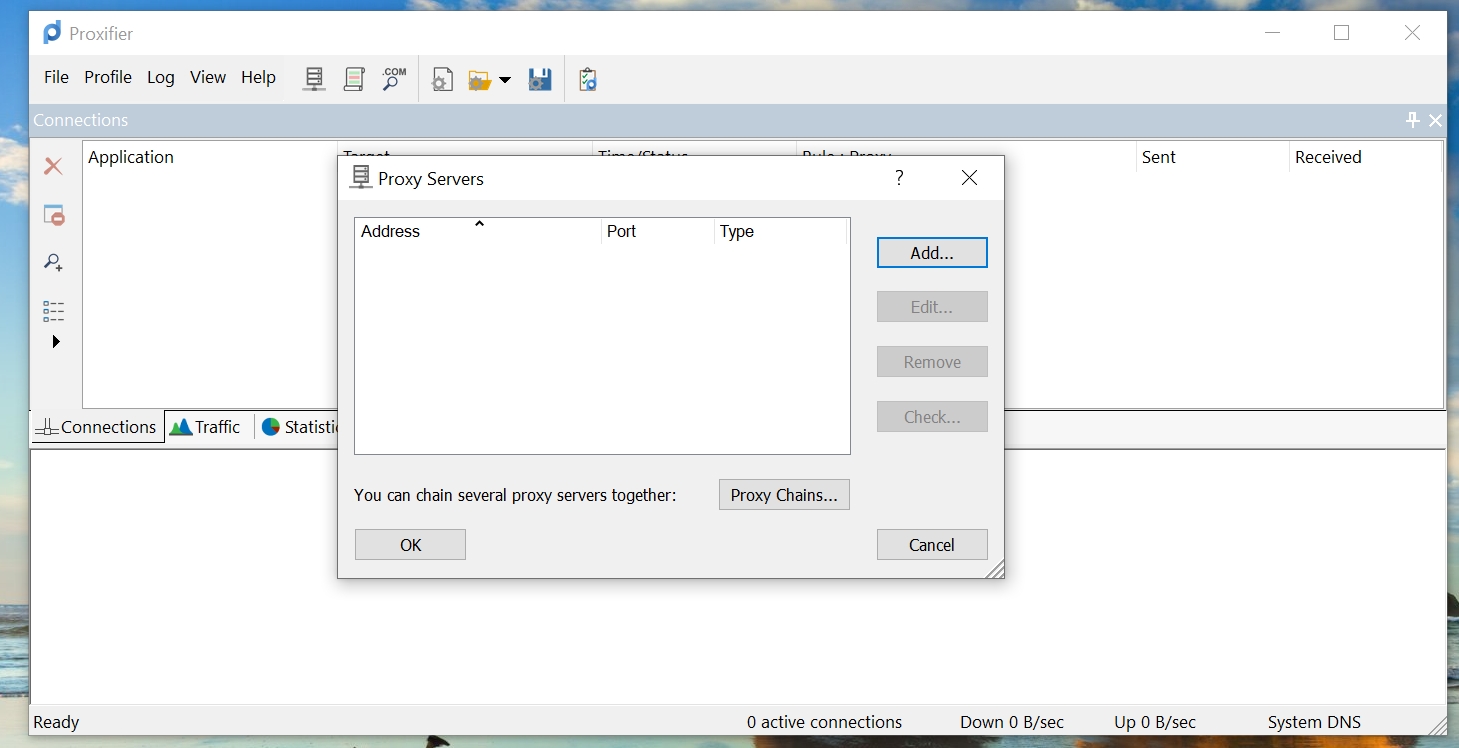
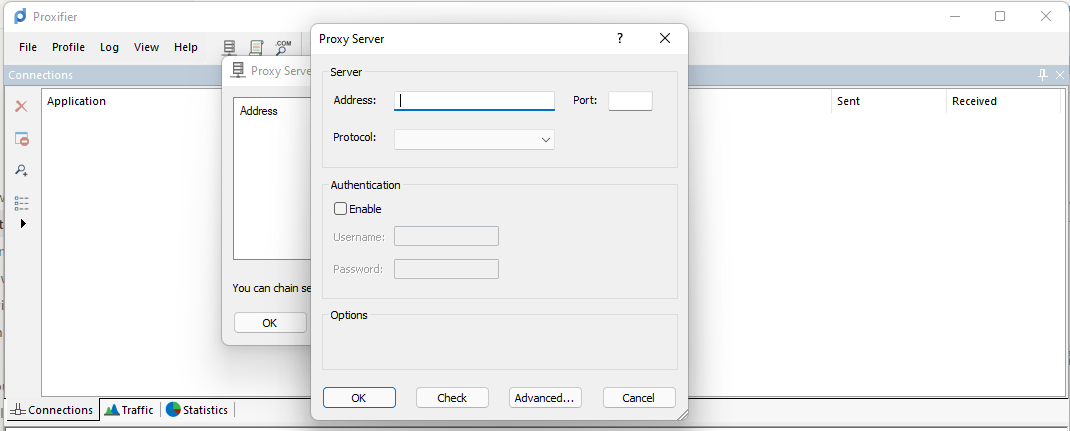
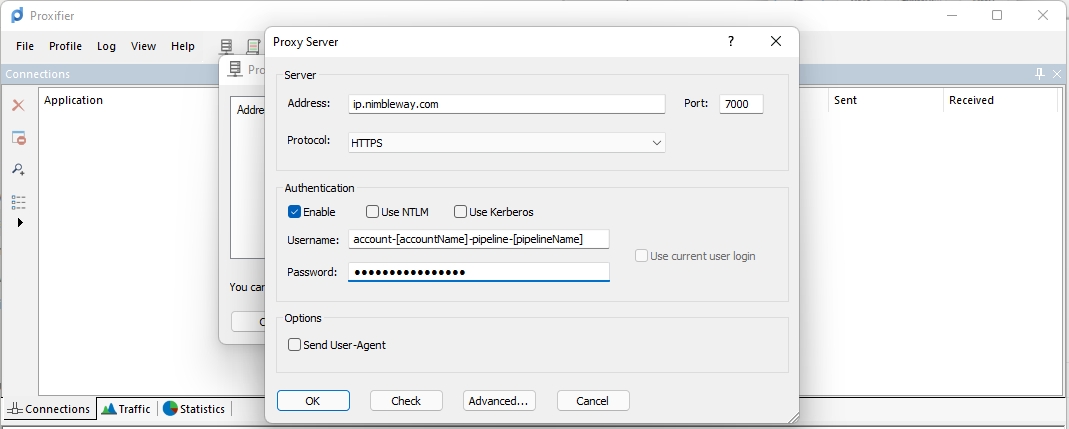
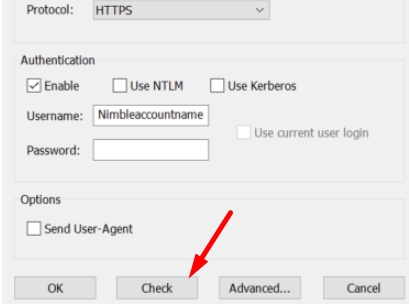
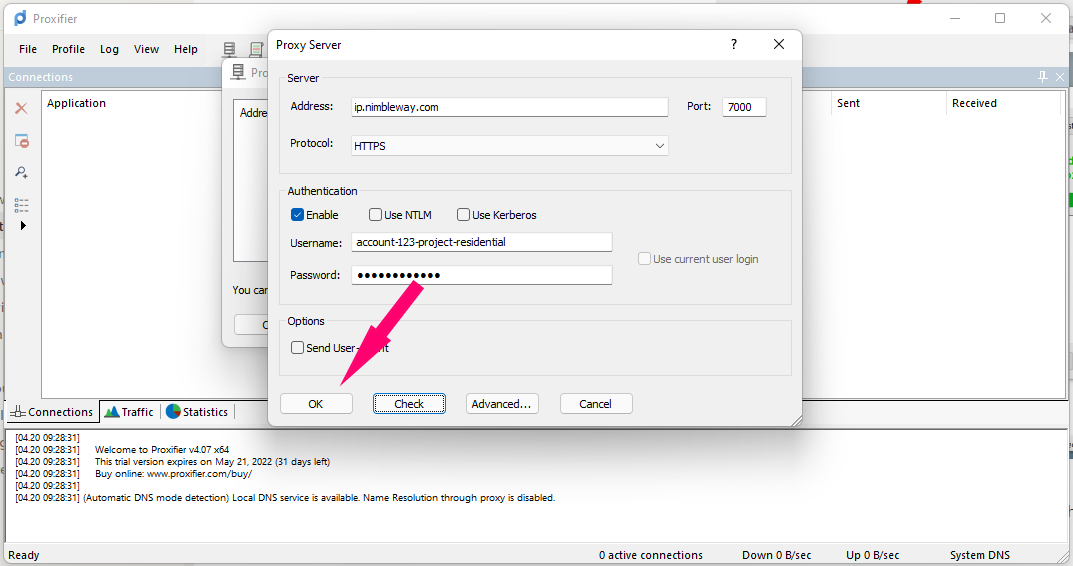
3. Enter the following server information:

  • Address ⇒ ip.nimbleway.com

  • Port ⇒ 7000

  • Protocol ⇒ HTTPS

4. Authentication This is when you need to decide which Nimble pipeline you would like to use, determined by the pipeline name in the username connection string. Your Nimble account comes pre-configured with one pipeline for a quick start, and your account manager will provide you with its username and password. We will discuss the option for adding additional pipelines in the “Setting proxy rules” section below.

  • Check the box to enable username and password authentication

  • Username ⇒ Nimble’s username string: account-[accountName]-pipeline-[pipelineName]

  • Password ⇒ Nimble’s pipeline password

Your Nimble account manager will provide you with the username and password for your pipeline.

Check the proxy connection

5. To verify the setup was successful, click on ‘Check’ and Proxifier will test the connection and report back its status.

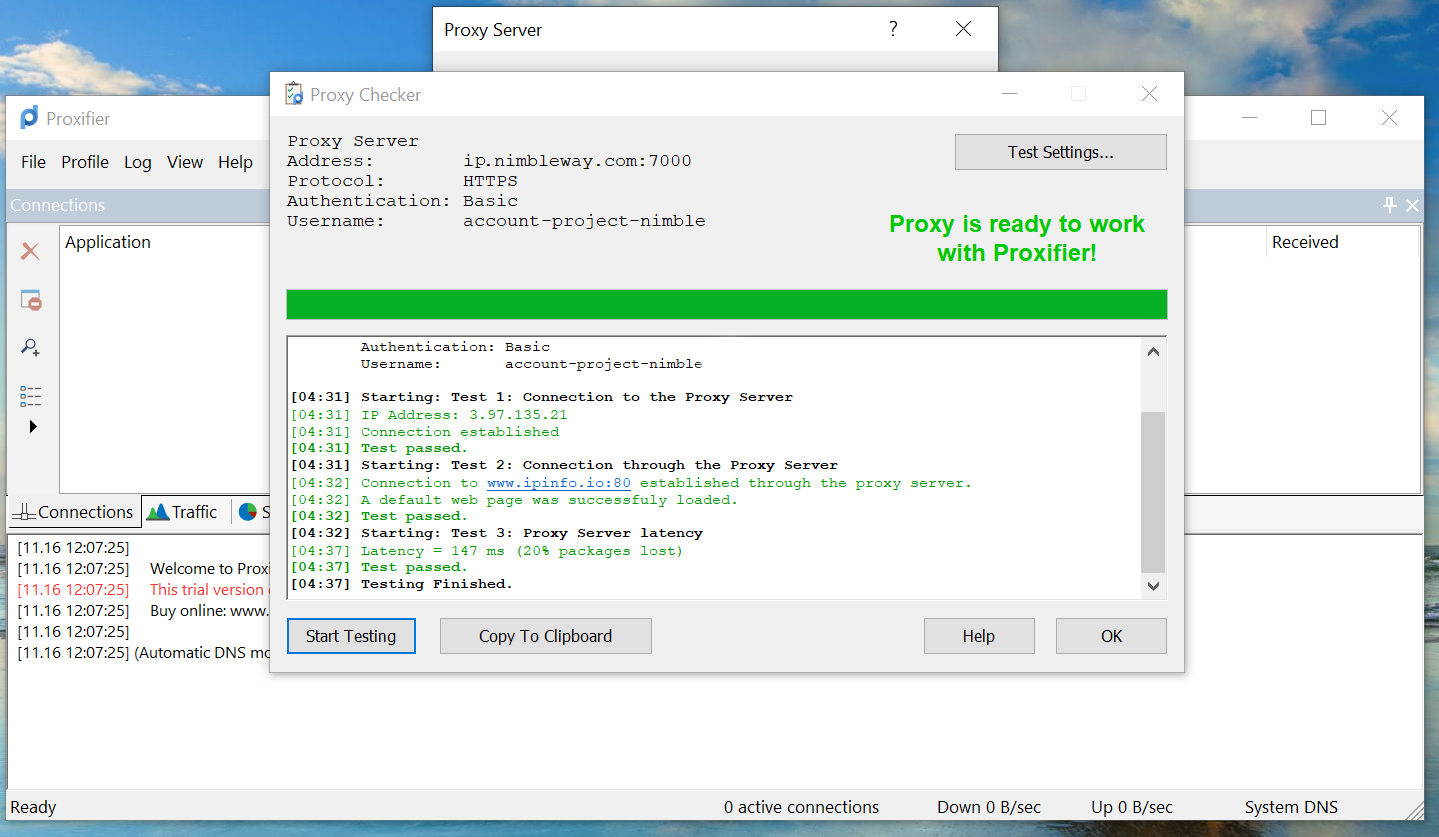
6. Once you receive confirmation that the connection is set up correctly, go back to the main Proxifier window and click “OK” to save your profile.

Note: We recommend you do not set Nimble IP as your default proxy server as this may result in an unwanted amount of traffic going through Nimble.

Controlling proxy session behavior

So far, we have covered how to connect a single pipeline from Nimble to Proxifier. Now it’s time to decide in which scenarios this connection should be used, and whether you need to connect multiple Nimble pipelines.

  1. In case the requests you send through Nimble should all have the same session behavior and targeting (location, IP rotation, session control, etc.), the profile previously created is all you need. We suggest you configure your session preferences in the Nimble pipeline, as it will help our optimization engines select more relevant IPs for your use case. Check out our Admin API documentation for more details on how to configure your pipelines.

  2. If you have multiple use cases, each with its own proxy connection requirements, there are two ways to control the session behavior for each case:

    1. Create multiple pipelines in Nimble IP, one for each profile in Proxifier. As previously mentioned, this helps our optimization engines tune in to your needs faster. Read more on the use of pipelines and their available configurations.

    2. Use the username string set in each Proxifier profile to configure the proxy connection and session behavior. Read more about Nimble Backconnect Gateway API and possible configurations.

Adding proxy rules

We’ll now connect various applications and scenarios to the Proxifier profiles that channel each one through Nimble IP.

Click on the ‘Profile’ tab again, but this time choose ‘Proxification rules’.

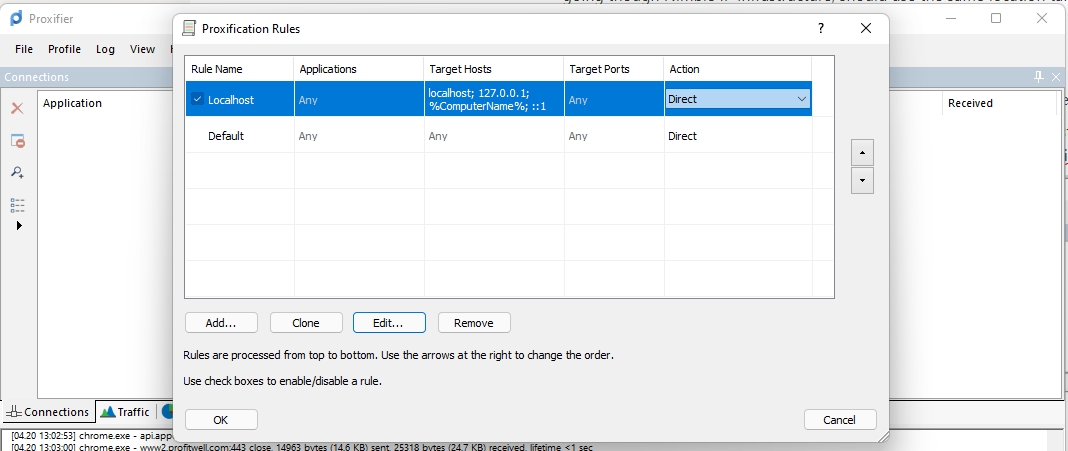
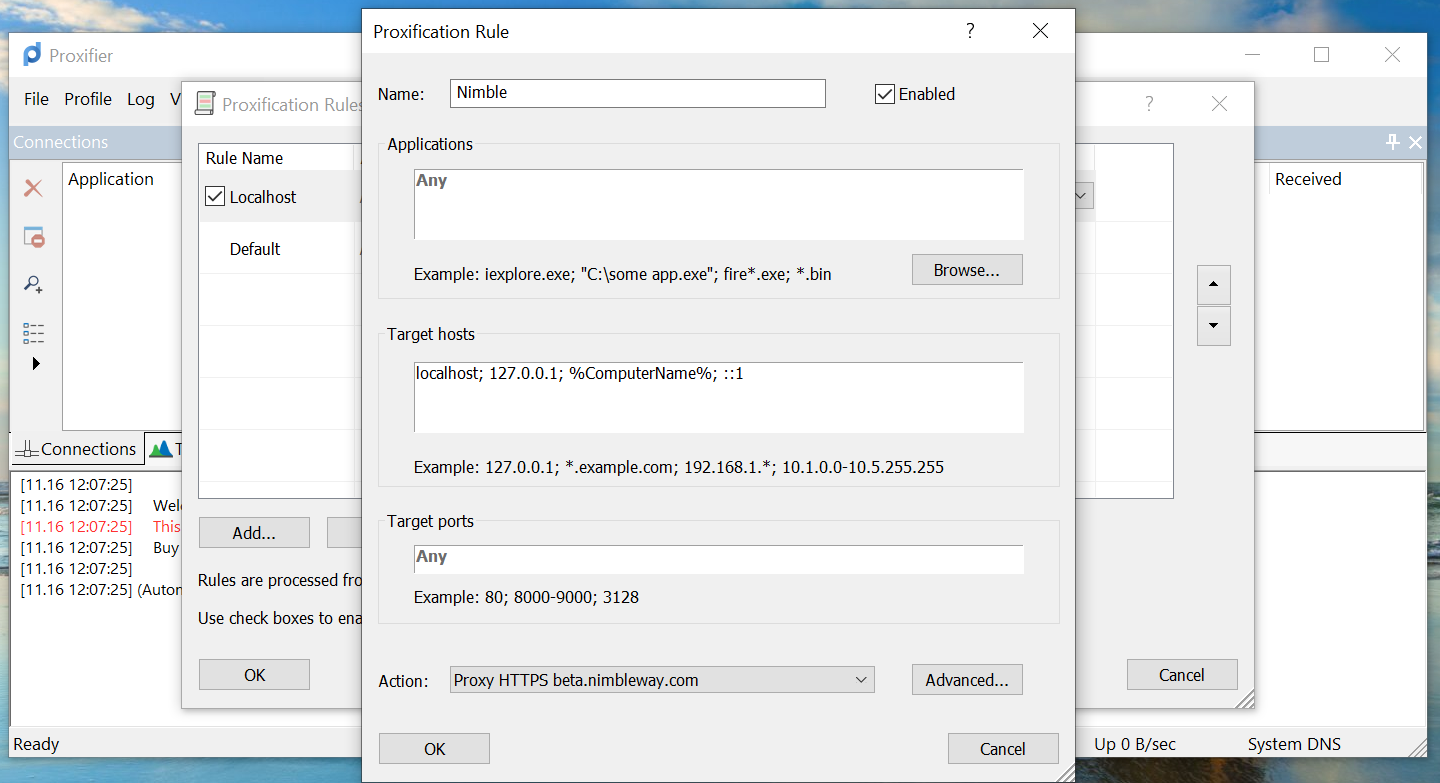
In the rules window, select the profiles created for use with Nimble:

  1. Set the applications that are allowed to access each Nimble pipeline.

  2. In case your proxy use cases are split by domain or port, you have the option to set those as part of your rules as well.
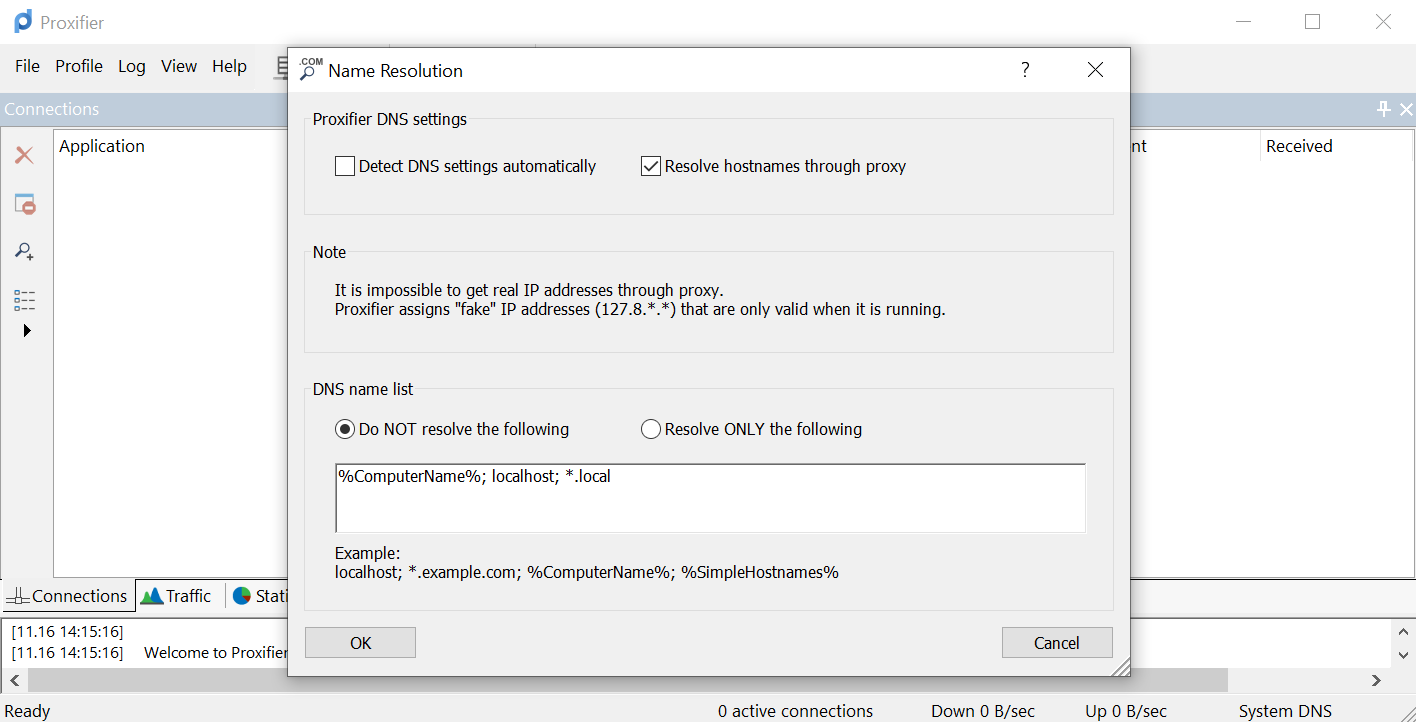
DNS Resolution

In order to improve your data-gathering success, DNS resolution should be done by Nimble IP.

  1. Under the Profiles menu, select ‘Name Resolution’.

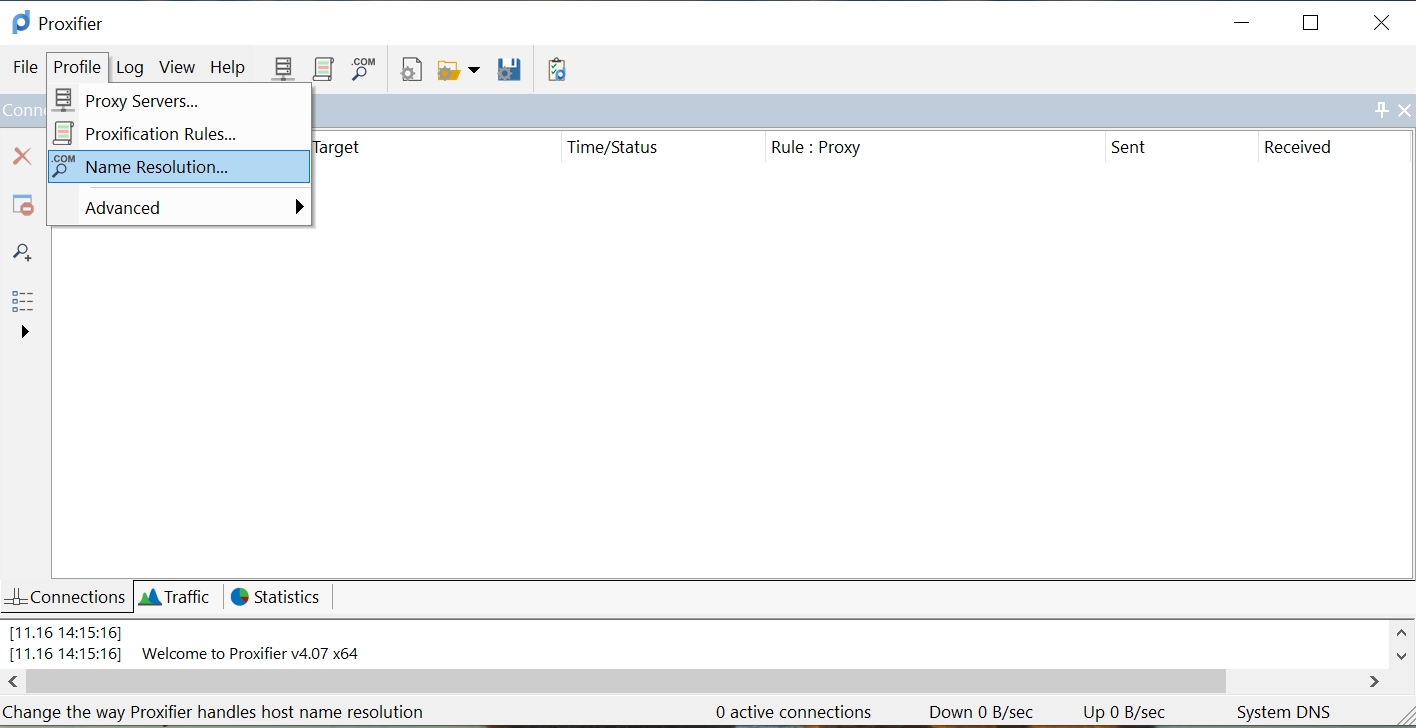
2. Under ‘Proxifier DNS settings’ select ‘Resolve hostnames through proxy’.

Click ‘OK’ at the bottom and you are ready to go!