Manually configure the Nimble MCP server as a tool in a Microsoft Copilot Studio agent
Microsoft Copilot Studio agents can call Nimble’s web data toolkit — search, extract, map, crawl, and Nimble Agents — through the Model Context Protocol (MCP). This page covers the manual setup: add the Nimble MCP server to an agent using the built-in MCP onboarding wizard.
A Microsoft Copilot Studio environment with an agent you can edit (licensing details)
A Nimble account — sign up free. Sign-in happens through OAuth during setup; no API key to paste.
MCP routes tool results through the agent’s context window and can consume tokens
quickly. For high-volume retrieval, consider the Nimble API directly.
The MCP onboarding wizard is the fastest way to connect an existing MCP server. It lives inside Copilot Studio — no trip to Power Apps required.
1
Open the Tools page and add a tool
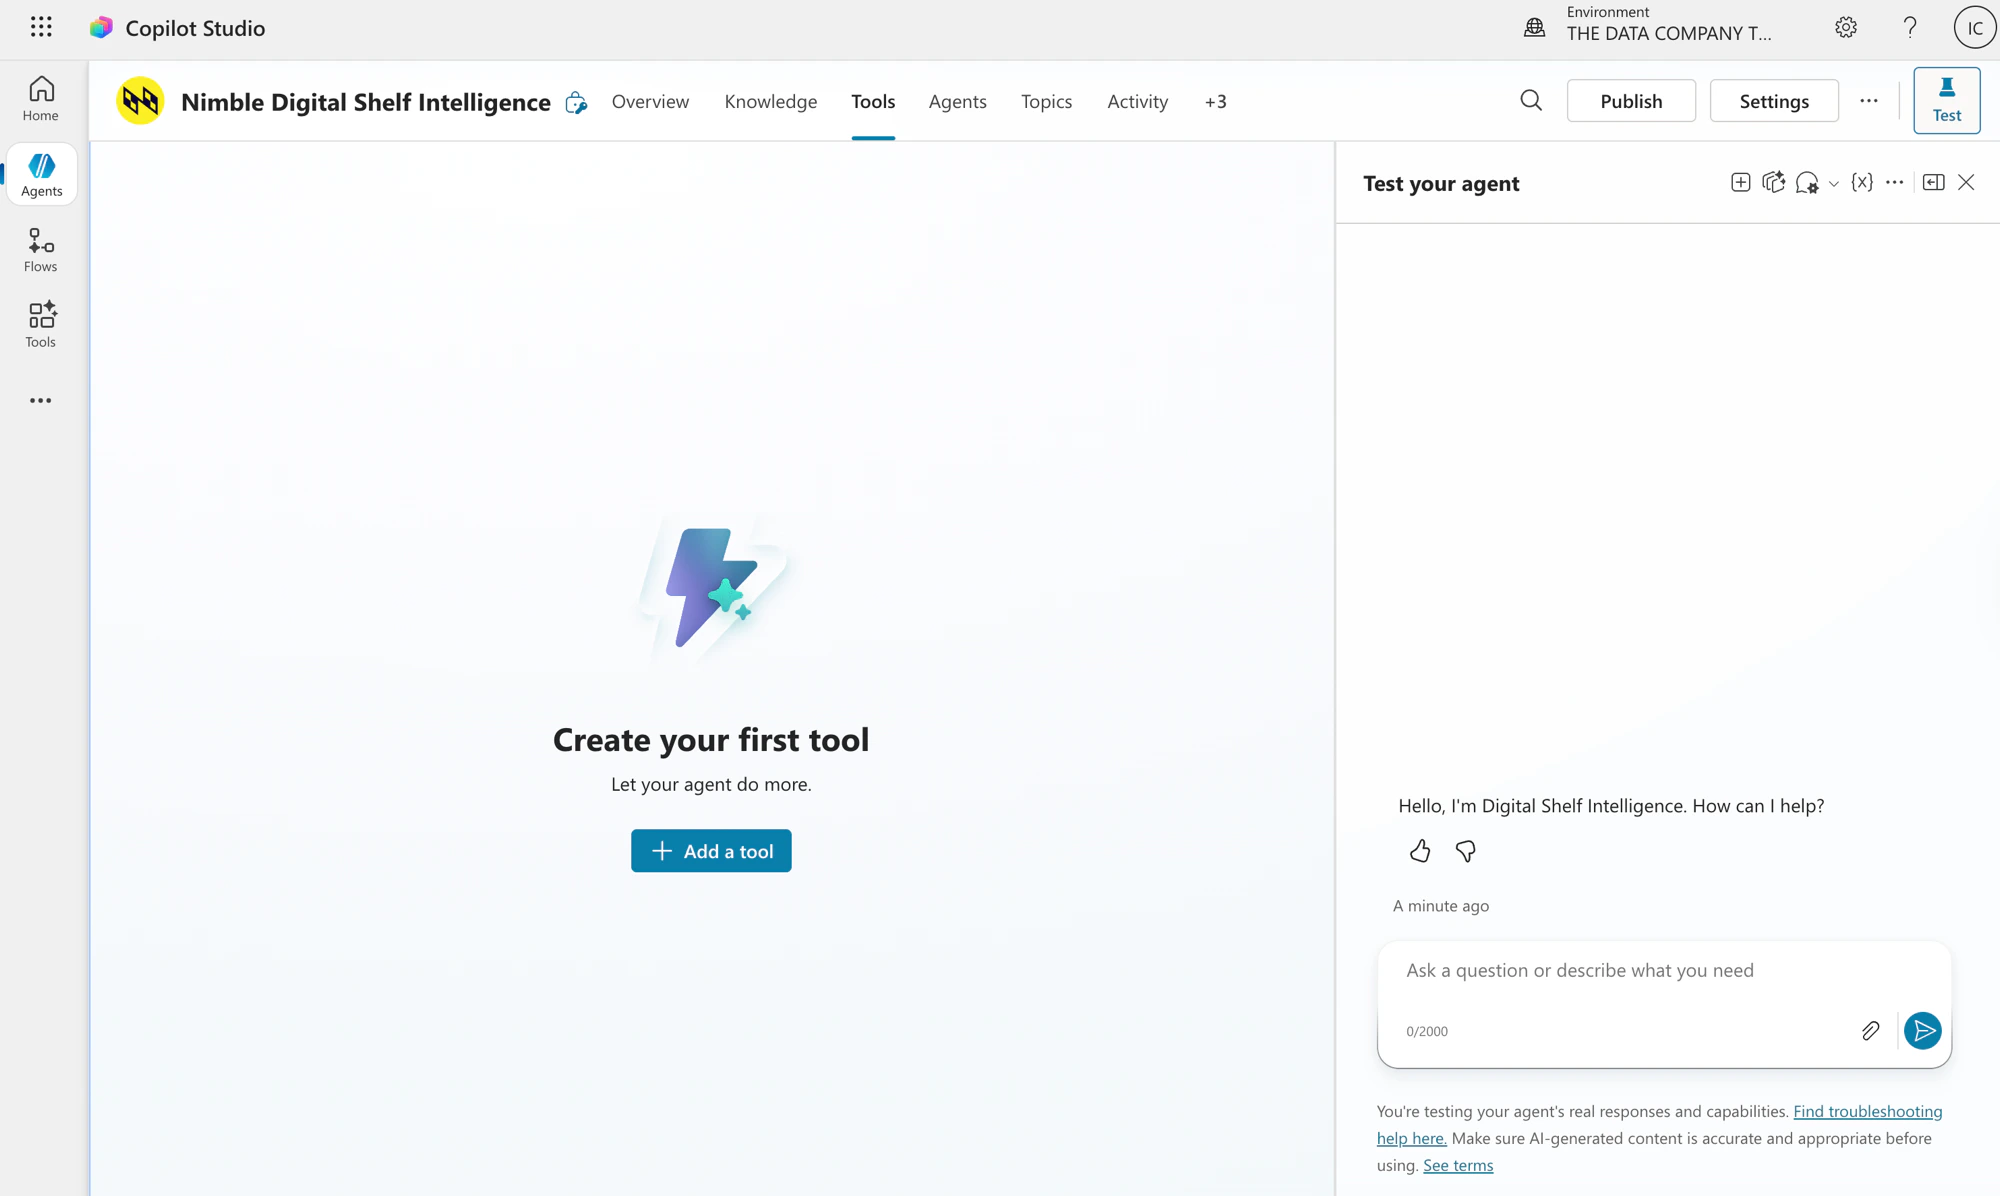
In Copilot Studio, open your agent and go to the Tools page. Select Add a tool.
Add a tool to a Copilot Studio agent
2
Choose Model Context Protocol
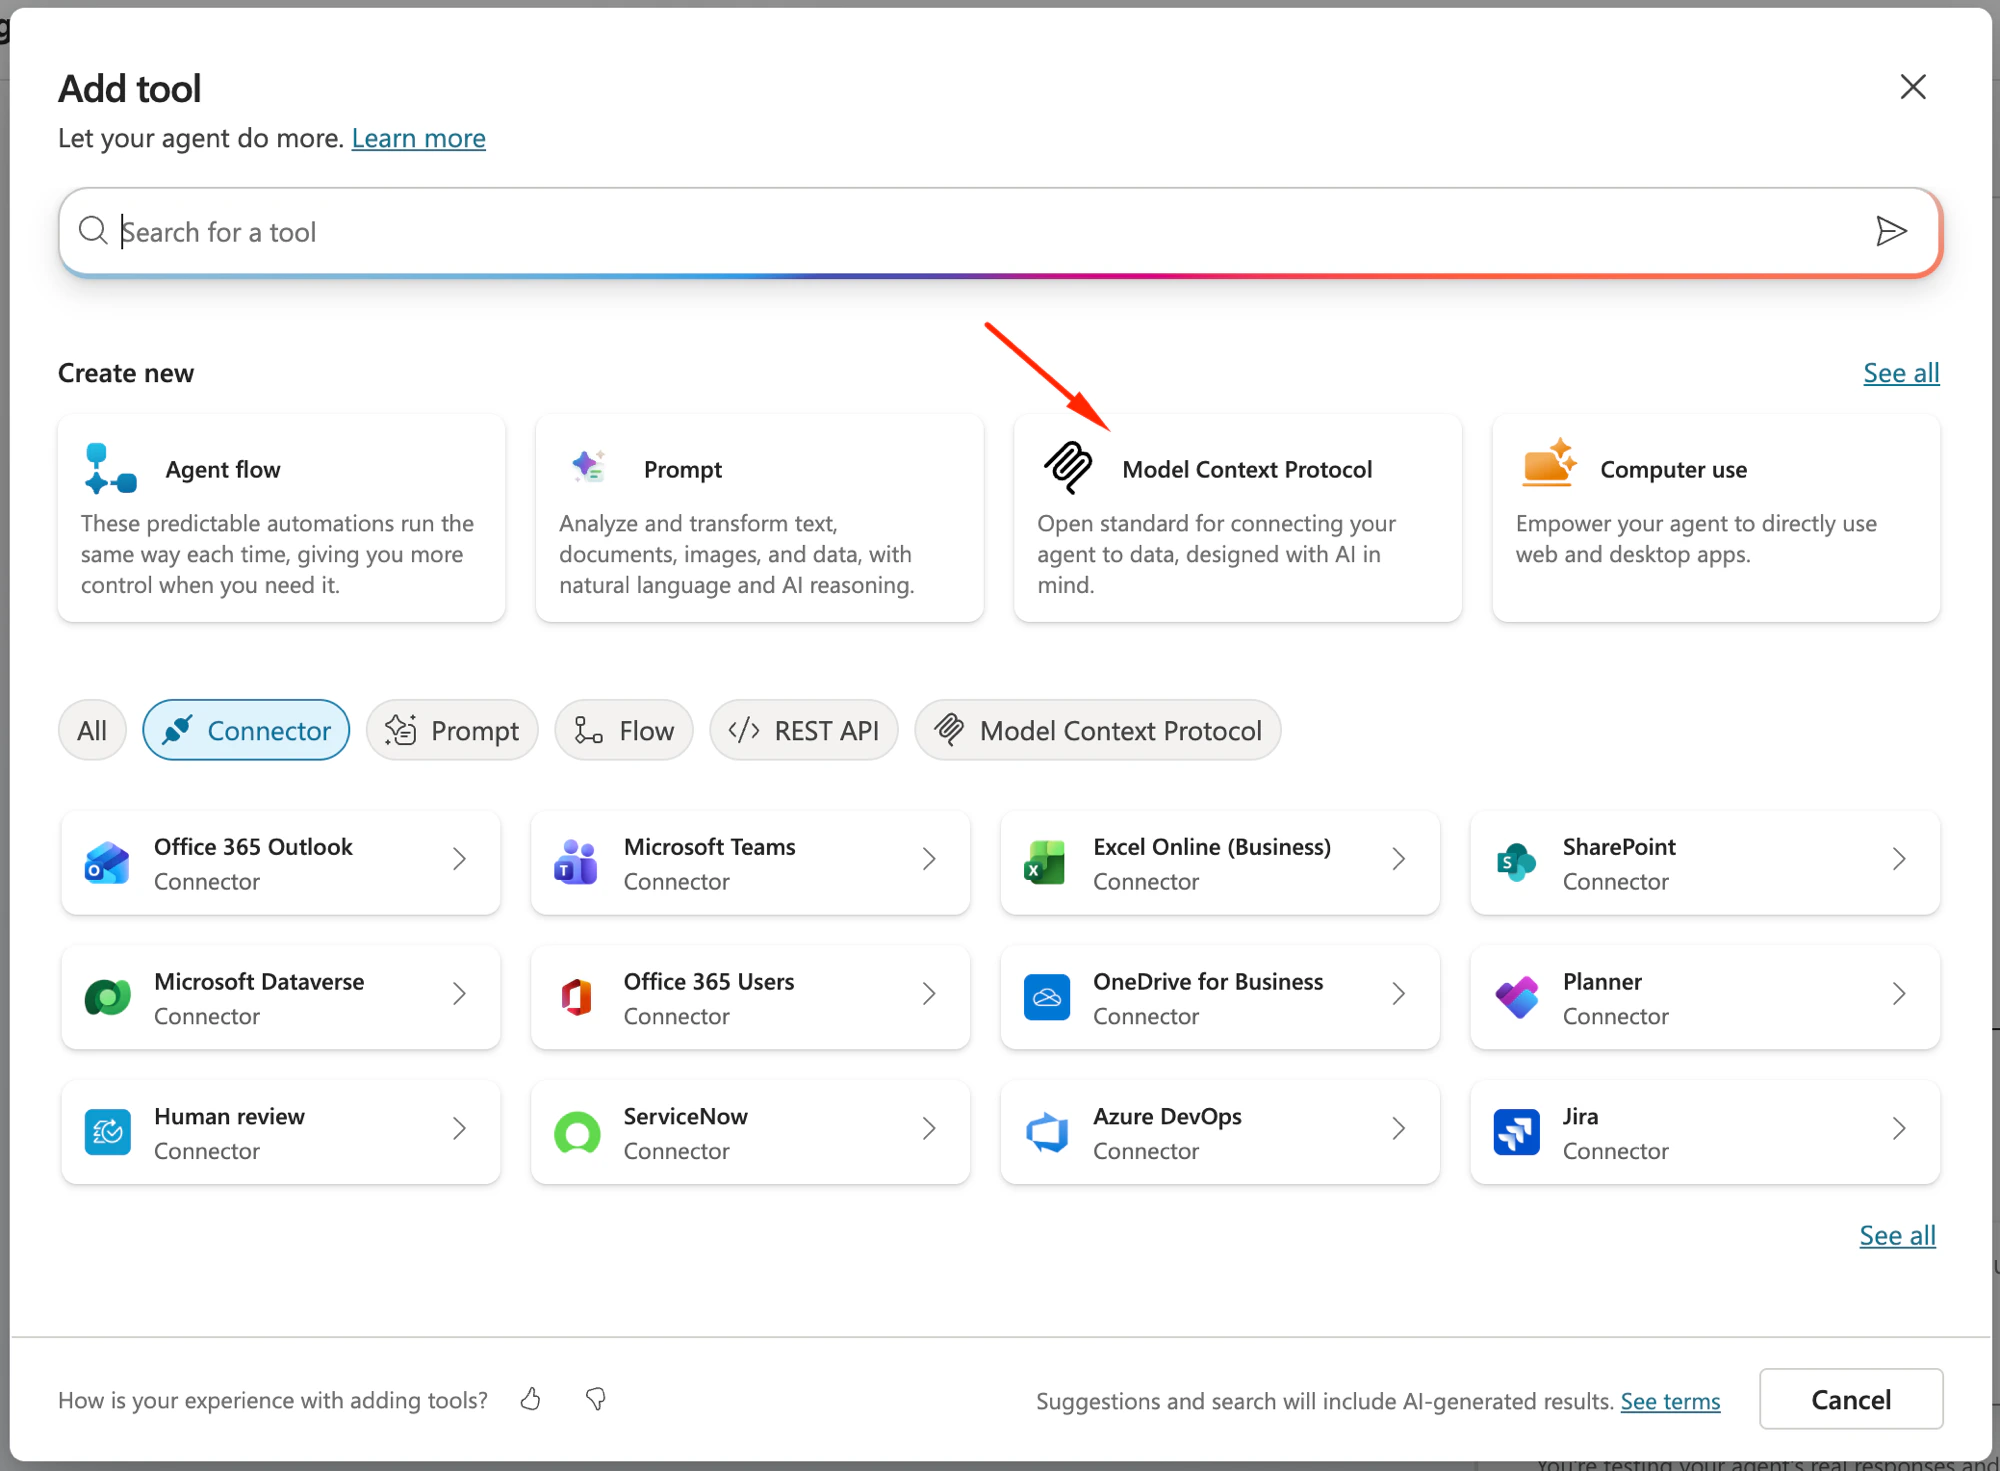
In the Add tool dialog, under Create new, select Model Context Protocol.
Select Model Context Protocol in the Add tool dialog
3
Enter the Nimble server details and authentication
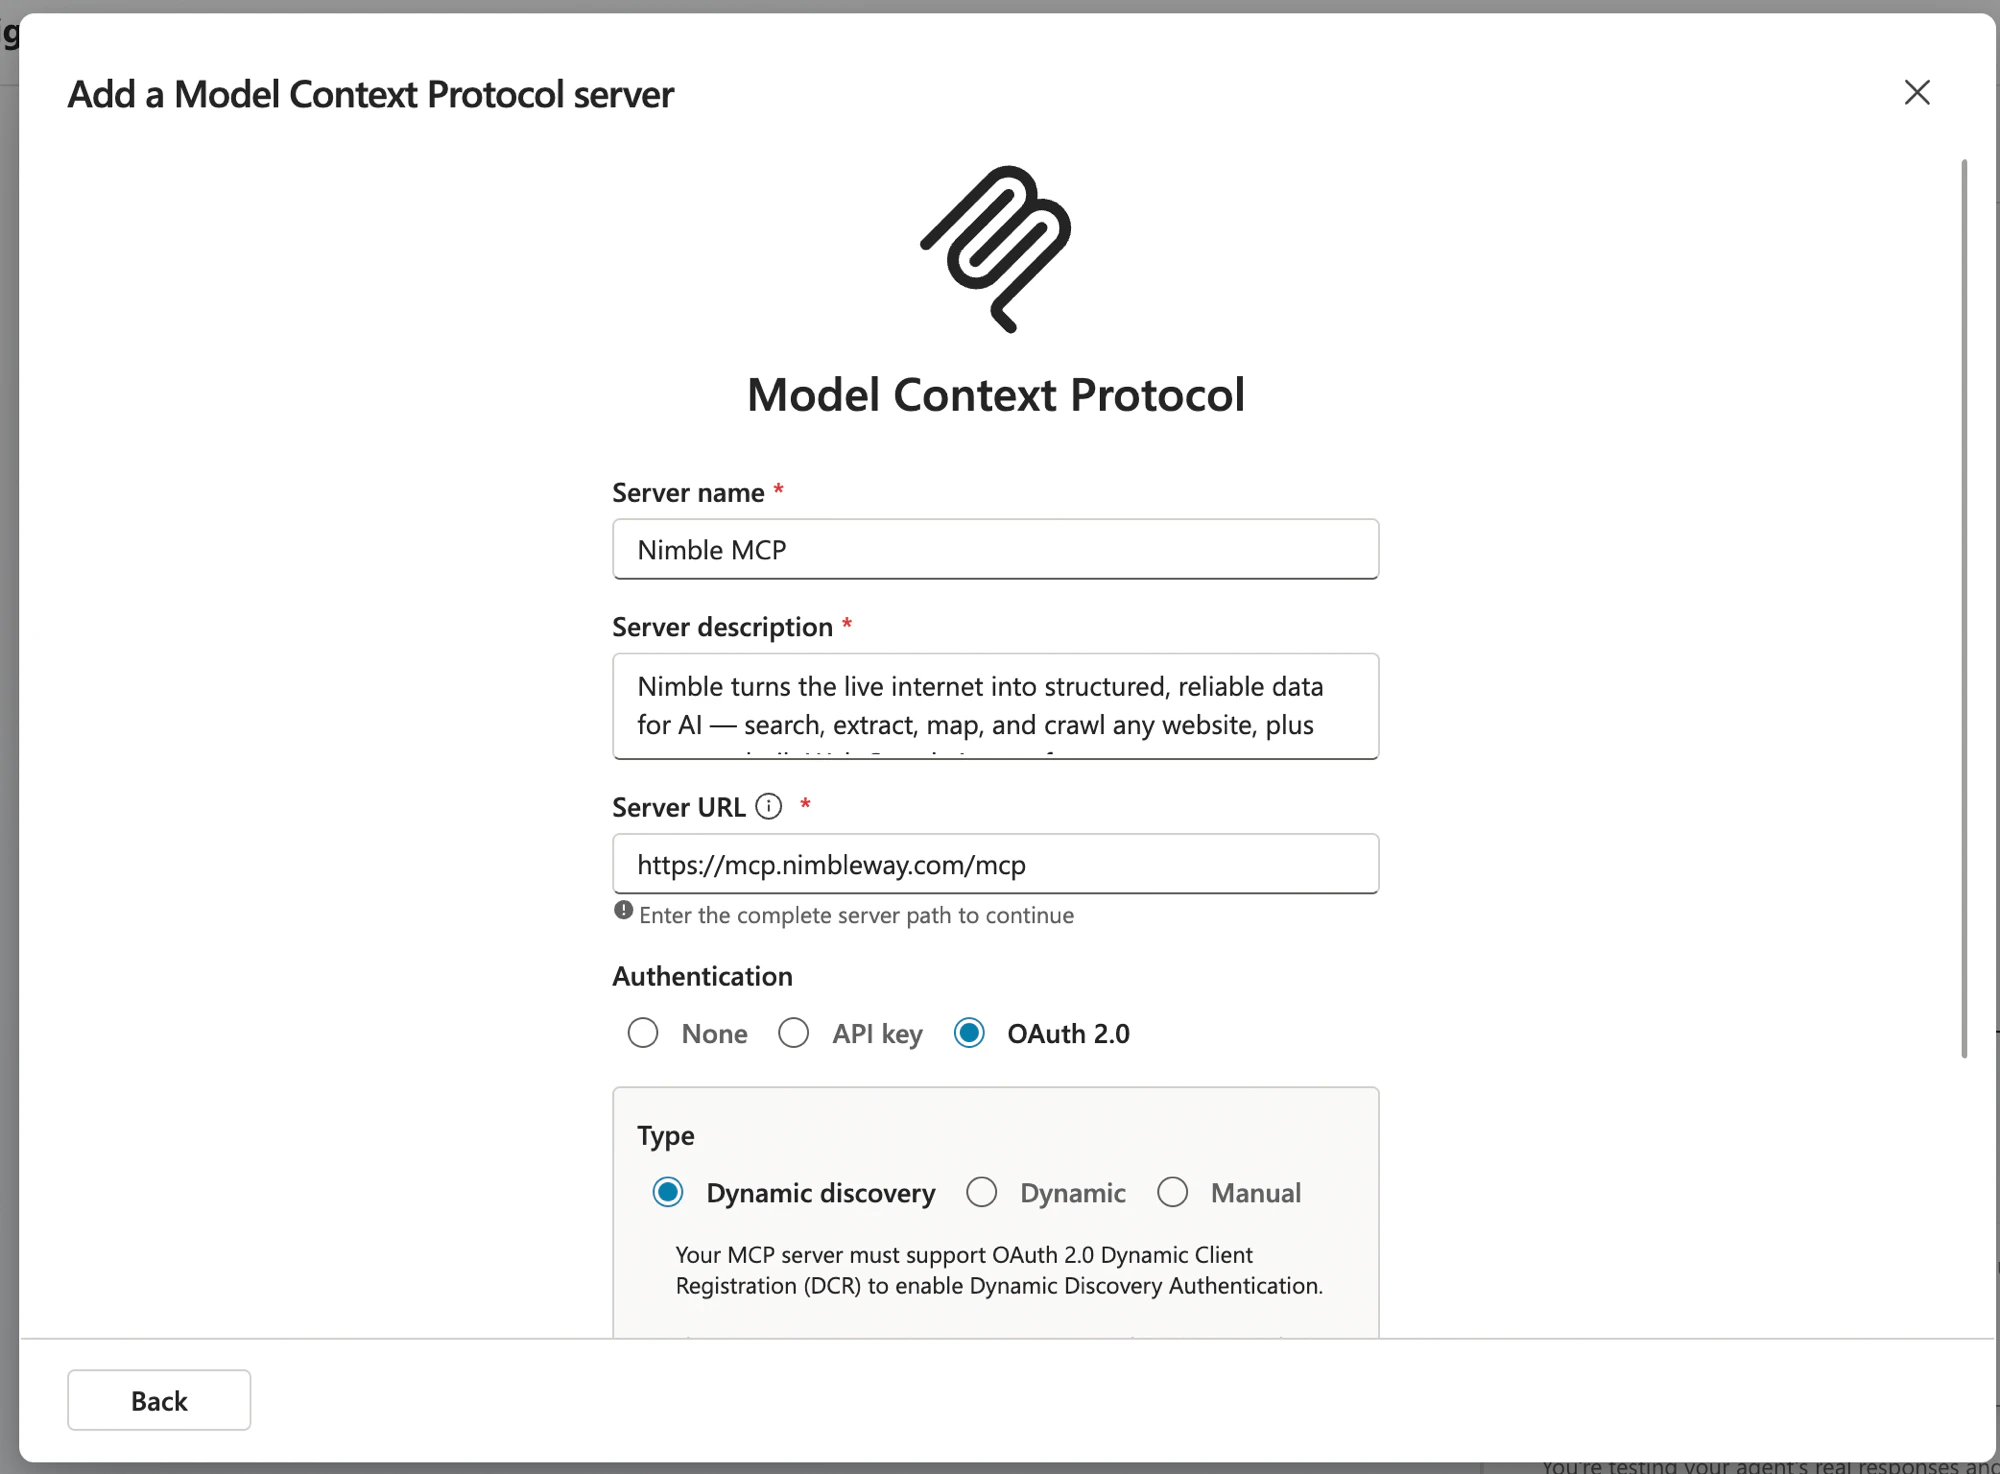
Fill in the server fields, then set authentication to OAuth 2.0 with type Dynamic discovery. Nimble MCP supports OAuth 2.0 Dynamic Client Registration (DCR), so it advertises its endpoints automatically — there’s nothing else to configure. Select Create.
Field
Value
Server name
Nimble MCP
Server description
Nimble turns the live internet into structured, reliable data for AI — search, extract, map, and crawl any website, plus purpose-built Agents for your use case at scale.
Server URL
https://mcp.nimbleway.com/mcp
Authentication
OAuth 2.0 → Dynamic discovery
The agent orchestrator uses the description to decide when to call Nimble — keep it clear and specific.
Nimble MCP server details with OAuth 2.0 Dynamic discovery selected
4
Create a connection
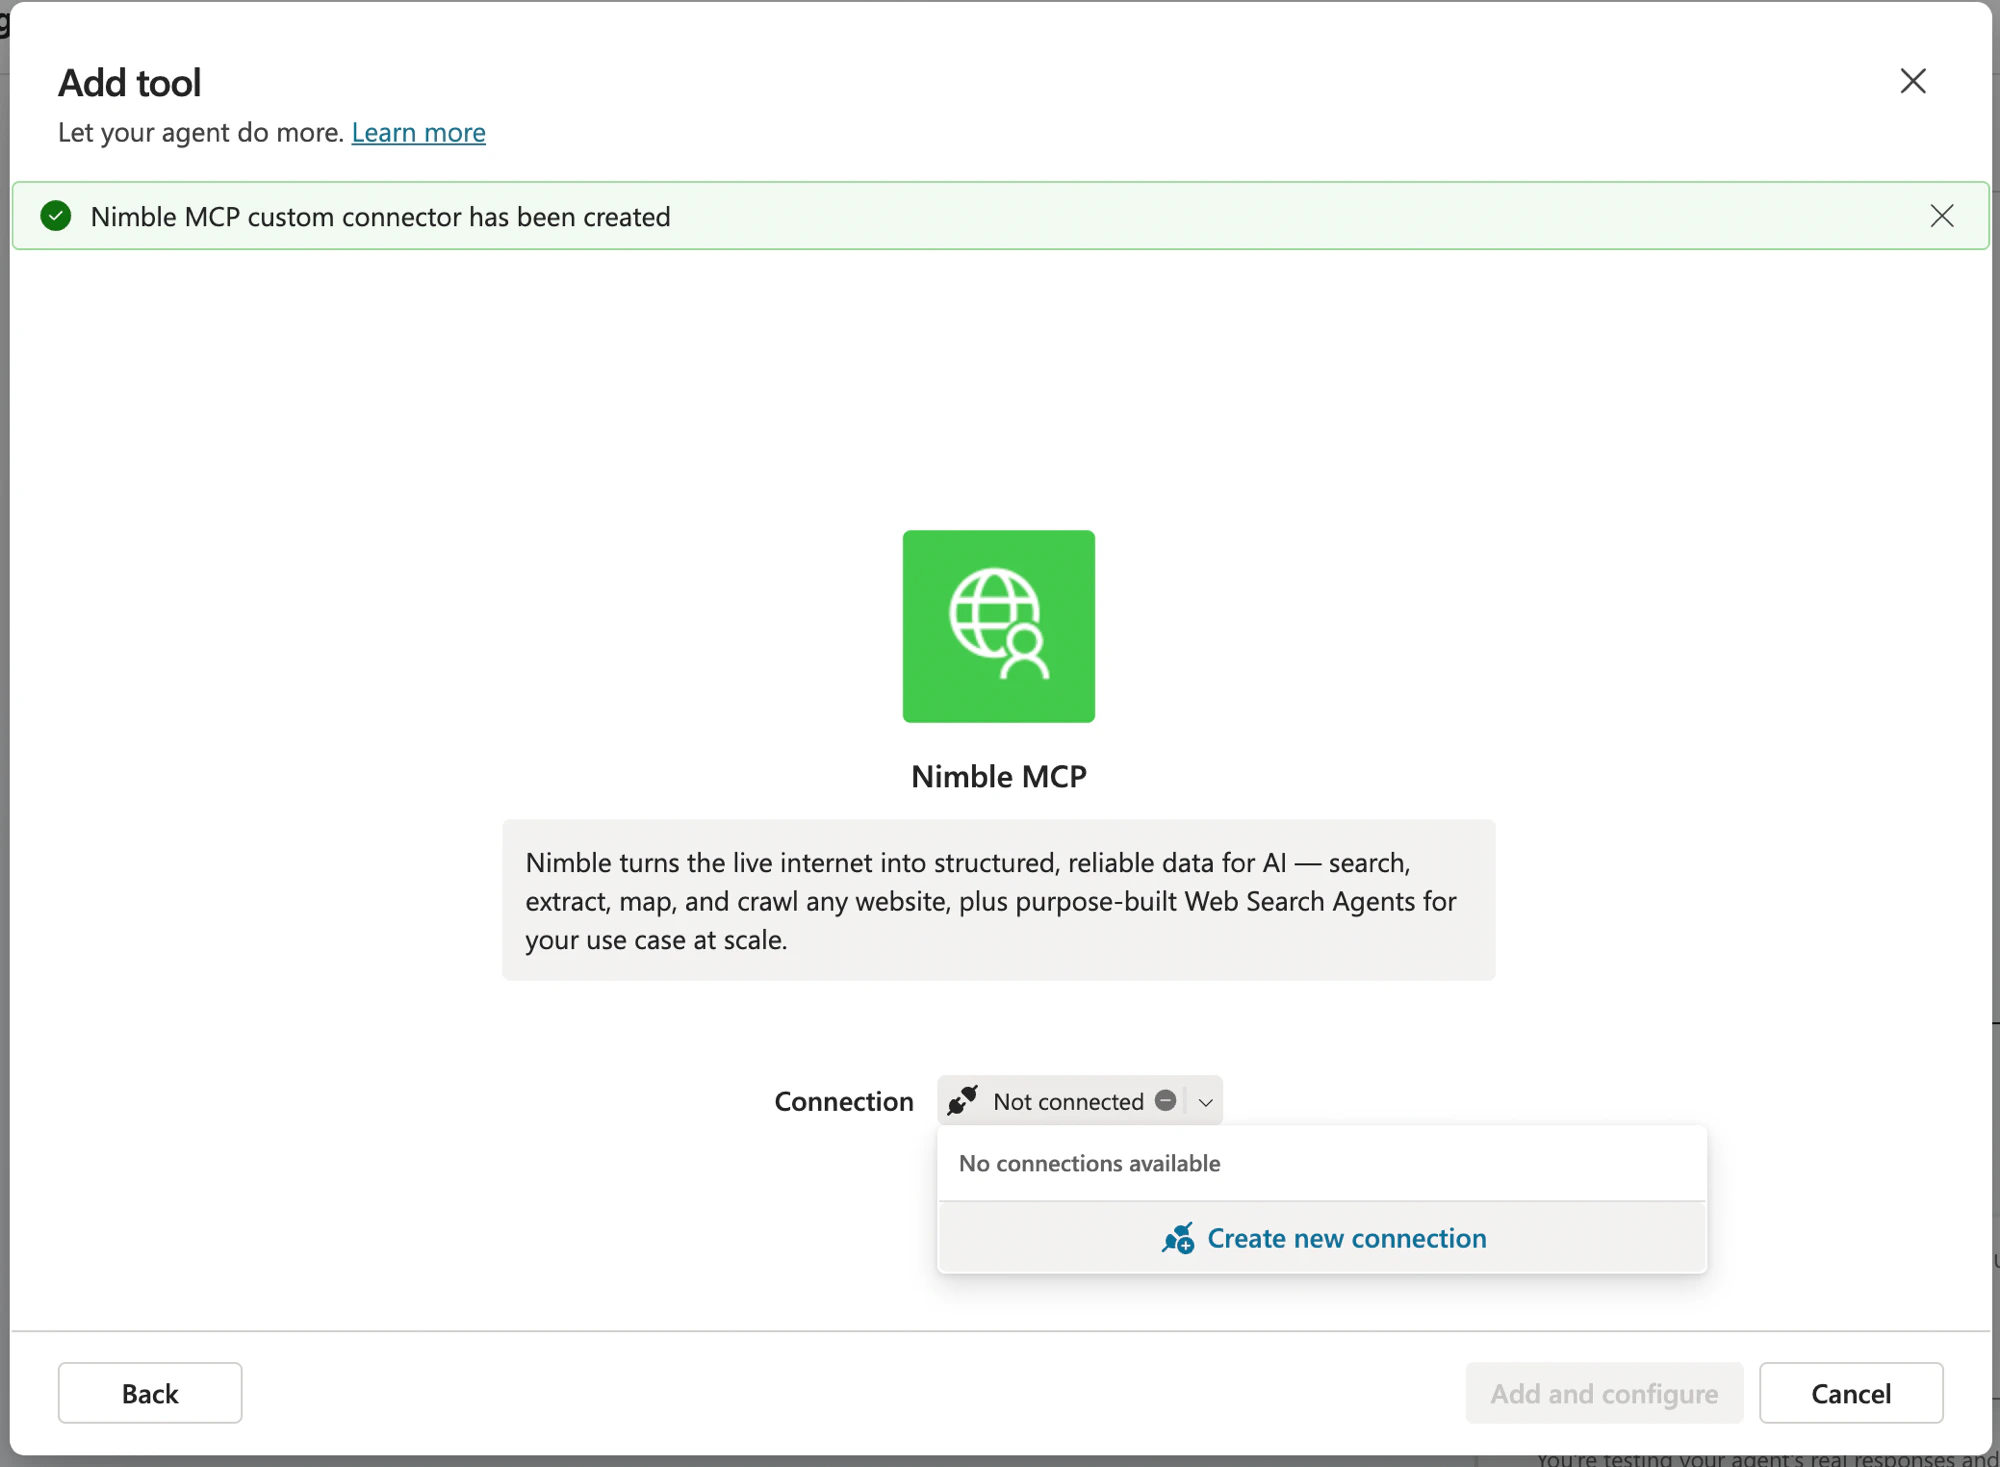
Copilot Studio creates the custom connector. On the Add tool dialog, open the Connection dropdown and select Create new connection.
Create a new connection for the Nimble MCP connector
5
Approve the OAuth consent
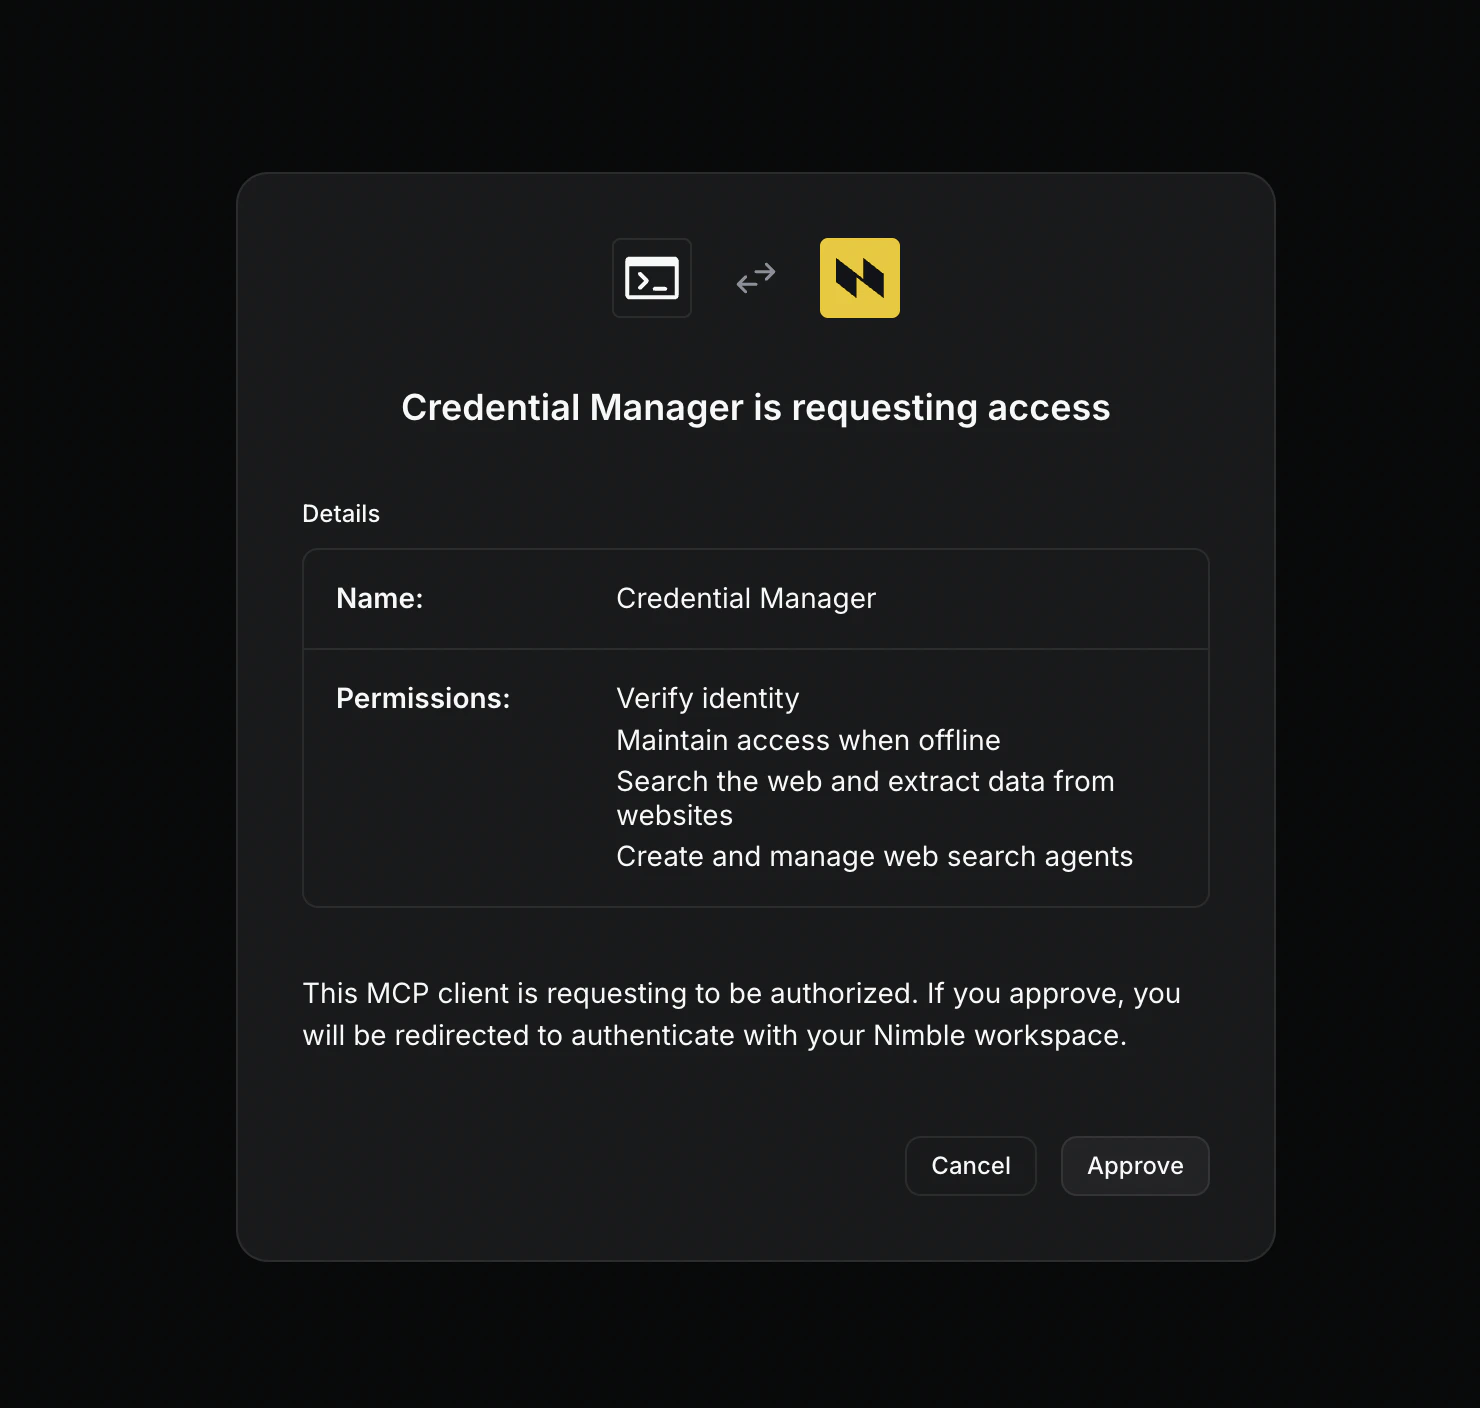
A browser window opens to authorize with your Nimble workspace. Review the requested permissions — verify identity, maintain access when offline, search and extract, and manage Agents — and select Approve. Copilot Studio stores the tokens and refreshes them automatically.
Approve the Nimble OAuth consent
6
Add to the agent
Back on the Add tool dialog, select Add and configure. Copilot Studio discovers the Nimble tools and lists them under the agent’s tools.
Open a test chat with your agent and send a prompt that forces a Nimble tool call:
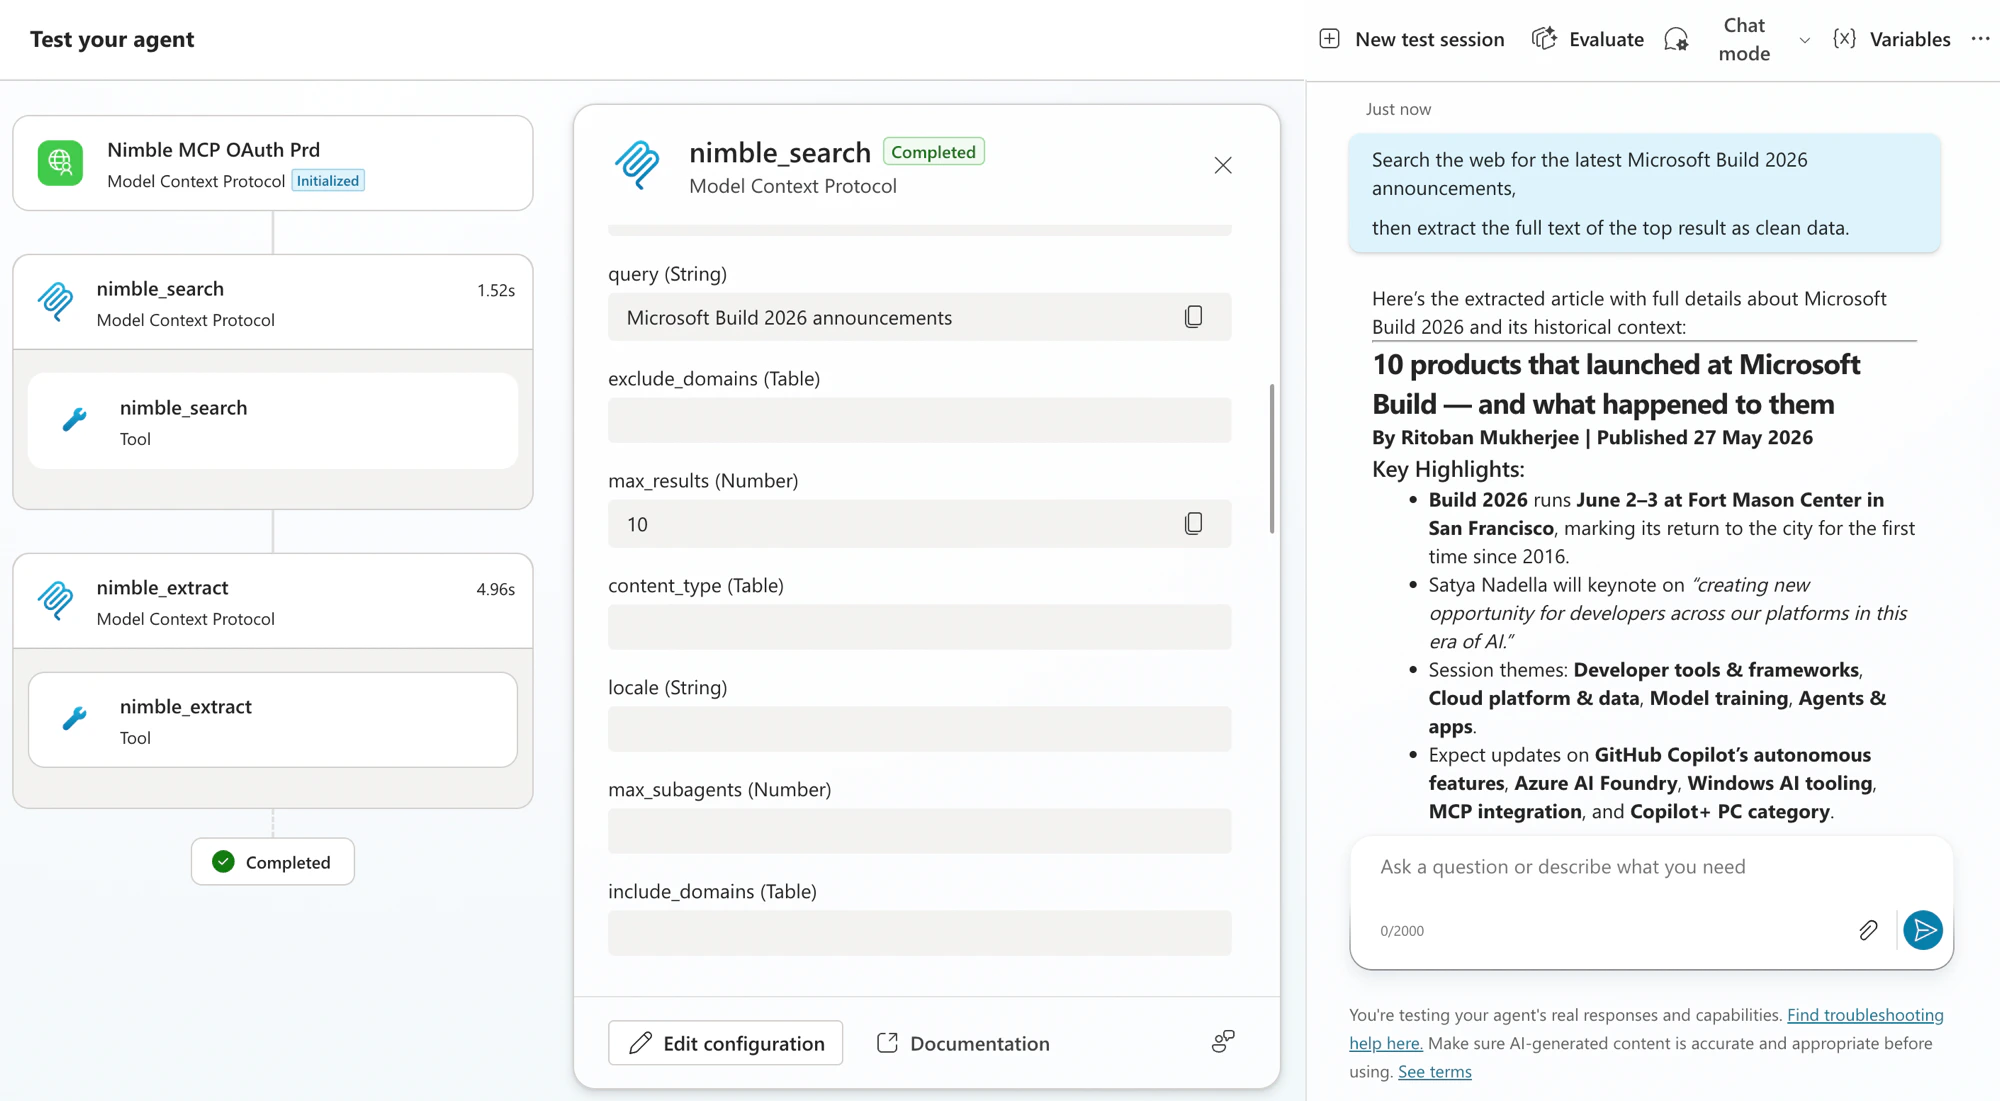
Search the web for the latest Microsoft Build 2026 announcements,then extract the full text of the top result as clean data.
The agent calls Nimble Search, then Extract, and returns results grounded in live web data. If the tools run and return content, the connection works end to end.
The agent running nimble_search then nimble_extract in the Copilot Studio test pane
Expand the activity map in the test pane to confirm the agent invoked the Nimble tools (nimble_search and nimble_extract) rather than answering from its own knowledge.