Batch Processing

Nimble's SERP API can scale up dramatically by using batch requests with up to 1,000 URLs per batch. Below, we outline three real-world use cases before reviewing the full parameter list, response examples, and response codes.

Example one - collecting data for multiple search terms

In this first example, we'll collect data for several unique search terms. To do so, we set the terms we wish to search and collect in the query field of the requests object.

Nimble APIs requires that a base64 encoded credential string be sent with every request to authenticate your account. For detailed examples, see Web API Authentication.

curl -X POST 'https://api.webit.live/api/v1/batch/serp' \
--header 'Authorization: Basic <credential string>' \
--header 'Content-Type: application/json' \
--data-raw '{ 
    "requests": [
        { "query": "Coffee" },
        { "query": "Tea" },
        { "query": "Biscuits" }
    ],
    "search_engine": "google_search",
    "storage_type": "s3",
    "storage_url": "s3://Your.Repository.Path/",
    "callback_url": "https://your.callback.url/path"
}'

Parameters that are placed outside the requests object, such as search_engine ,storage_type, storage_url, and callback_url , are automatically applied as defaults to all defined requests.

If a parameter is set both inside and outside the requests object, the value inside the request overrides the one outside.

Example two - collecting multiple searches from different countries

In this example, we'll again search for several different terms, but this time, we'll also use a different location for each search. To achieve this, we'll take advantage of the requests object, which allows us to set any parameter inside each request:

curl -X POST 'https://api.webit.live/api/v1/batch/serp' \
--header 'Authorization: Basic <credential string>' \
--header 'Content-Type: application/json' \
--data-raw '{ 
    "requests": [
        { "query": "Coffee, "country": "US", "locale": "en-US" },
        { "query": "Tea",  "country": "FR", "locale": "fr" },
        { "query": "Biscuits",  "country": "GR", "locale": "de" },
        { "query": "Eggs" }
    ],
    "country": "CA",
    "locale": "ca",
    "search_engine": "google_search",
    "storage_type": "s3",
    "storage_url": "s3://Your.Repository.Path/",
    "callback_url": "https://your.callback.url/path"
}'

For the above request, each search would be performed from the corresponding country. "Eggs" does not have a country set in its request, and thus will default to the country defined outside the requests object (CA - Canada). If no default country had been set, by default the request would have used a randomly selected country.

Example three - searching for the same phrase with different engines

Any parameter can be defined inside and outside the requests object. We can take advantage of this by defining our parameters in the requests object, and setting our search term once outside of it as a default. For example:

curl -X POST 'https://api.webit.live/api/v1/batch/serp' \
--header 'Authorization: Basic <credential string>' \
--header 'Content-Type: application/json' \
--data-raw '{ 
    "requests": [
        { "search_engine": "google_search" },
        { "search_engine": "bing_search" },
        { "search_engine": "yandex_search" },
    ],
    "query": "Coffee",
    "storage_type": "s3",
    "storage_url": "s3://Your.Repository.Path/",
    "callback_url": "https://your.callback.url/path"
}'

In the above example, three searches would be performed for the same phrase of "Coffee", but each time with a different search engine.

Request Options

Batch requests use the same parameters as asynchronous requests, with the exception of the requests object.

ParameterRequiredTypeDescription

requests

Optional

Object array

Allows for defining custom parameters for each request within the bulk. Any of the parameters below can be used in an individual request.

query

Required

String

The term or phrase to search for.

search_engine

Required

Enum: google_search | bing_search | yandex_search

The search engine from which to collect results.

tab

Optional (default = null)

Enum: news

When using google_search , setting tab to news will provide Google News results instead of standard search results.

country

Optional (default = all)

String

Country used to access the target URL, use ISO Alpha-2 Country Codes i.e. US, DE, GB

state

Optional

String

For targeting US states (does not include regions or territories in other countries). Two-letter state code, e.g. NY, IL, etc.

city

Optional

String

For targeting large cities and metro areas around the globe. When targeting major US cities, you must include state as well. Click here for a list of available cities.

locale

Optional (default = en)

String

LCID standard locale used for the URL request.

parse

Optional (default = true)

Boolean

Instructs Nimble whether to structure the results into a JSON format or return the raw HTML.

ads_optimization

Optional (default = false)

Boolean

This flag increases the number of paid ads (sponsored ads) in the results. It works by running the requests in 'incognito' mode.

storage_type

Optional

ENUM: s3 | gs

Use s3 for Amazon S3 and gs for Google Cloud Platform. Leave blank to enable Push/Pull delivery.

storage_url

Optional

String

Repository URL: s3://Your.Bucket.Name/your/object/name/prefix/ | Output will be saved to TASK_ID.json Leave blank to enable Push/Pull delivery.

callback_url

Optional

String

A url to callback once the data is delivered. Nimble APIs will send a POST request to the callback_url with the task details once the task is complete (this “notification” will not include the requested data).

Setting GCS/AWS access permissions

GCS Repository Configuration

In order to use Google Cloud Storage as your destination repository, please add Nimble’s system user as a principal to the relevant bucket. To do so, navigate to the “bucket details” page in your GCP console, and click on “Permission” in the submenu.

Next, past our system user [email protected] into the “New Principals” box, select Storage Object Creator as the role, and click save.

That’s all! At this point, Nimble will be able to upload files to your chosen GCS bucket.

S3 repository configuration

In order to use S3 as your destination repository, please give Nimble’s service user permission to upload files to the relevant S3 bucket. Paste the following JSON into the “Bucket Policy” (found under “Permissions”) in the AWS console.

Follow these steps:

1. Go to the “Permissions” tab on the bucket’s dashboard:

2. Scroll down to “Bucket policy” and press edit:

3. Paste the following bucket policy configuration into your bucket:

{
    "Version": "2012-10-17",
    "Statement": [
        {
            "Sid": "Statement1",
            "Effect": "Allow",
            "Principal": {
                "AWS": "arn:aws:iam::744254827463:user/webit-uploader"
            },
            "Action": [
                "s3:PutObject",
                "s3:PutObjectACL"
            ],
            "Resource": "arn:aws:s3:::YOUR_BUCKET_NAME/*"
        },
        {
            "Sid": "Statement2",
            "Effect": "Allow",
            "Principal": {
                "AWS": "arn:aws:iam::744254827463:user/webit-uploader"
            },
            "Action": "s3:GetBucketLocation",
            "Resource": "arn:aws:s3:::YOUR_BUCKET_NAME"
        }
    ]
}

Important: Remember to replace “YOUR_BUCKET_NAME” with your actual bucket name.

Here is what the bucket policy should look like:

4. Scroll down and press “Save changes”

S3 Encrypted Buckets

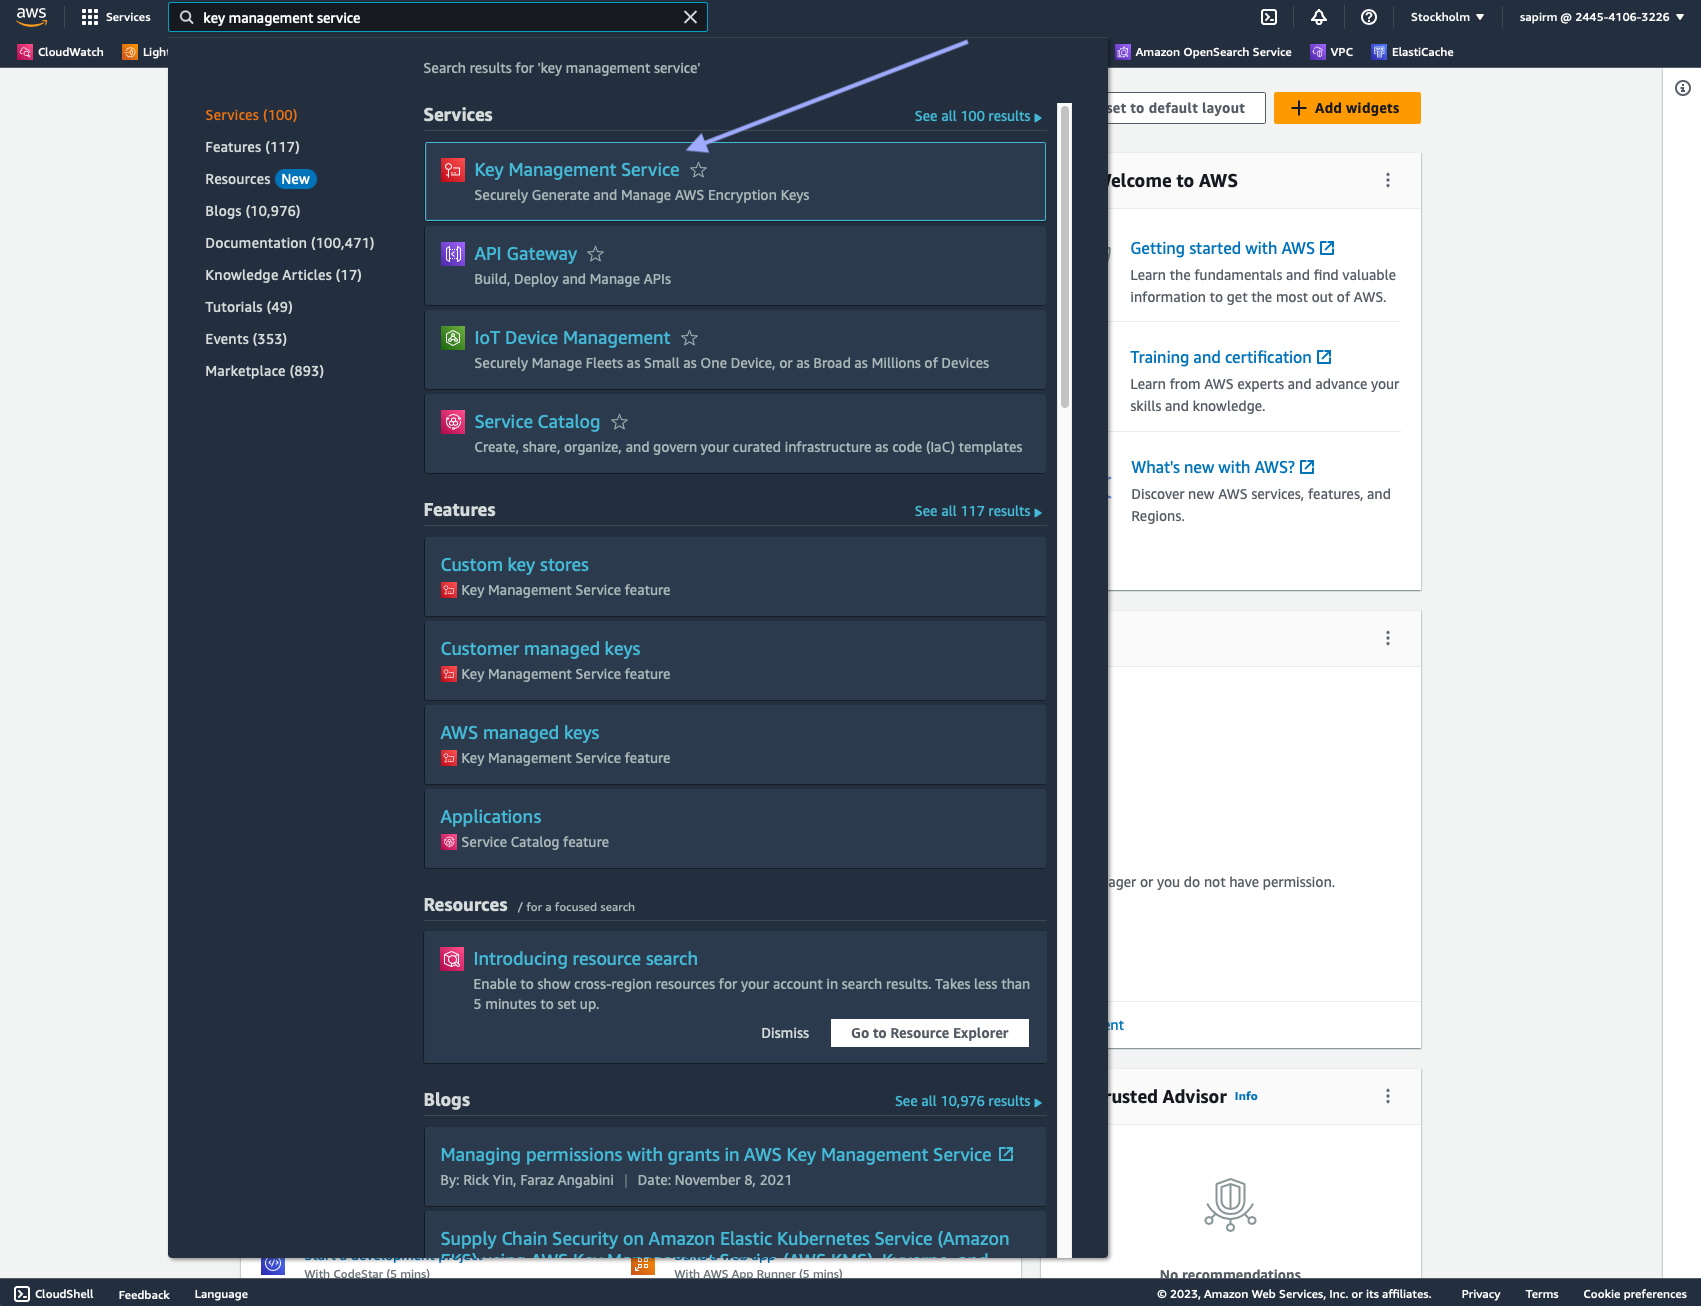
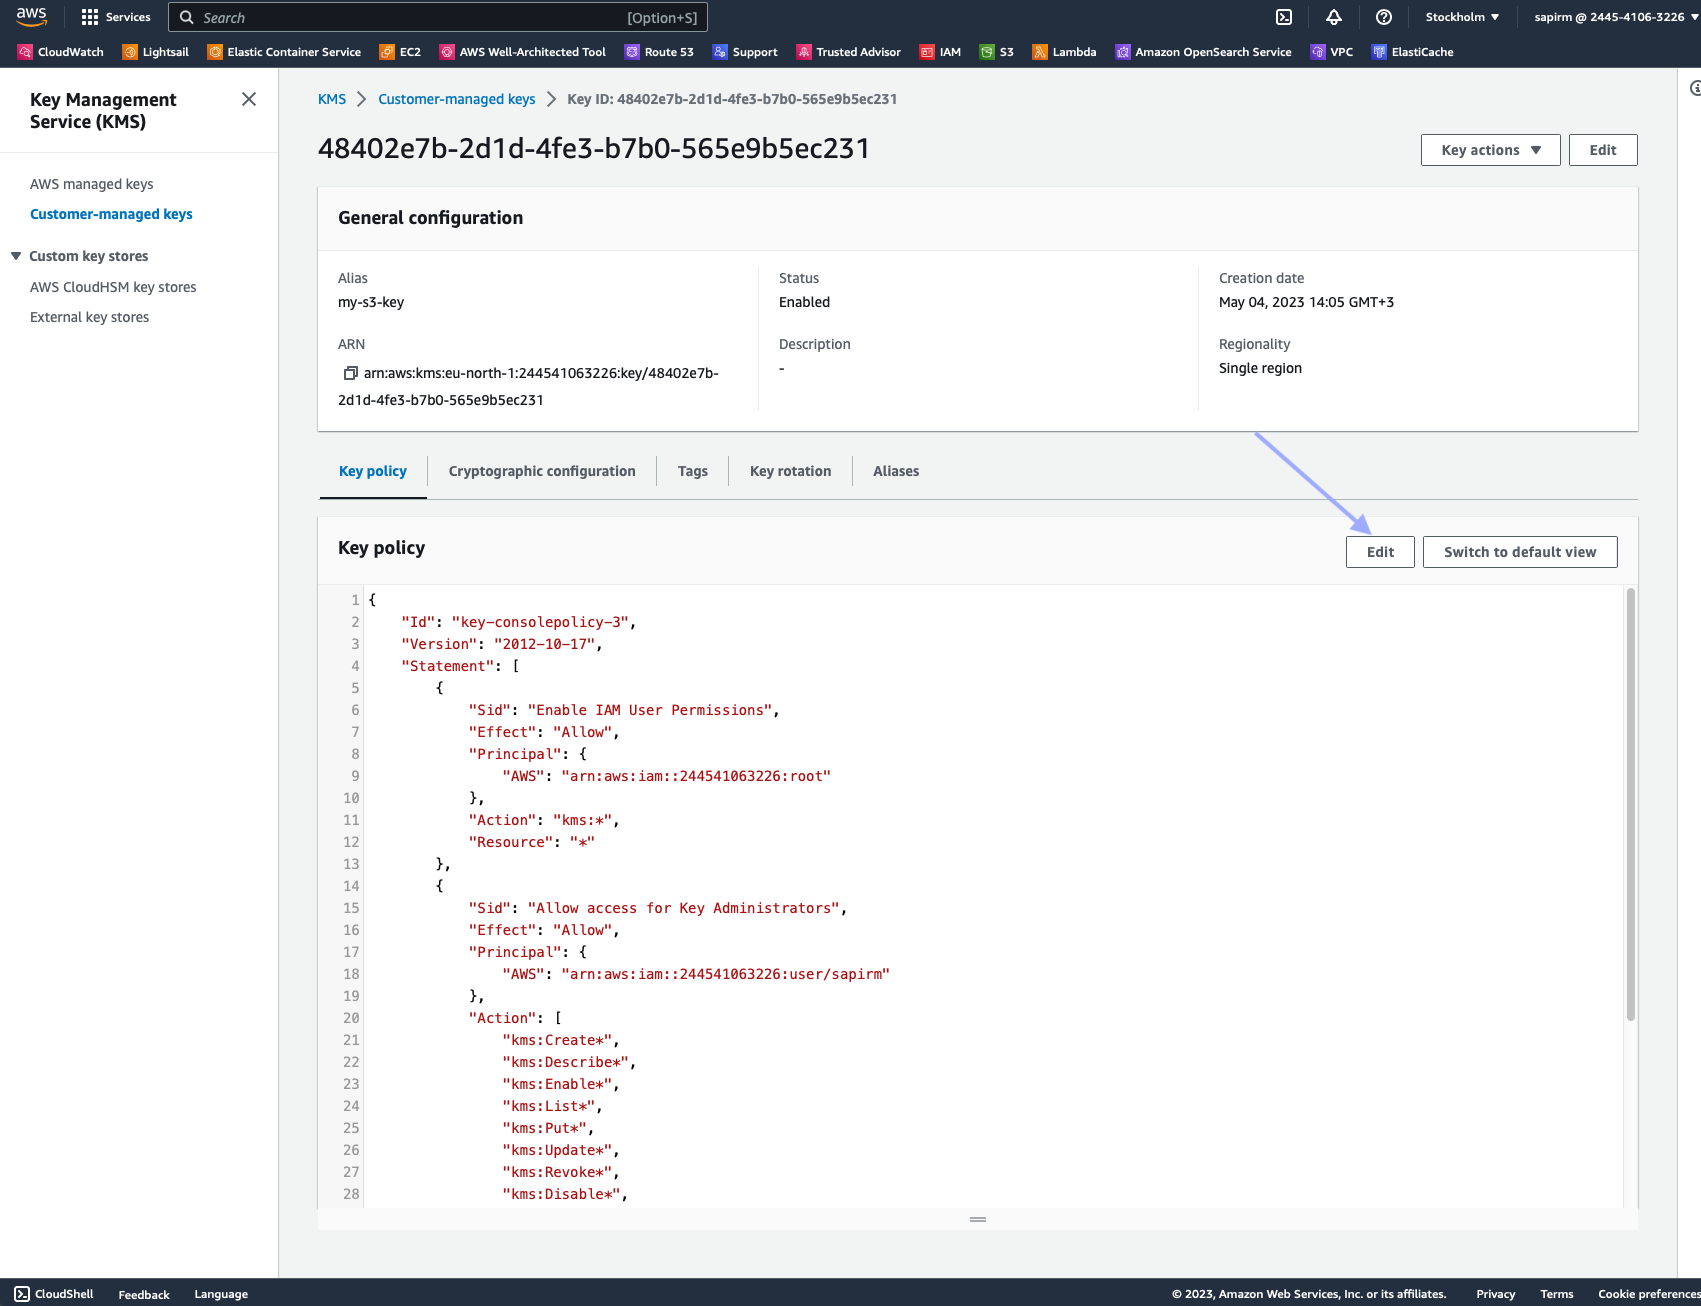
If your S3 bucket is encrypted using an AWS Key Management Service (KMS) key, additional permissions to those outlined above are also needed. Specifically, Nimble's service user will need to be given permission to encrypt and decrypt objects using a KMS key. To do this, follow the steps below:

  1. Sign in to the AWS Management Console and open the AWS Key Management Service (KMS) console.

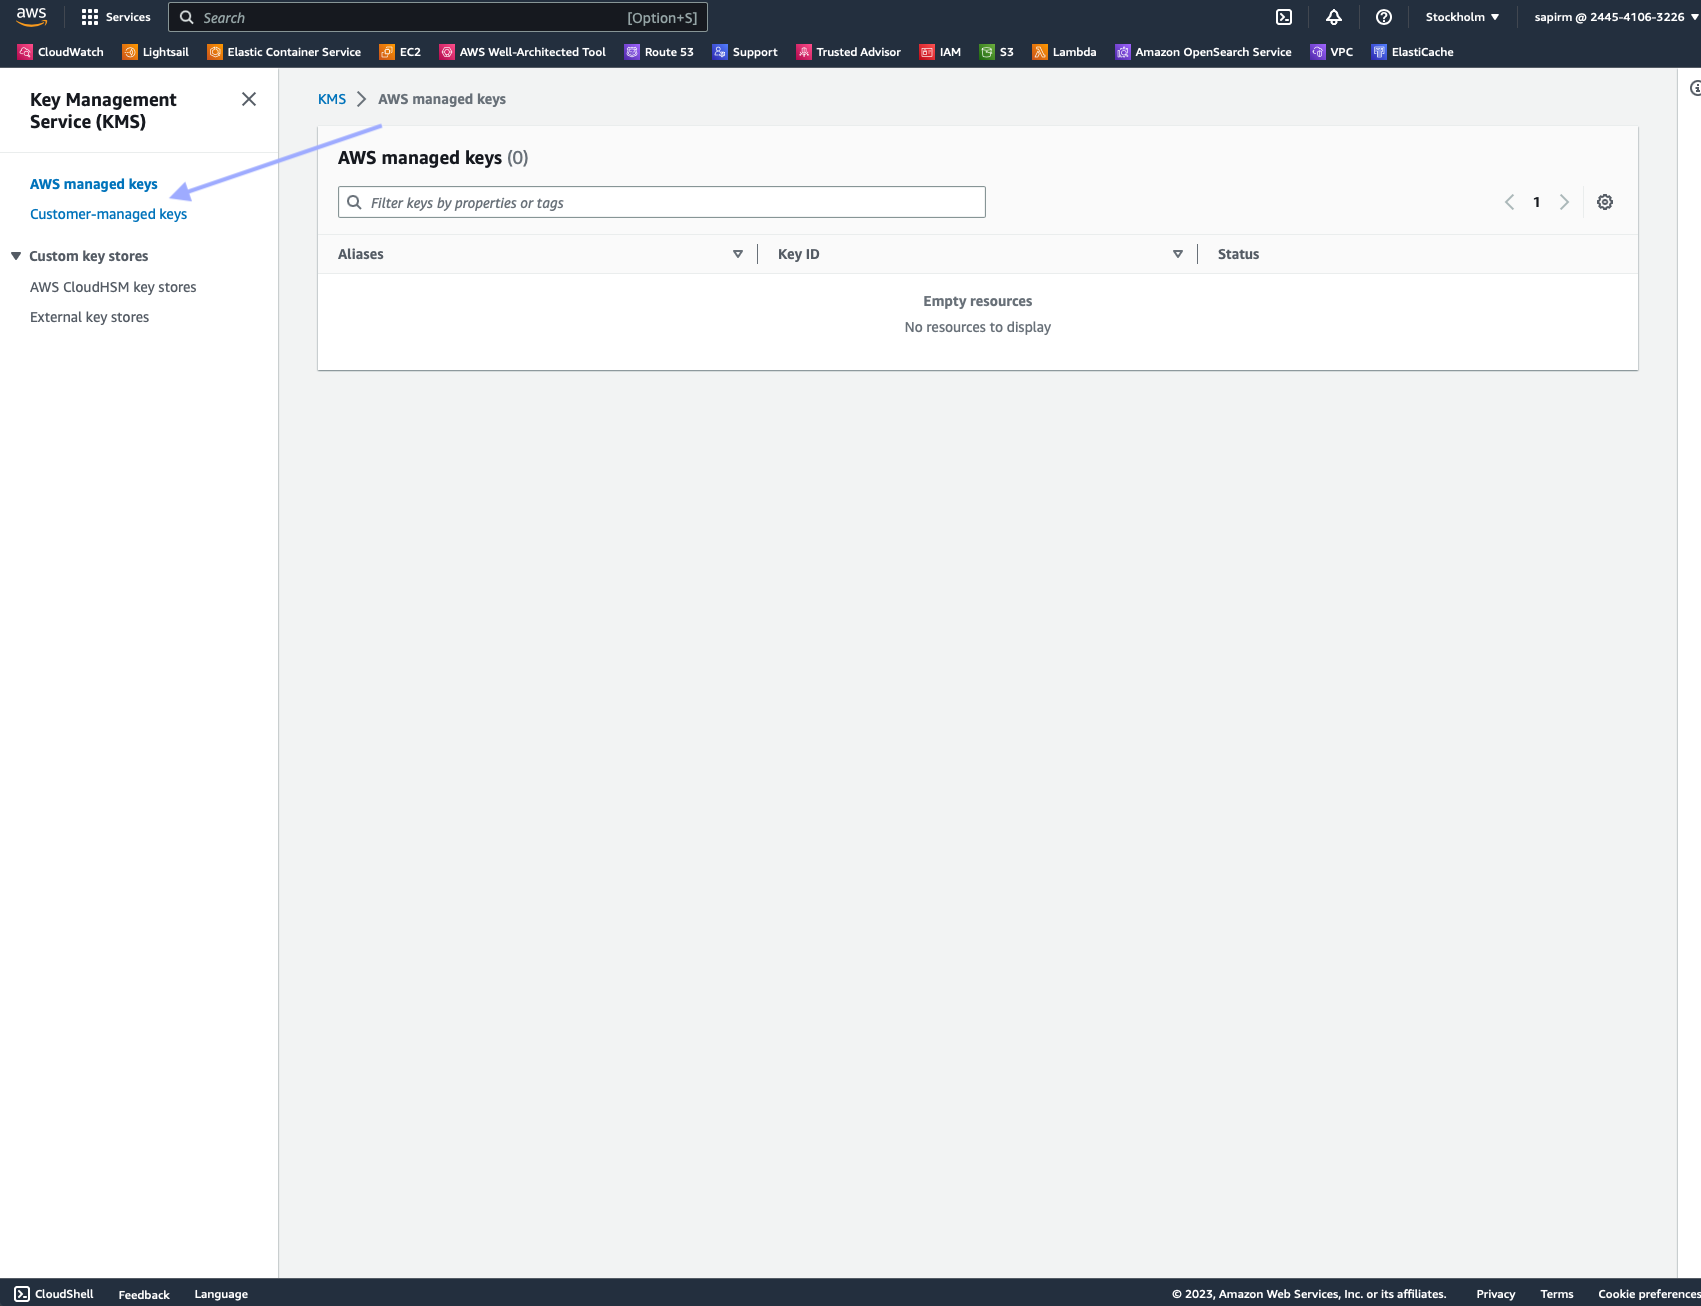
  2. In the navigation pane, choose "Customer managed keys".

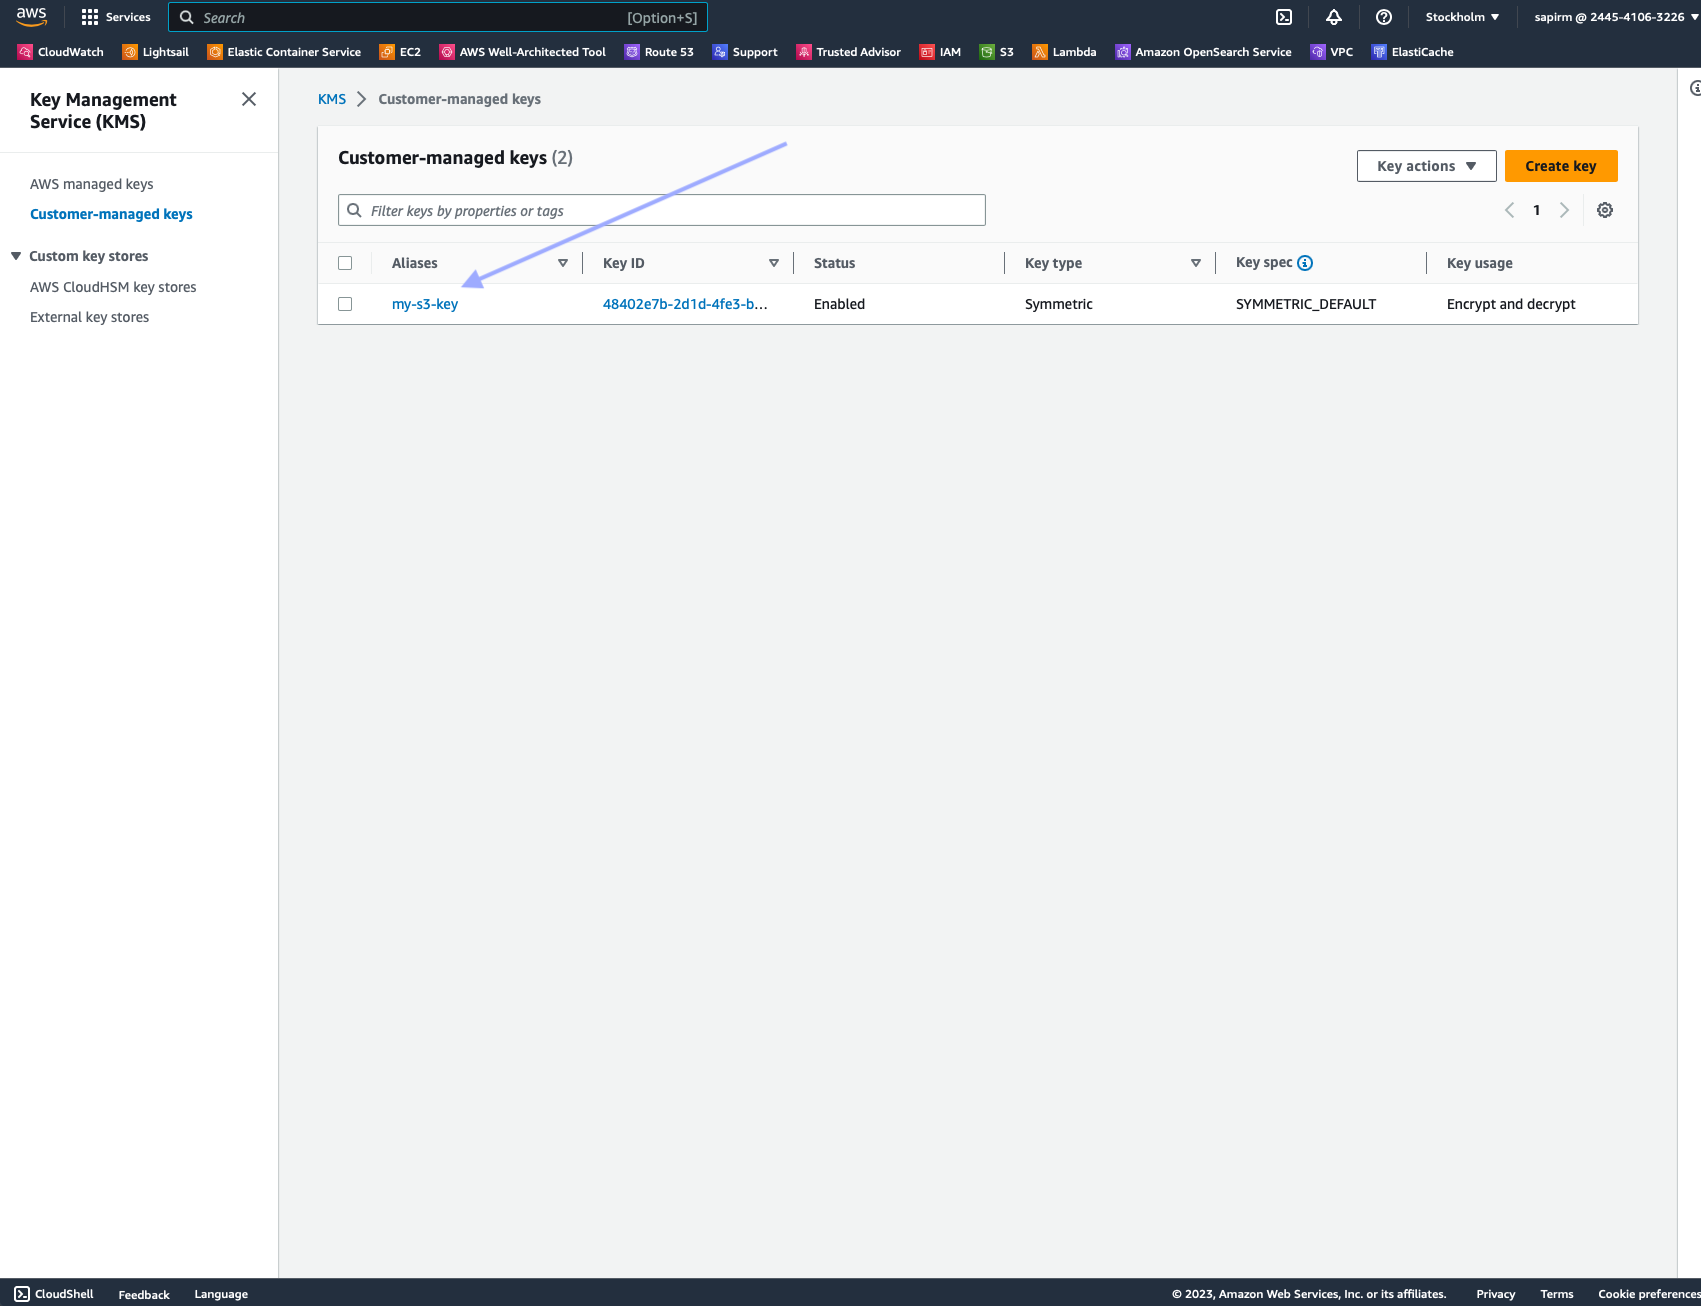
  3. Select the KMS key you want to modify.

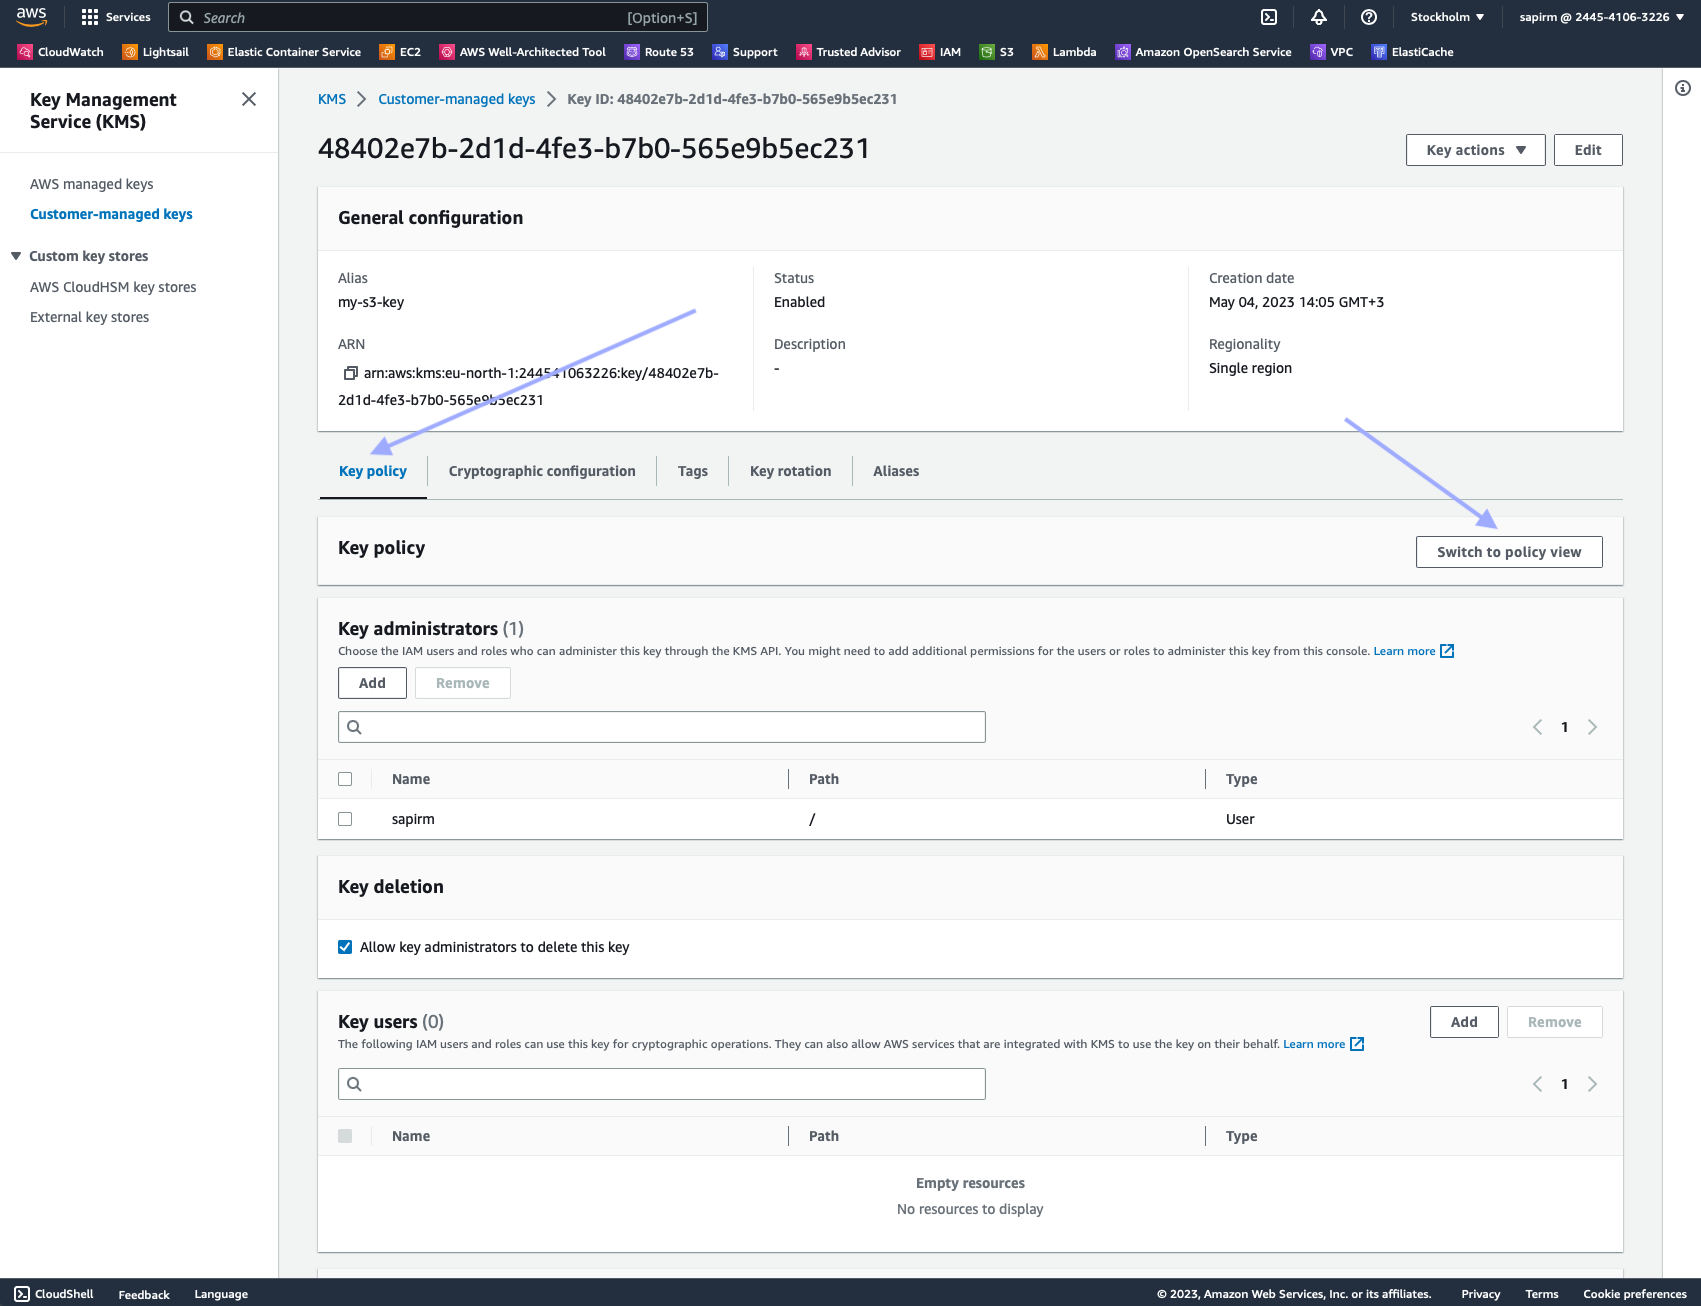
  4. Choose the "Key policy" tab, then "Switch to policy view".

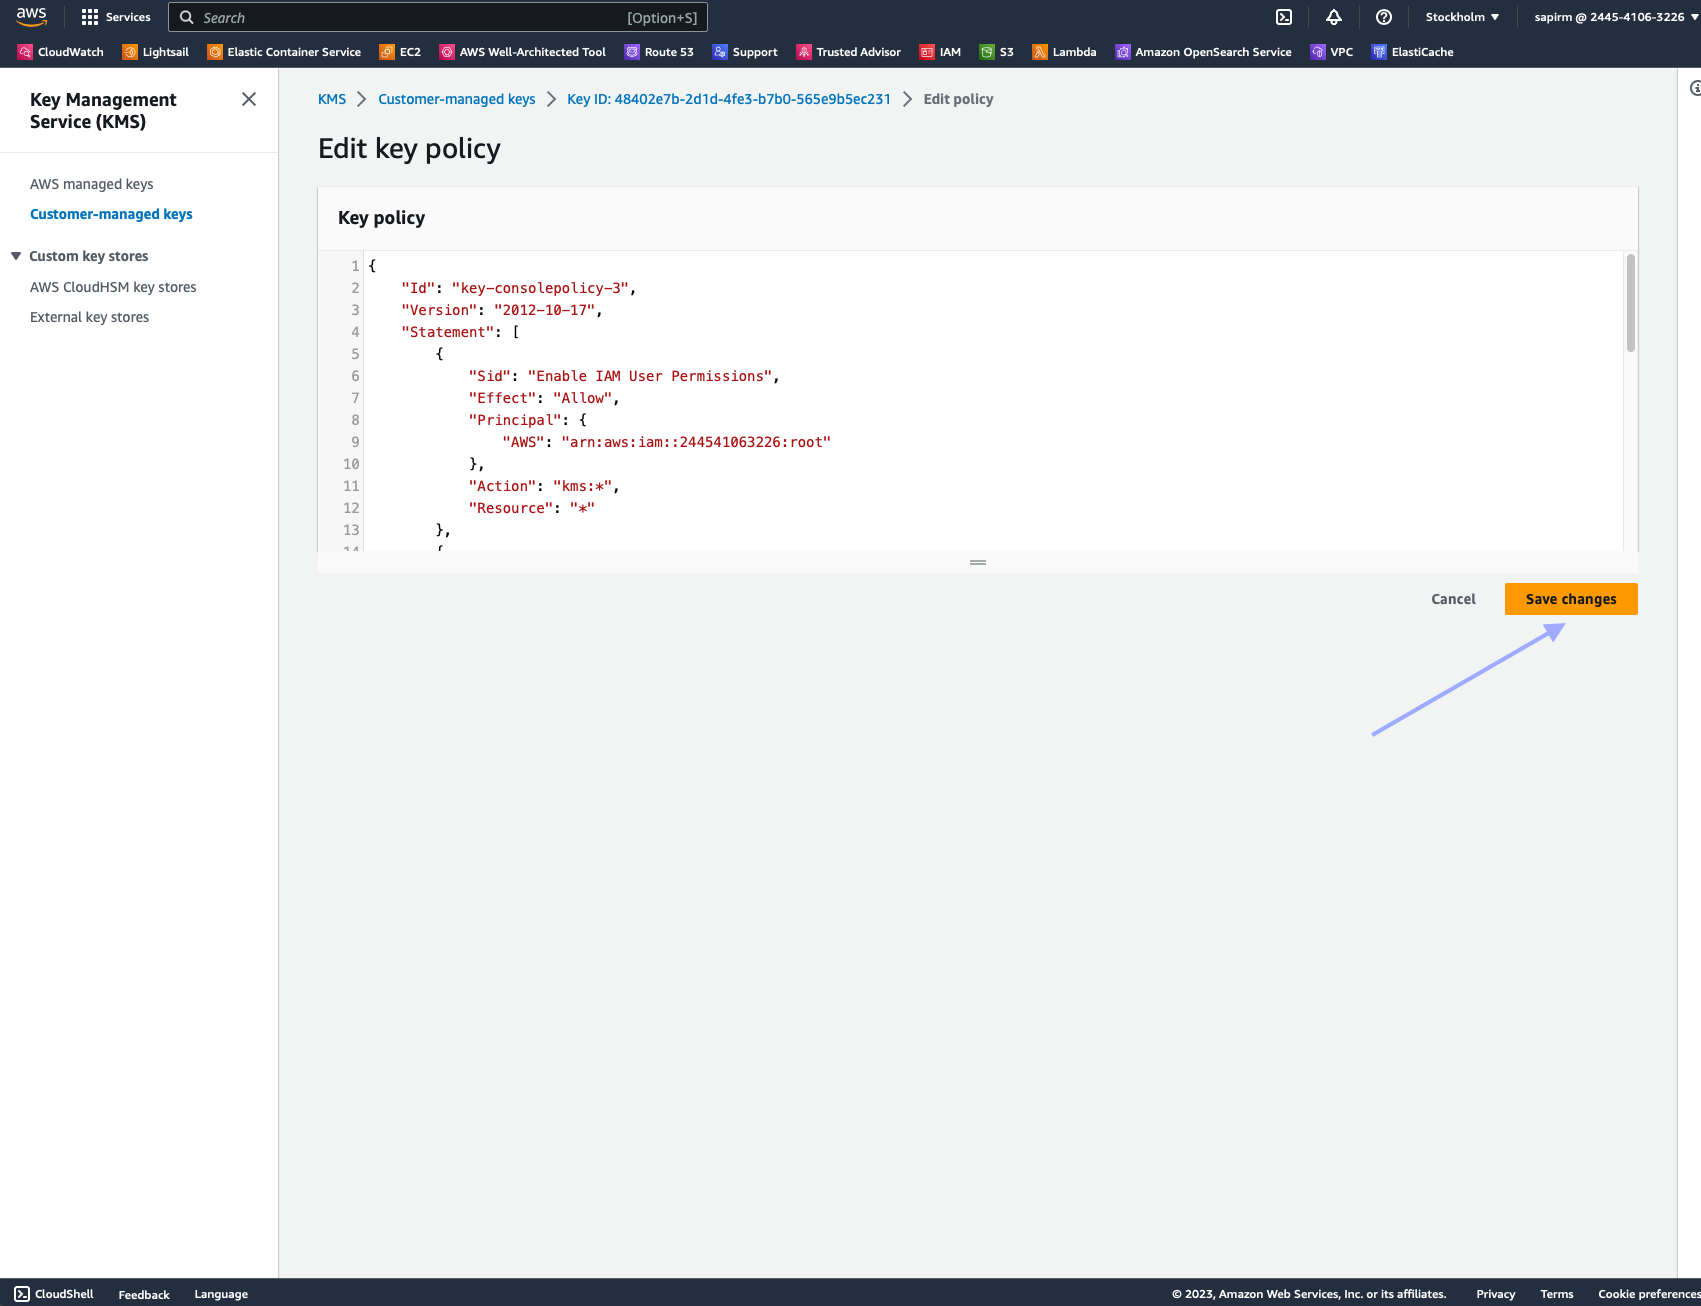
  5. Click "Edit".

  6. Add the following statement to the existing policy JSON, ensuring it's inside the Statement array:

{
	"Version": "2012-10-17",
	"Id": "example-key-policy",
	"Statement": [
		// ... your pre-existing statements ...
		{
			"Sid": "Allow Nimble APIs account",
			"Effect": "Allow",
			"Principal": {
				"AWS": "arn:aws:iam::744254827463:user/webit-uploader"
			},
			"Action": [
				"kms:Encrypt",
				"kms:Decrypt",
				"kms:ReEncrypt*",
				"kms:GenerateDataKey*",
				"kms:DescribeKey"
			],
			"Resource": "*"
		},
	]
}
  1. Click "Save changes" to update the key policy.

That's it! You've now given Nimble APIs permission to encrypt and decrypt objects, enabling access to encrypted buckets.

Please add Nimble's system/service user to your GCS or S3 bucket to ensure that data can be delivered successfully.

Response

Initial Response

Batch requests operate asynchronously, and treat each request as a separate task. The result of each task is stored in a file, and a notification is sent to the provided callback any time an individual task is completed.

{
    "batch_id": "7a07a96d-c402-4d98-a17f-4ecb390d11a3",
    "batch_size": 3,
    "tasks": [
        {
            "batch_id": "7a07a96d-c402-4d98-a17f-4ecb390d11a3",
            "id": "2e508d43-8b02-4fc0-96c7-0968ab454a0c",
            "state": "pending",
            "output_url": "s3://Your.Repository.Path/2e508d43-8b02-4fc0-96c7-0968ab454a0c.json",
            "callback_url": "https://your.callback.url/path",
            "status_url": "https://api.webit.live/api/v1/tasks/2e508d43-8b02-4fc0-96c7-0968ab454a0c",
            "created_at": "2022-07-24T08:09:23.205Z",
            "modified_at": "2022-07-24T08:09:23.205Z",
            "input": {
            ...
        },
        {
            "batch_id": "7a07a96d-c402-4d98-a17f-4ecb390d11a3",
            "id": "63cc3bd5-01b4-4787-90a2-f382b9960c77",
            "state": "pending",
            ...
        },
        {
            "batch_id": "7a07a96d-c402-4d98-a17f-4ecb390d11a3",
            "id": "4cb39bbf-5580-4c50-8ed4-4a7905e2ec52",
            "state": "pending",
            ...
        }
    ]
}

Checking batch progress and status

POST https://api.webit.live/api/v1/batches/<batch_id>/progress

Like asynchronous tasks, the status of a batch is available for 24 hours.

curl -X GET 'https://api.webit.live/api/v1/batches/<batch_id>/progress' \
--header 'Authorization: Basic <credential string>'

Response

The progress of a batch is reported in percentages.

{
    "status": "success",
    "completed": false,
    "progress": 0.333333
}

Once a batch is finished, its progress will be reported as “1”.

{
    "status": "success",
    "completed": true,
    "progress": 1
}

Retrieving Batch Summary

One a batch has finished, it’s possible to return a summary of the completed tasks, by using the following endpoint:

GET https://api.webit.live/api/v1/batches/<batch_id>

For example:

curl -X GET 'https://api.webit.live/api/v1/batches/<batch_id>' \
--header 'Authorization: Basic <credential string>'

The response object lists the status of the overall batch, as well as the individual tasks and their details:

Response

{
    "status": "success",
    "tasks": [
        {
            "batch_id": "7a07a96d-c402-4d98-a17f-4ecb390d11a3",
            "id": "2e508d43-8b02-4fc0-96c7-0968ab454a0c",
            "state": "success",
            "output_url": "s3://Your.Repository.Path/2e508d43-8b02-4fc0-96c7-0968ab454a0c.json",
            "callback_url": "https://your.callback.url/path",
            "status_url": "https://[base_url]/api/v1/tasks/2e508d43-8b02-4fc0-96c7-0968ab454a0c",
            "created_at": "2022-07-24T08:09:23.205Z",
            "modified_at": "2022-07-24T08:10:27.244Z",
            "input": {
        ...
            }
        },
        {
            "batch_id": "7a07a96d-c402-4d98-a17f-4ecb390d11a3",
            "id": "63cc3bd5-01b4-4787-90a2-f382b9960c77",
            "state": "success",
            "output_url": "s3://Your.Repository.Path/63cc3bd5-01b4-4787-90a2-f382b9960c77.json",
            "callback_url": "https://your.callback.url/path",
            "status_url": "https://[base_url]/api/v1/tasks/63cc3bd5-01b4-4787-90a2-f382b9960c77",
            "created_at": "2022-07-24T08:09:23.205Z",
            "modified_at": "2022-07-24T08:10:27.973Z",
            "input": {
        ...
            }
         },
        {
            "batch_id": "7a07a96d-c402-4d98-a17f-4ecb390d11a3",
            "id": "4cb39bbf-5580-4c50-8ed4-4a7905e2ec52",
            "state": "success",
            "output_url": "s3://Your.Repository.Path/4cb39bbf-5580-4c50-8ed4-4a7905e2ec52.json",
            "callback_url": "https://your.callback.url/path",
            "status_url": "https://[base_url]/api/v1/tasks/4cb39bbf-5580-4c50-8ed4-4a7905e2ec52",
            "created_at": "2022-07-24T08:09:23.205Z",
            "modified_at": "2022-07-24T08:10:30.292Z",
            "input": {
        ...
            }
        }
    ],
    "completed": true,
    "progress": 1
}

500 error

{
    "status": "error",
        "task_id": "<task_id>",
        "msg": "can't download the query response - please try again"
}

400 Input Error

{
        "status": "failed",
        "msg": error
}

Response Codes

StatusDescription

200

OK

400

The requested resource could not be reached

401

Unauthorized/invalid credental string

500

Internal service error

501

An error was encountered by the proxy service

Last updated