

Accessing Account Settings
Navigate to your account settings at online.nimbleway.com:- Log in with your username and password
- Click on your profile or settings icon
- Select Account Settings from the menu
API Keys
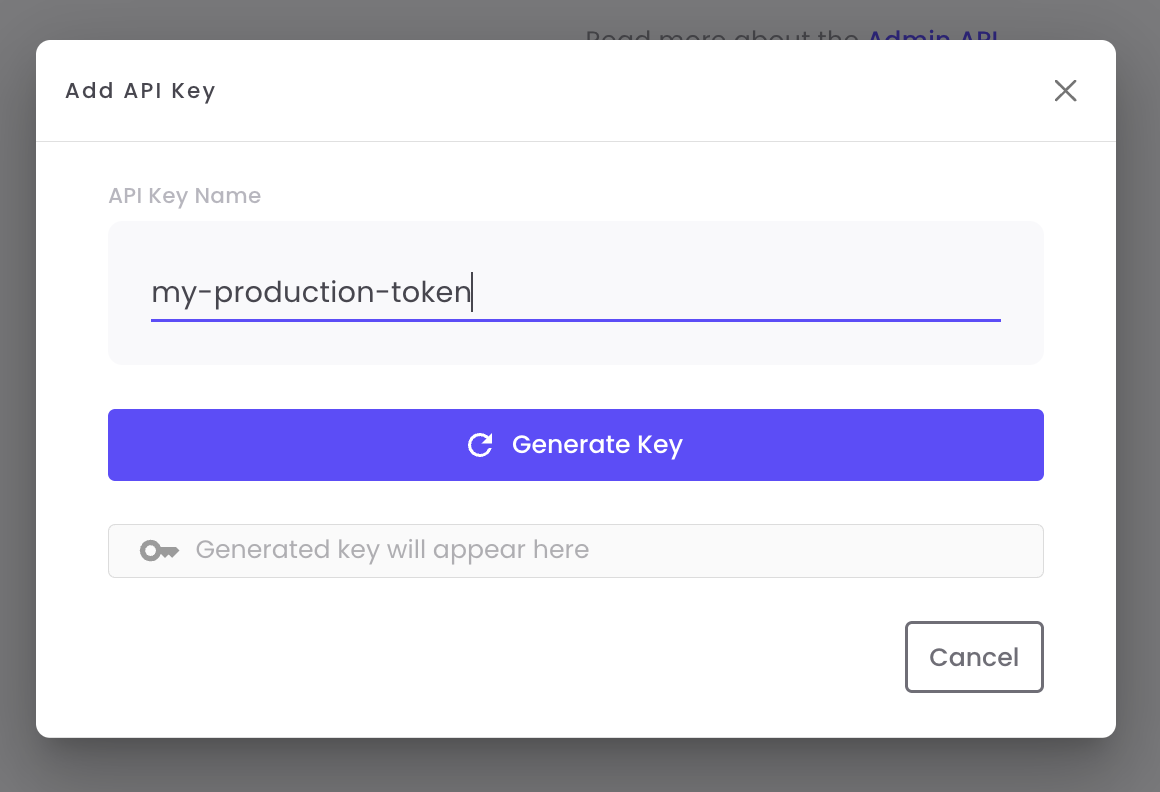
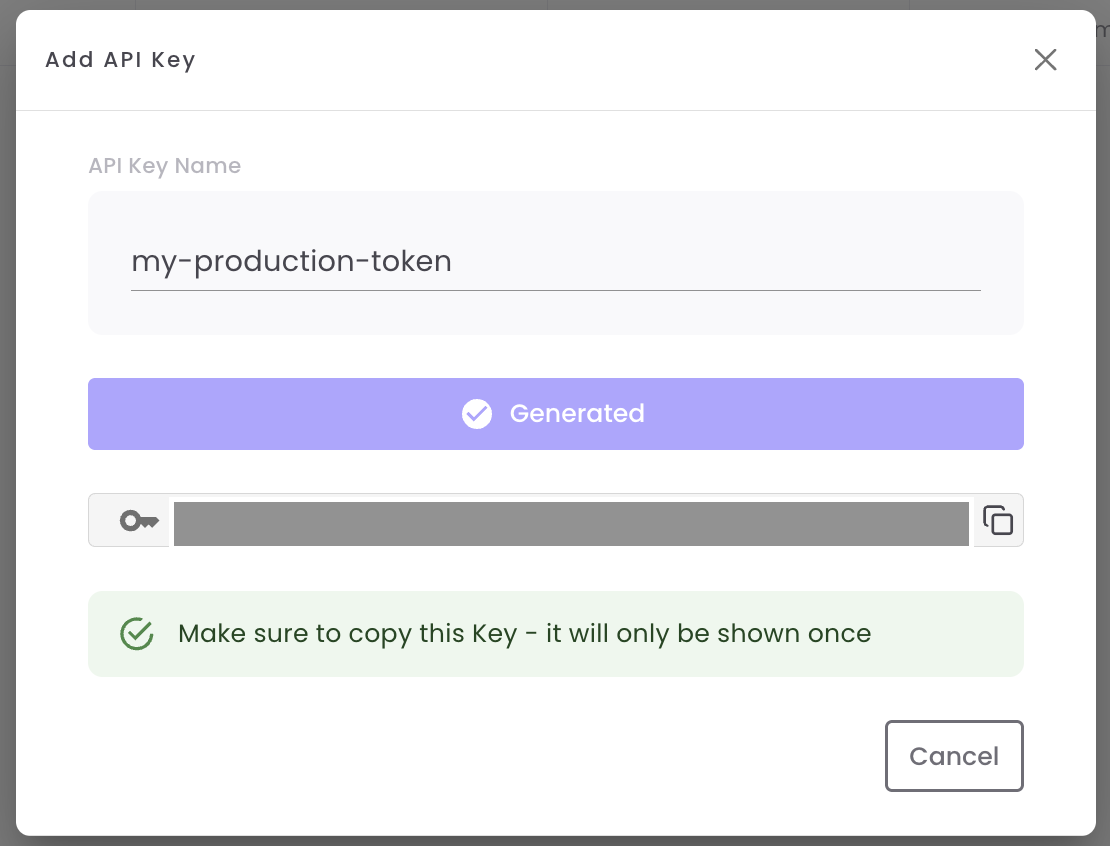
API keys are used to authenticate your requests to the Nimble API. Each key is unique and should be kept secure.Generate Your First API Key
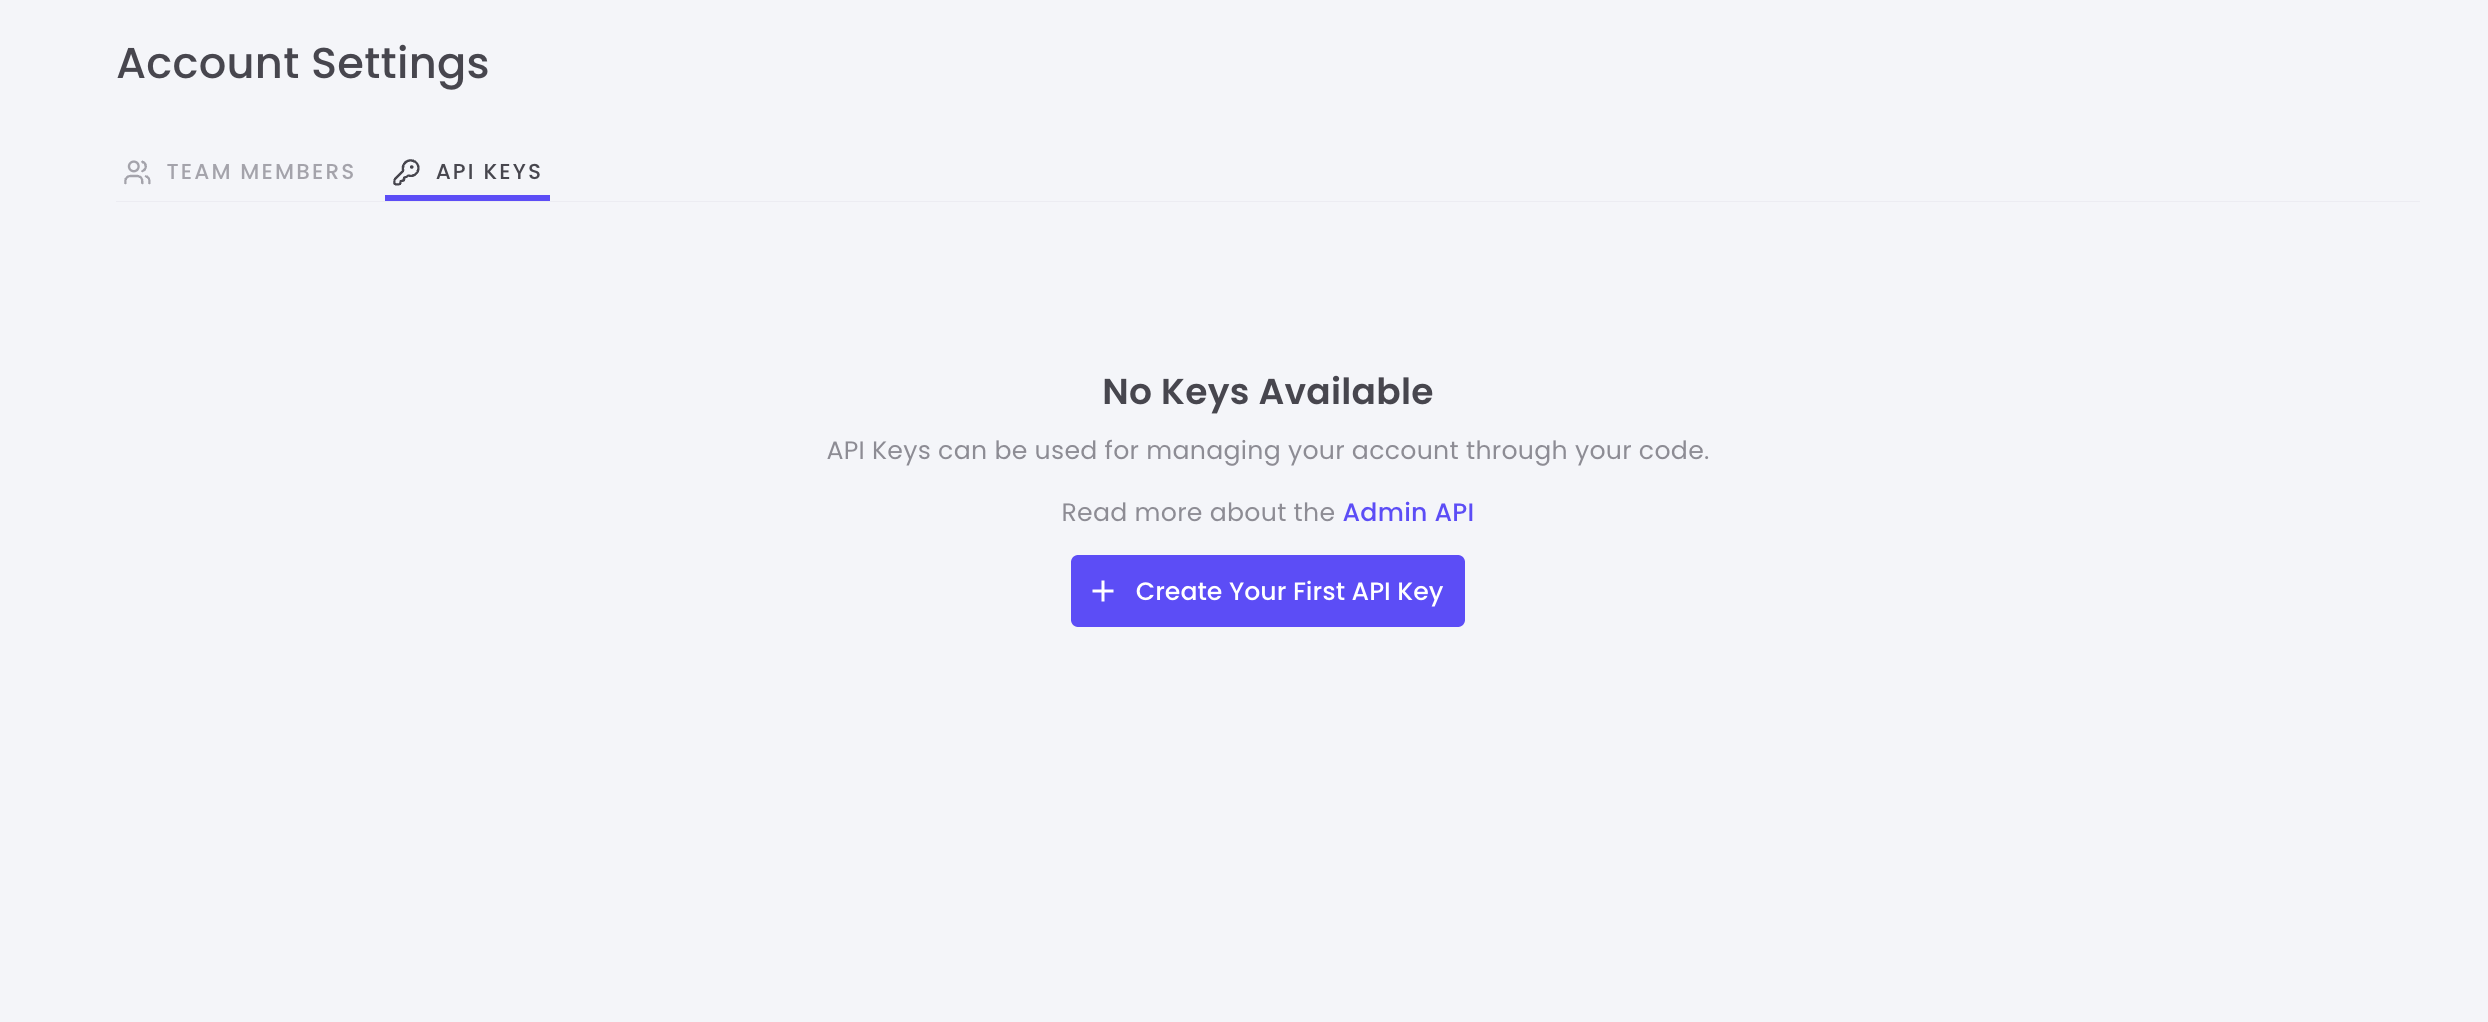

Managing API Keys
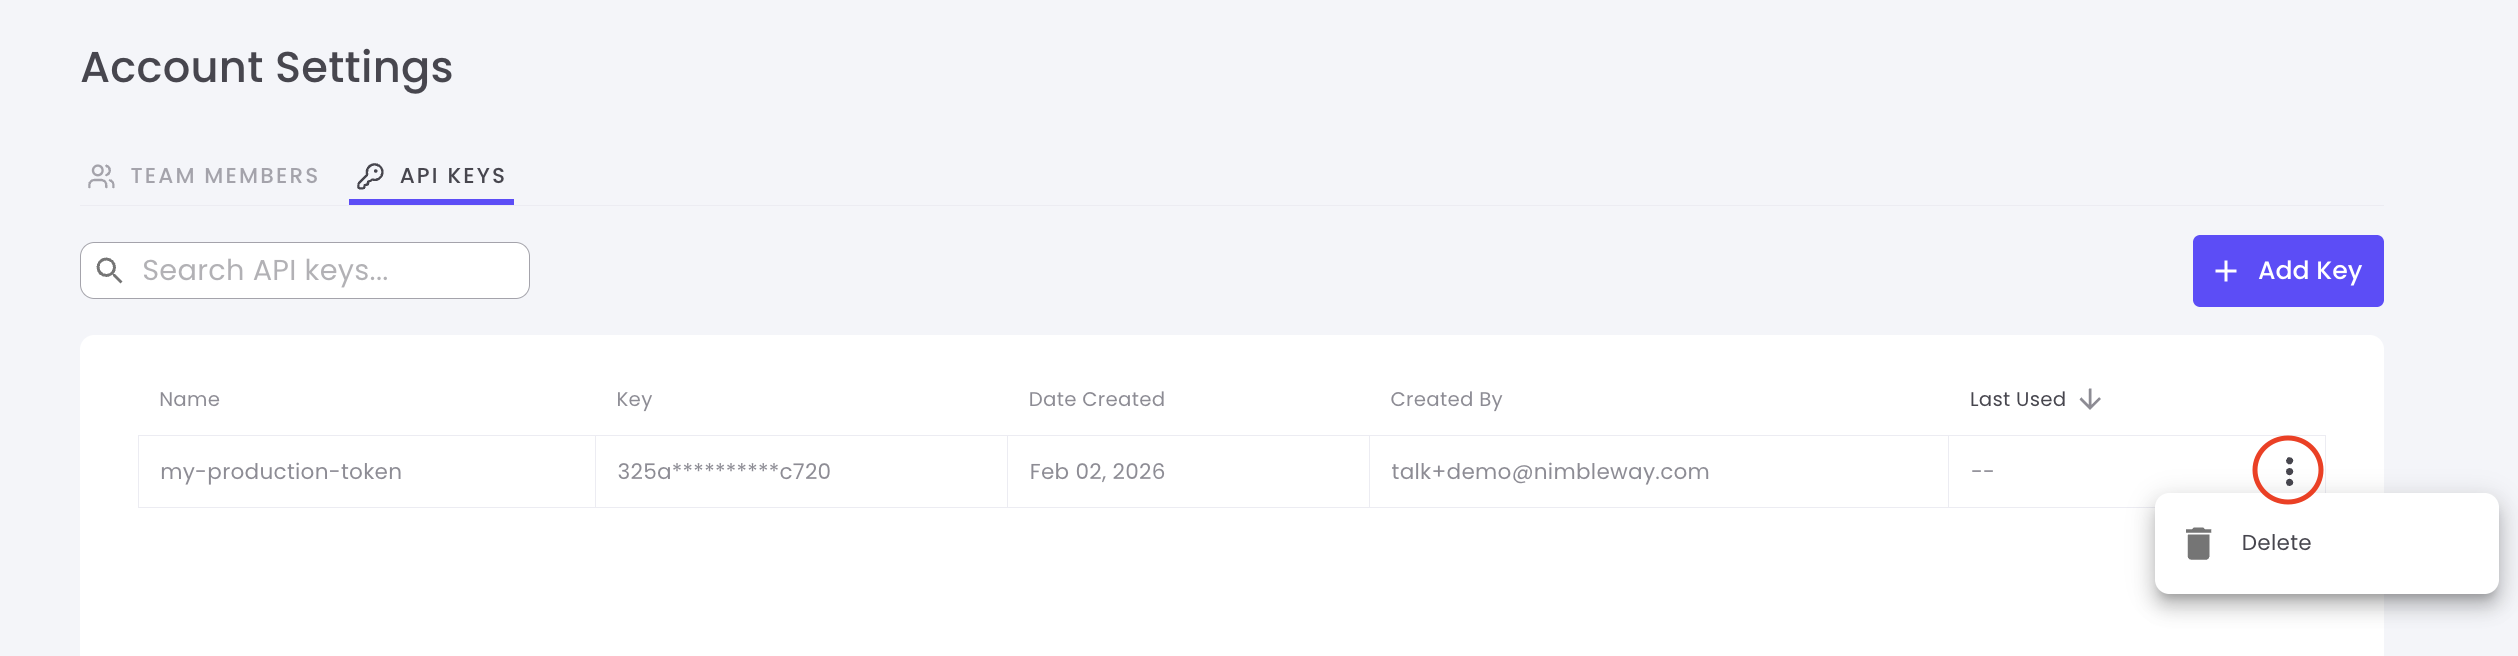
Once created, you can view and manage all your API keys from the API Keys dashboard.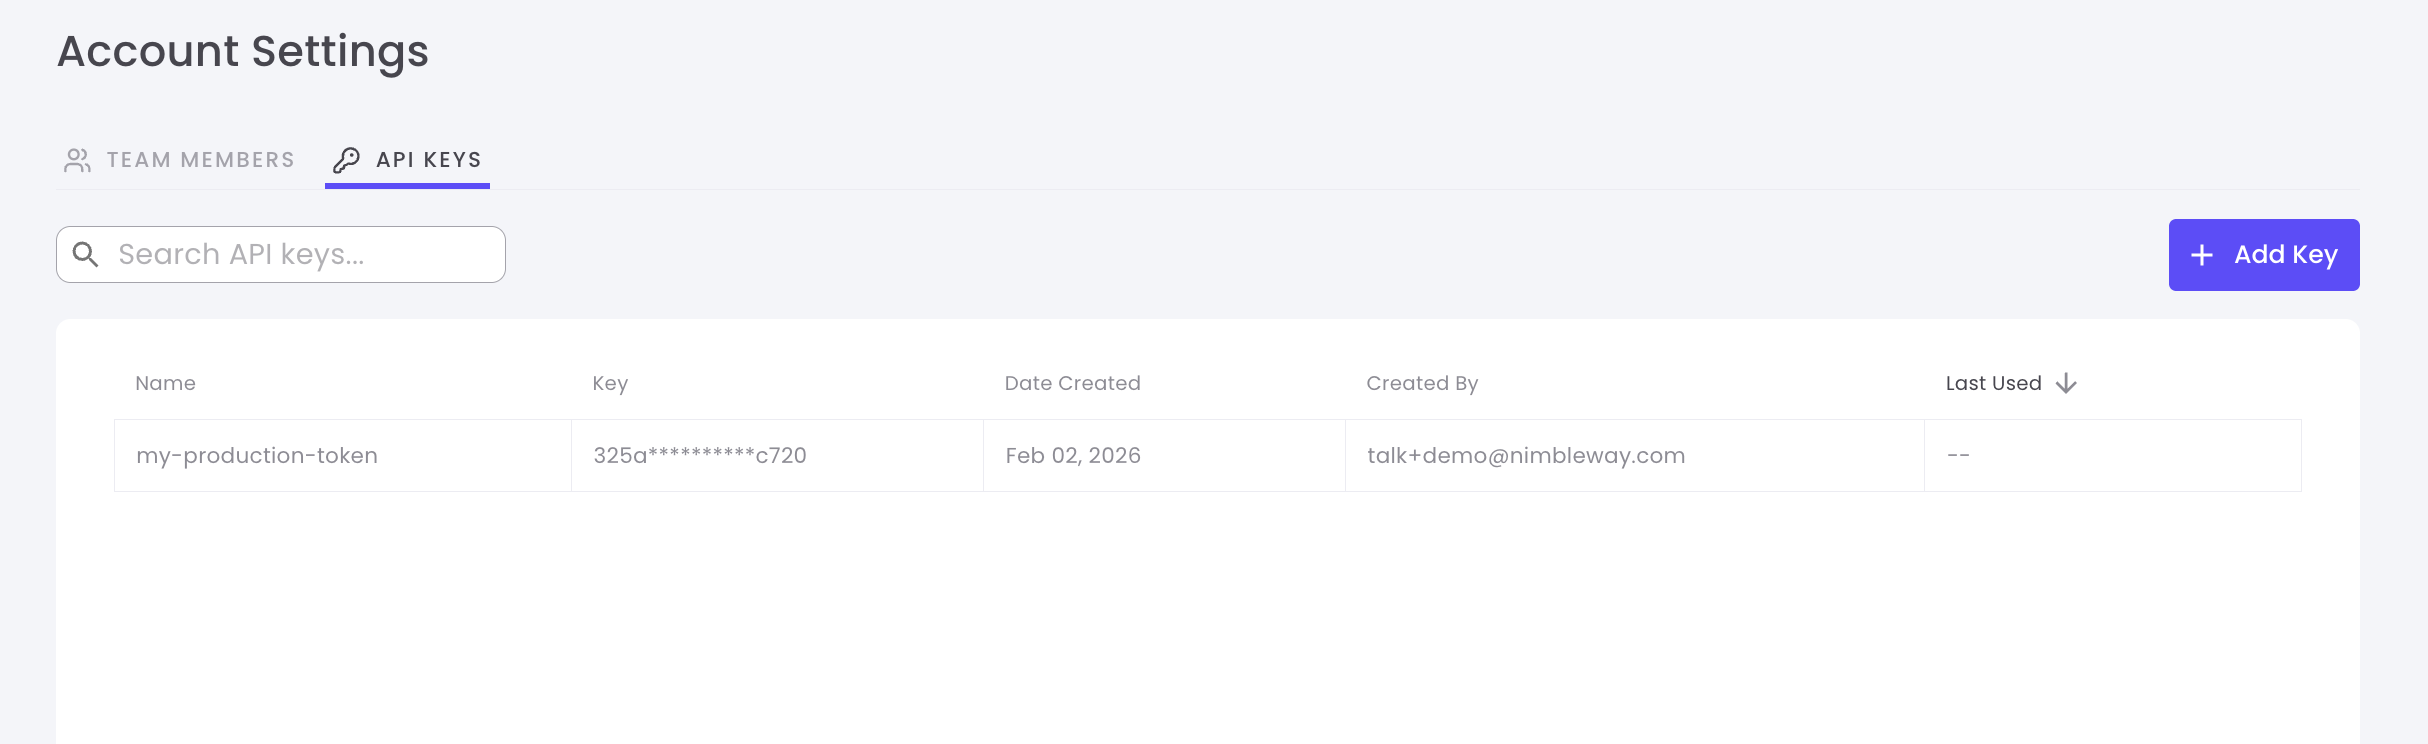
API Key Information
Each API key displays the following information:| Column | Description |
|---|---|
| Name | The descriptive name you gave to the key |
| Created | Date and time when the key was created |
| Created By | The team member who created the key |
| Last Used | Most recent date the key was used in an API request |
| Actions | Delete or manage the key |
Delete an API Key
To delete an API key:- Locate the key you want to delete in the list
- Click the Delete button or trash icon
-
Confirm the deletion in the popup dialog
Best Practices
Use Descriptive Names
Name keys based on their purpose or environment
Rotate Keys Regularly
Create new keys periodically and delete old ones to maintain security
One Key Per Service
Use separate API keys for different services to track usage and limit exposure
Never Share Keys
Keep API keys confidential and never commit them to version control
Team Members
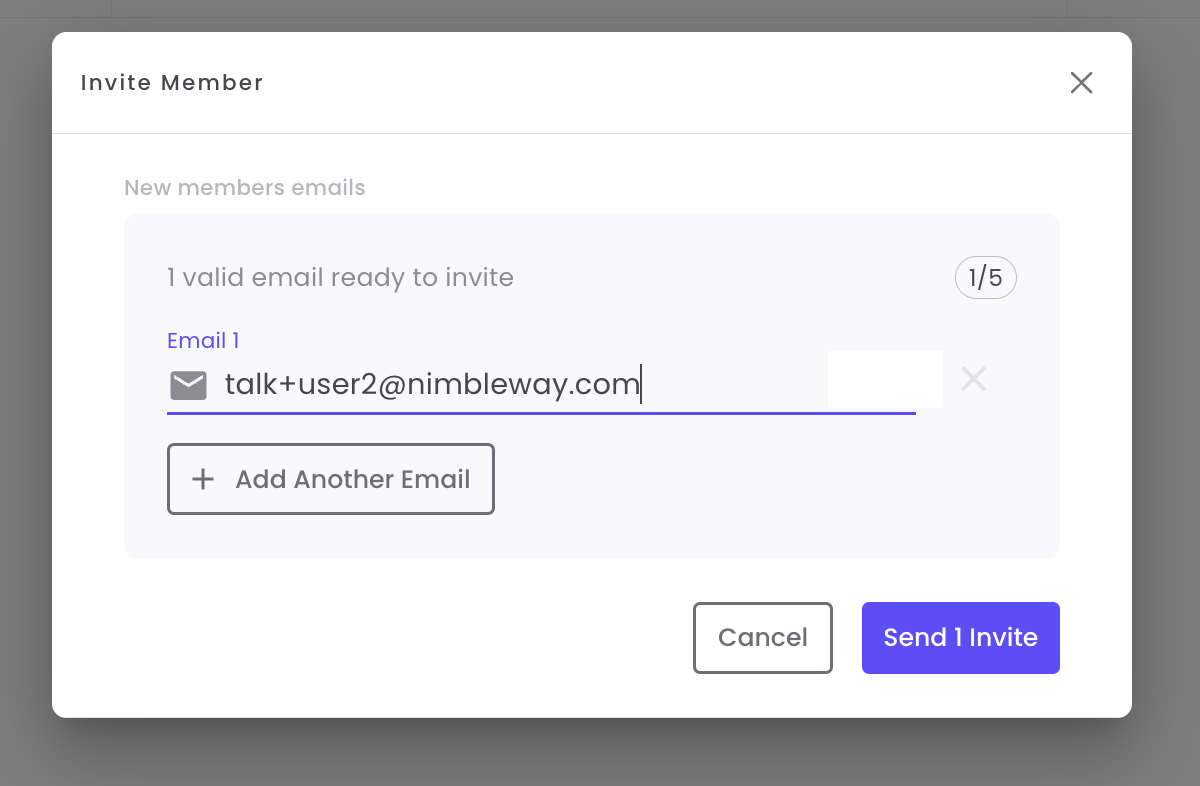
Collaborate with your team by inviting members to your Nimble account. Control access levels and manage permissions all in one place.Invite Team Members
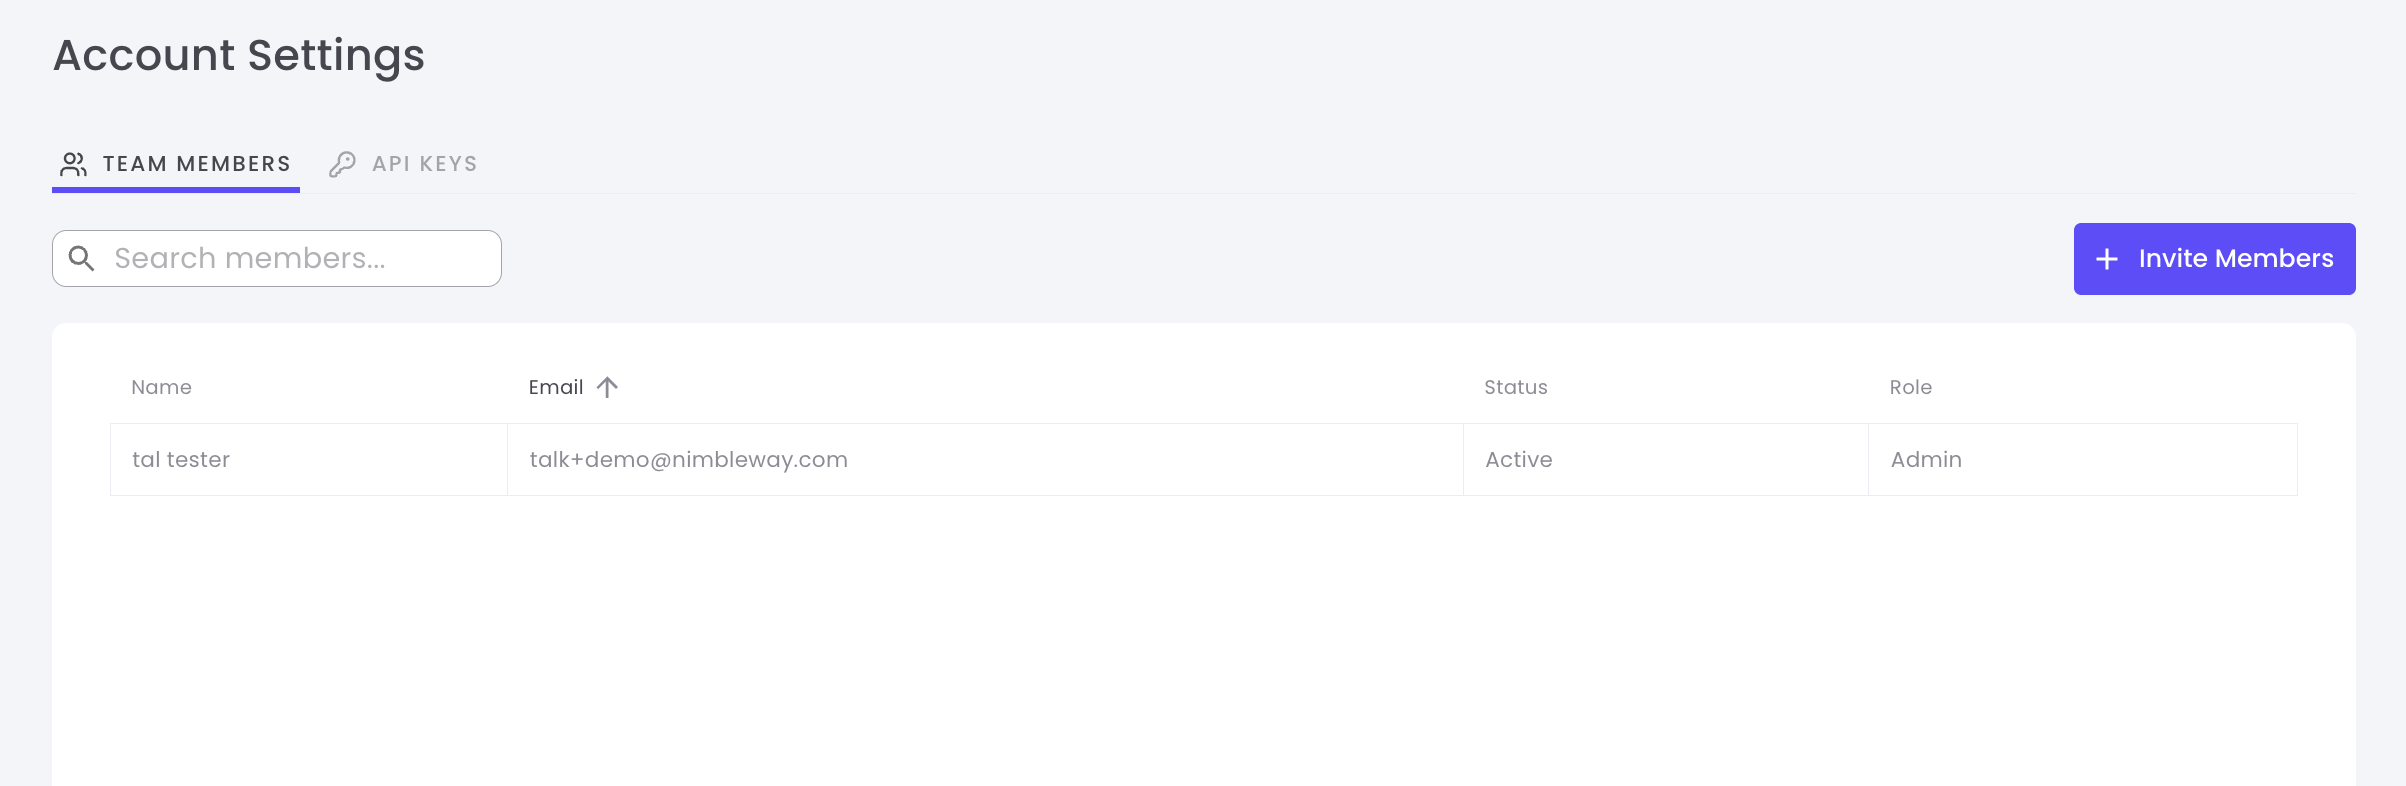
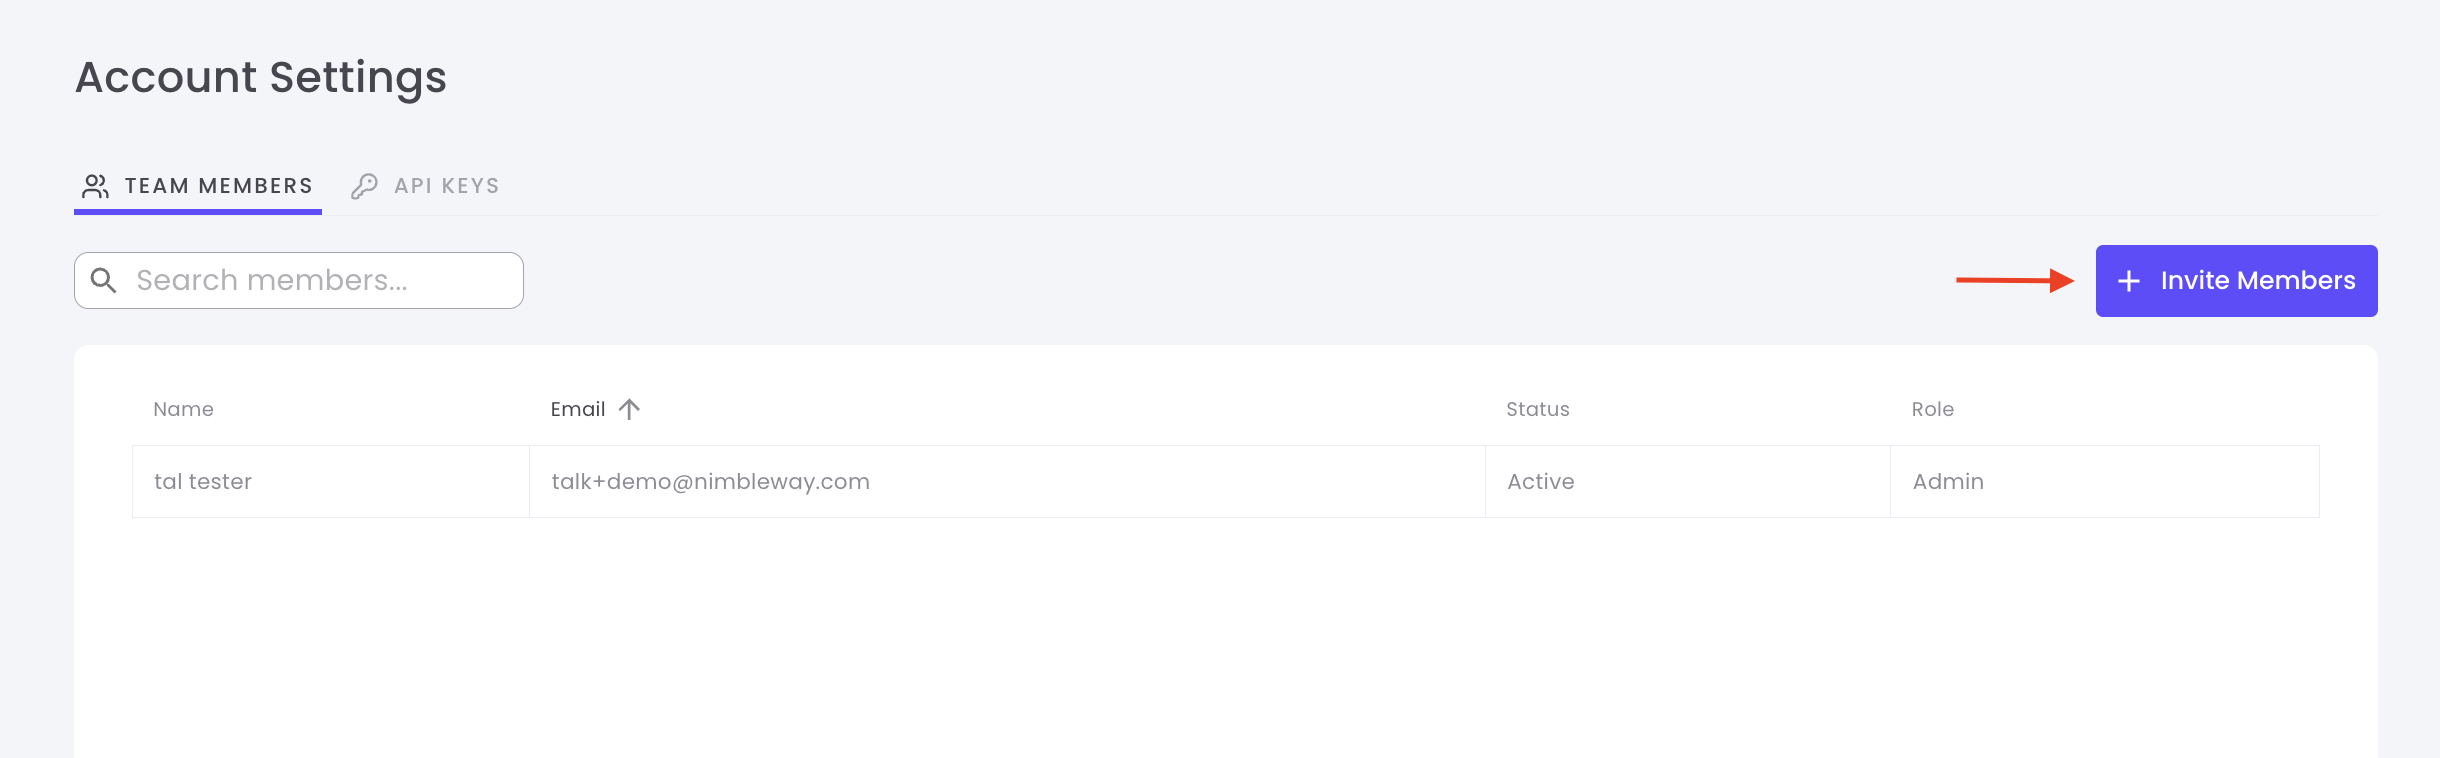
Managing Team Members
View and manage all team members from the Team Members dashboard.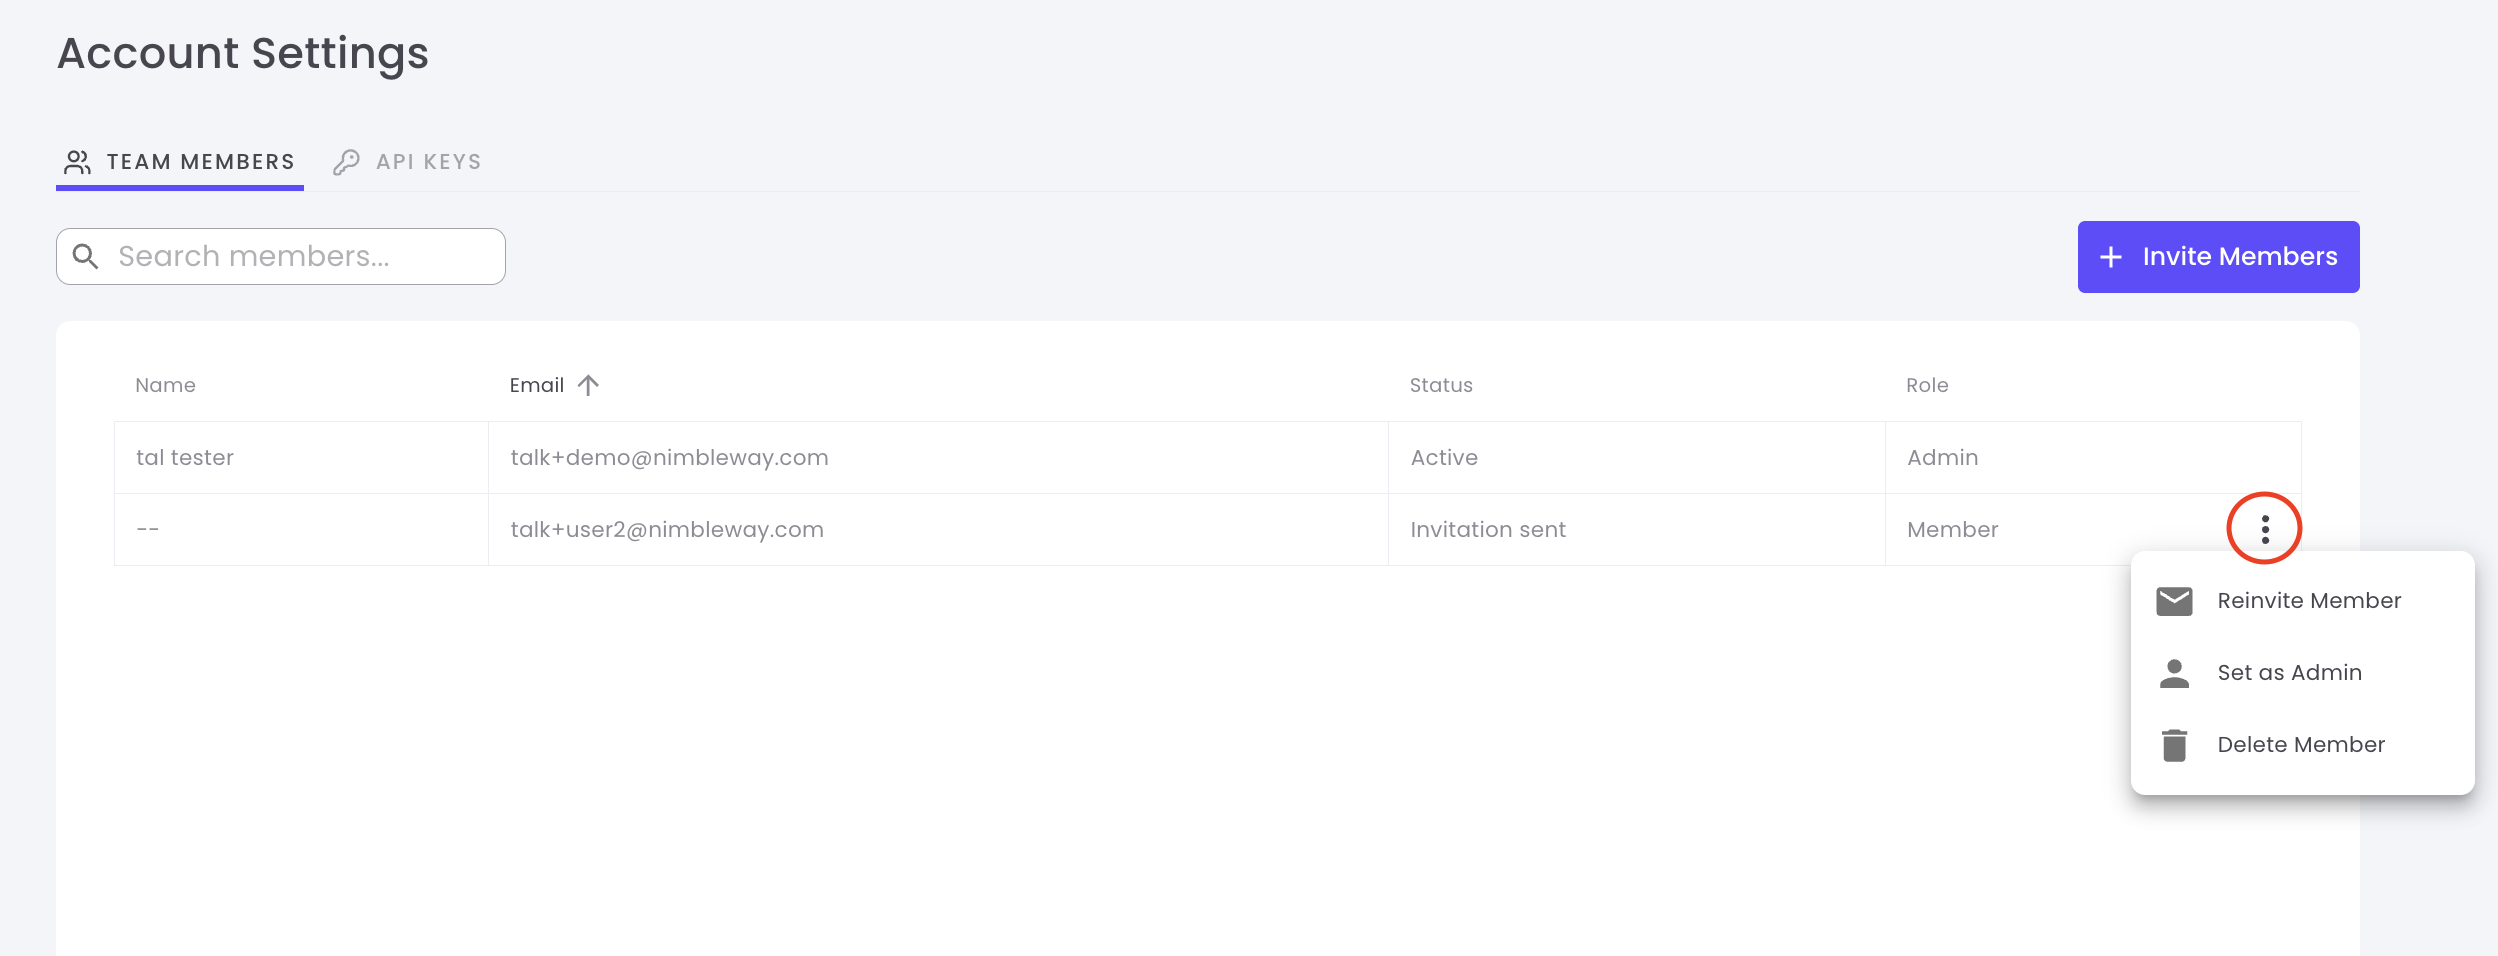
Team Member Information
| Column | Description |
|---|---|
| Name | Team member’s full name |
| Associated email address | |
| Role | Permission level (Member or Admin) |
| Status | Active, Pending, or Invited |
| Joined | Date when they accepted the invitation |
| Actions | Change role or remove member |
Change Member Role
Promote members to admins or revoke admin privileges:- Locate the team member in the list
- Click the Role dropdown
- Select Admin or Member
- Changes take effect immediately
Admins have full access to account settings, billing, API keys, and team management
Remove Team Members
To remove a team member from your account:- Find the member in the team list
- Click the Remove button or trash icon
- Confirm the removal
Permission Levels
Member
Member
Members can:
- Use existing API keys
- View usage statistics
- Access documentation
- Make API requests
- Create or delete API keys
- Invite or remove team members
- Access billing information
- Change account settings
Admin
Admin
Admins can:
- Everything Members can do
- Create and delete API keys
- Invite and remove team members
- Promote/demote member roles
- Access billing and payment information
- Modify account settings
Team Collaboration Tips
Separate API Keys
Create unique API keys for each team member to track individual usage and maintain accountability
Limit Admin Access
Only promote trusted team members to admin roles to maintain account security
Use Descriptive Names
Encourage team members to use clear names when creating API keys
Regular Audits
Periodically review team members and API keys to remove unused accounts
Security Best Practices
Protect Your API Keys
Protect Your API Keys
- Never commit API keys to version control
- Use environment variables to store keys
- Rotate keys regularly (every 90 days recommended)
- Delete keys immediately if compromised
- Use separate keys for development and production
Manage Team Access
Manage Team Access
- Grant minimum necessary permissions
- Remove access for departing team members immediately
- Use admin roles sparingly
- Review team member list regularly
- Monitor API key usage patterns
Monitor Account Activity
Monitor Account Activity
- Check “Last Used” dates on API keys
- Review team member activity
- Set up alerts for unusual usage
- Track API consumption by key
- Audit changes to account settings