
Android
Android is by far the most popular mobile OS on the planet, with upwards of 70% market share. Connecting an Android device to Nimble IP is easy and straightforward, with no 3rd-party apps needed!
Proxy Setup - Wi-Fi
To get started, open your device's settings, and then Internet/Network settings.
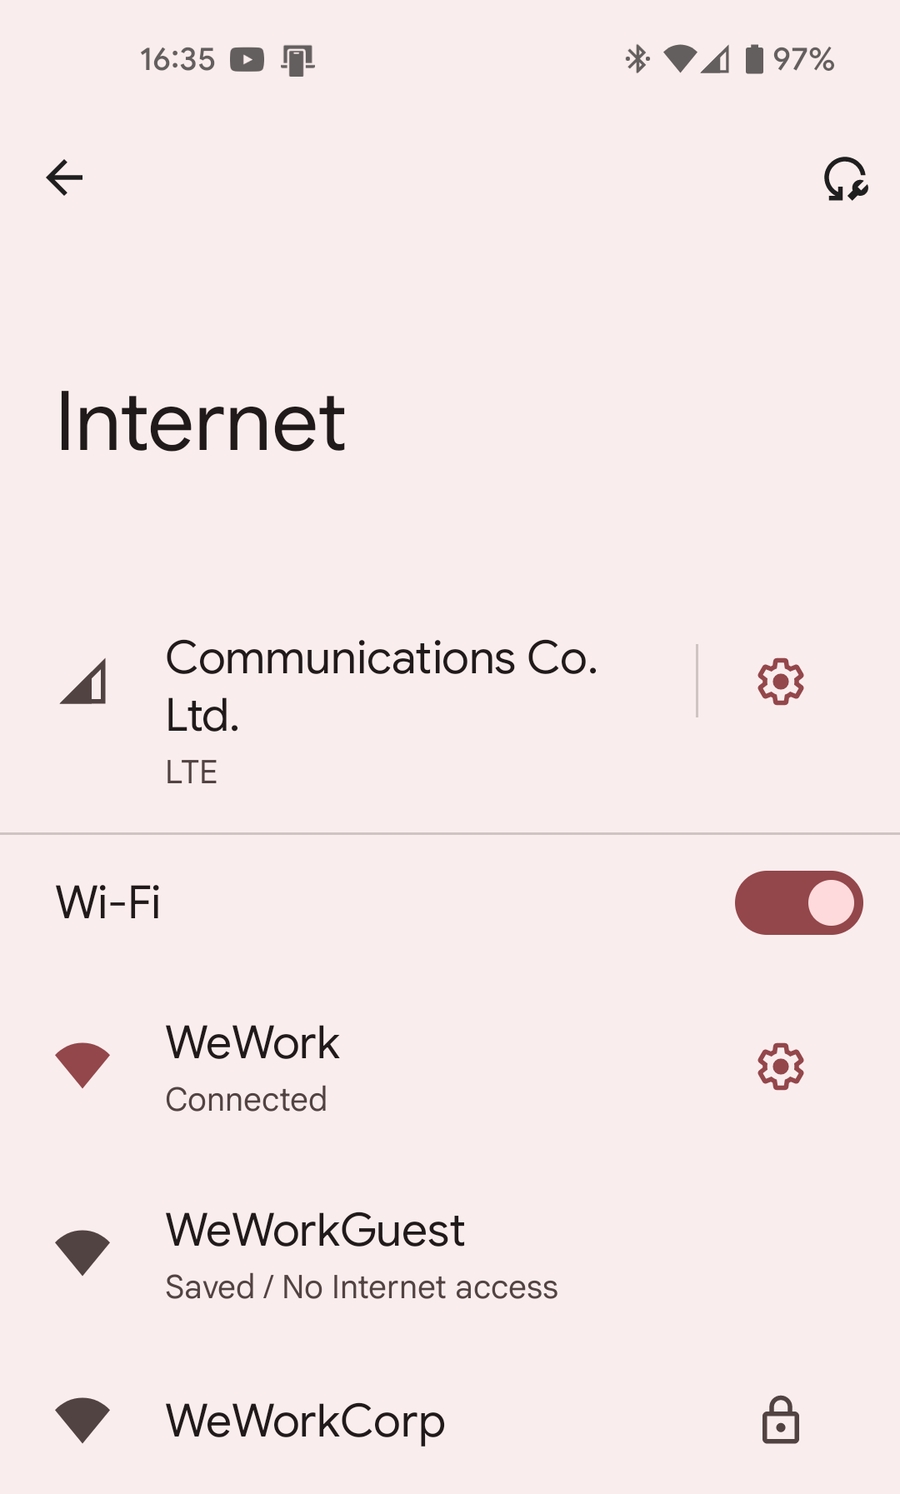
2. Next, click on the network you’re currently connected to in order to view its properties.

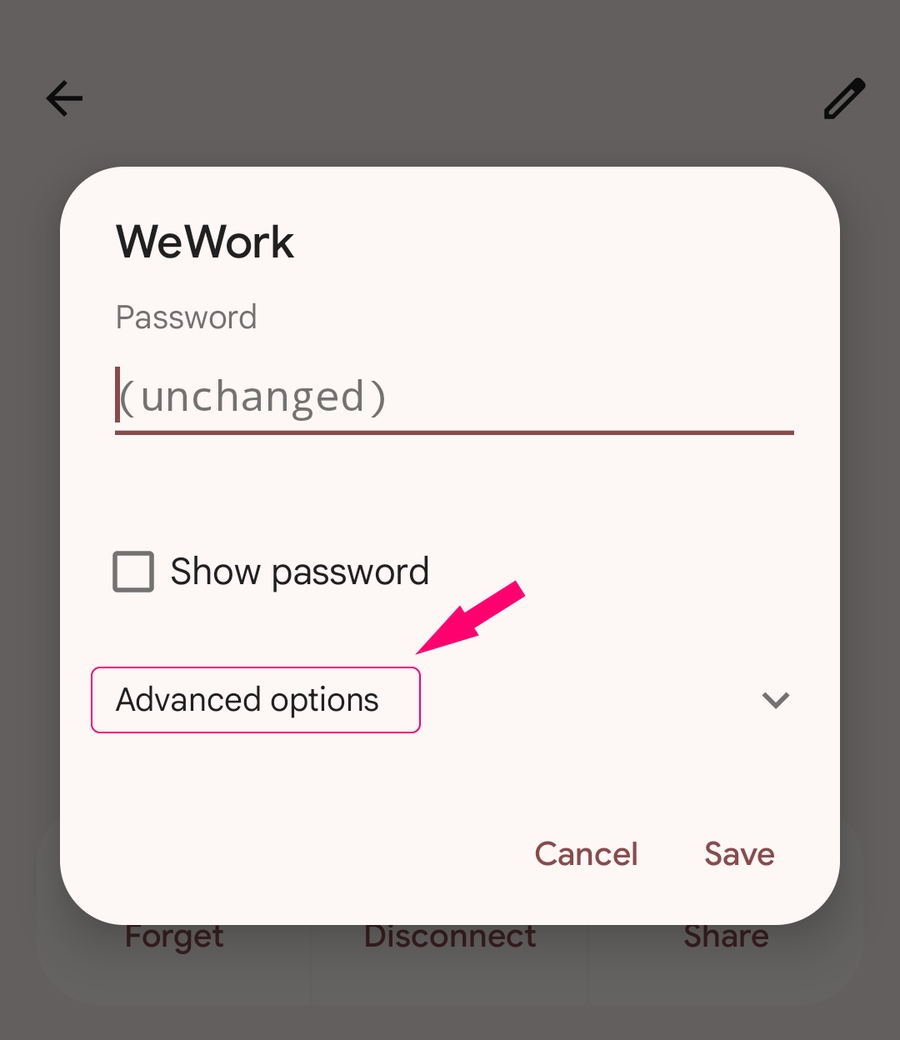
3. Click on the pencil at the top right to edit the network’s settings, and then on “Advanced options”.
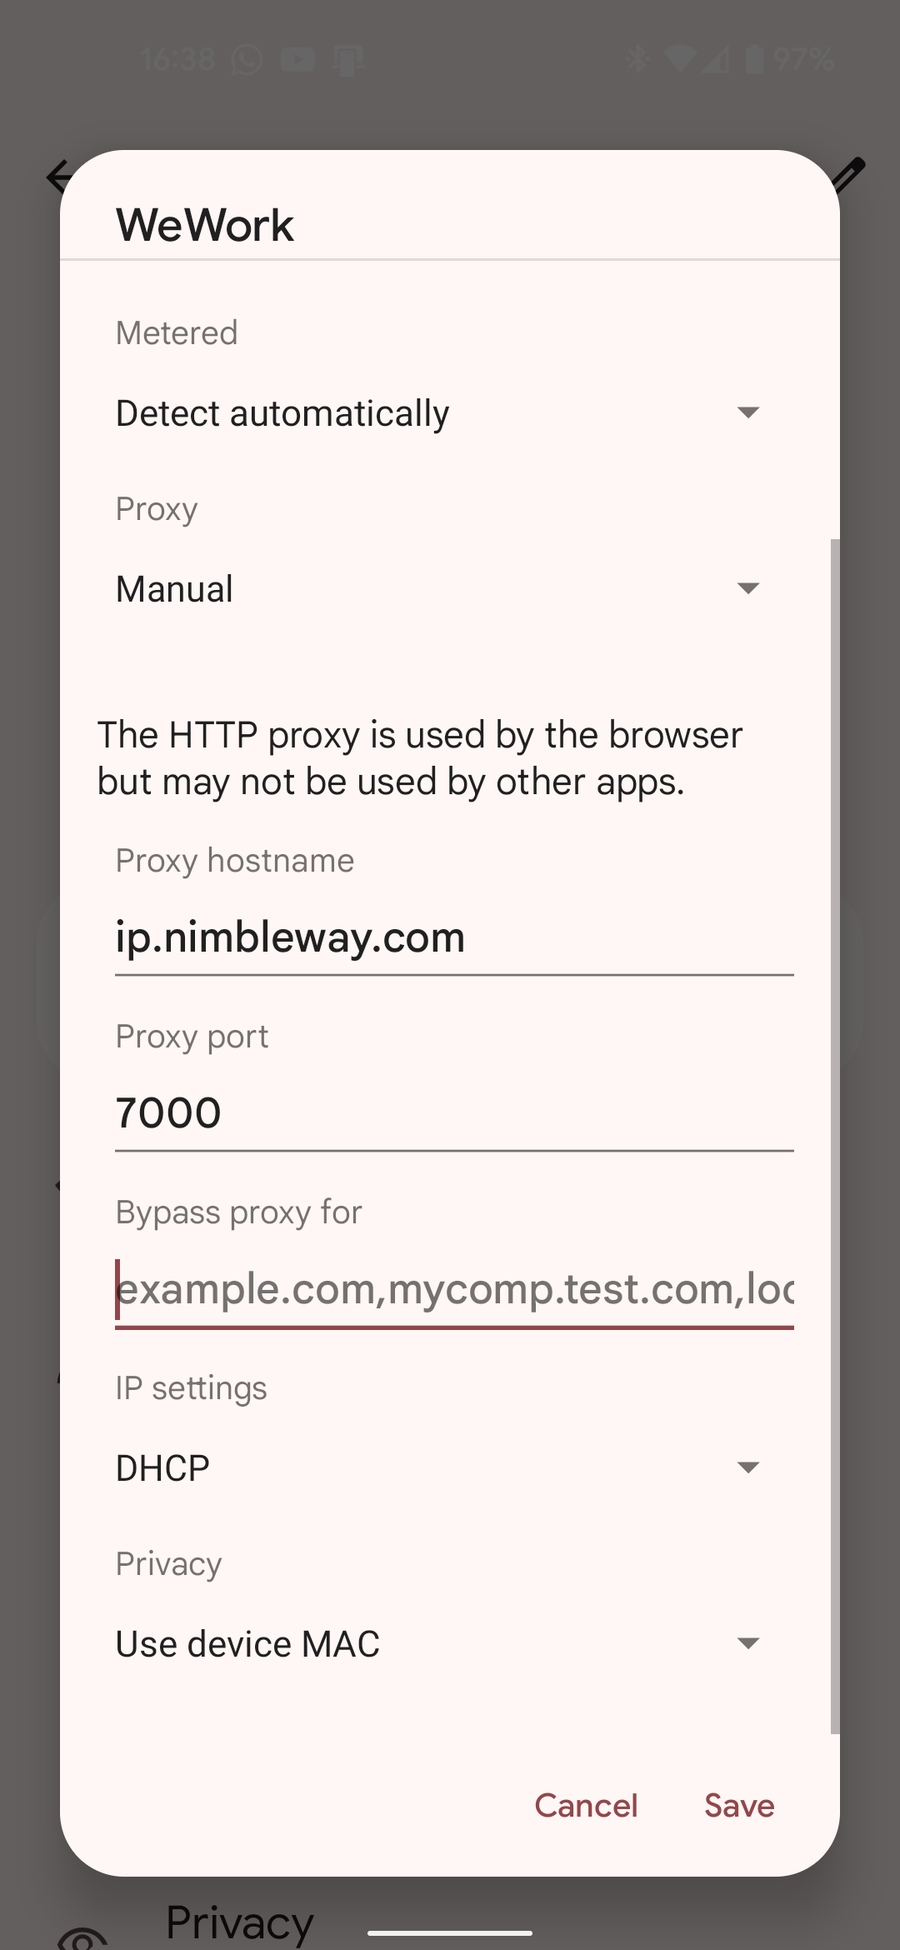
4. Scroll down until you see “Proxy”. Set your proxy settings to manual. A few new fields will be added, including “Proxy hostname” and “Proxy port”.
For Proxy hostname, enter “ip.nimbleway.com”.
For Proxy port, use “7000”.
Then click save.
5. At this point, your phone will begin sending your requests through Nimble IP, but you still need to authenticate your device. To do so, open Chrome and browse to any website. You’ll immediately be asked to sign in with a username and password.
Username ⇒ Nimble’s username string: account-[accountName]-pipeline-[pipelineName]
Password ⇒ Nimble’s pipeline password
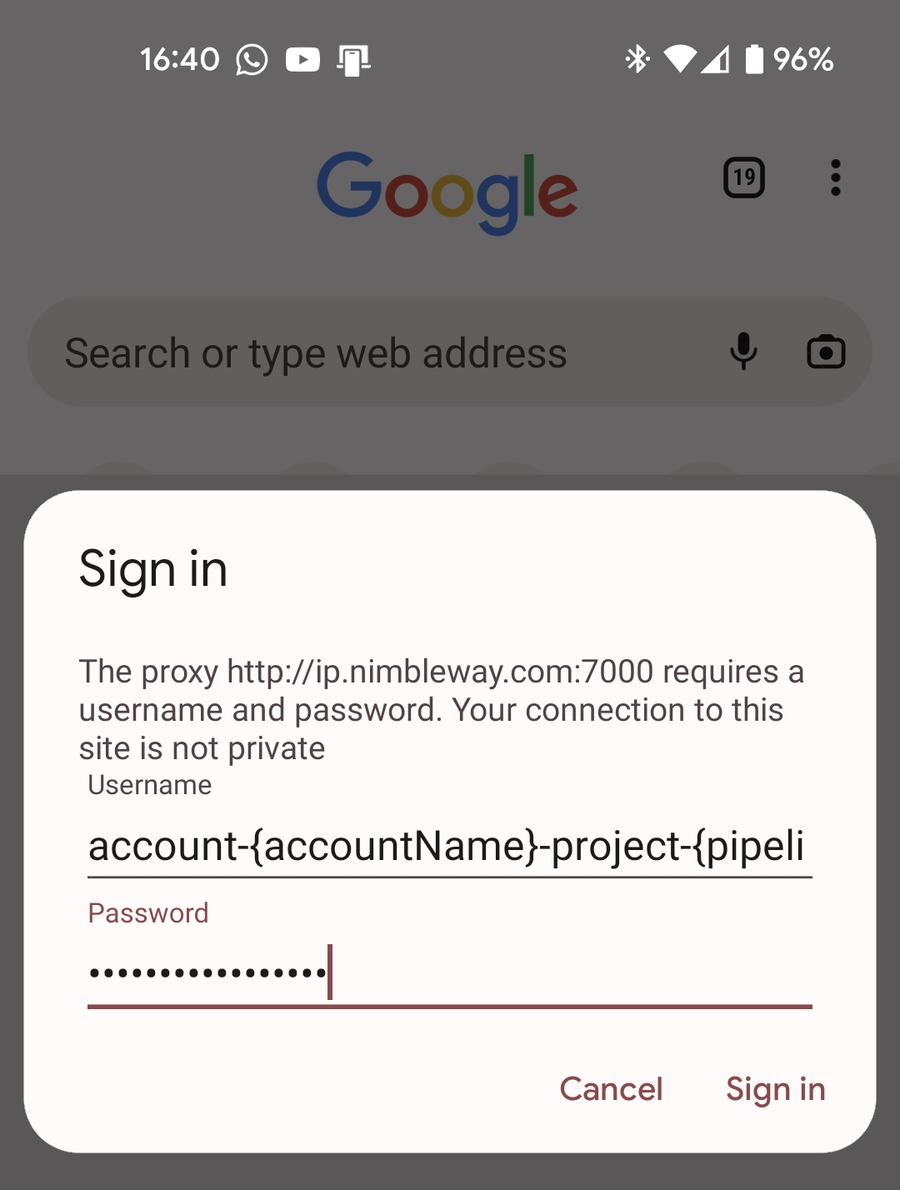
Click Sign in, and you’re done!
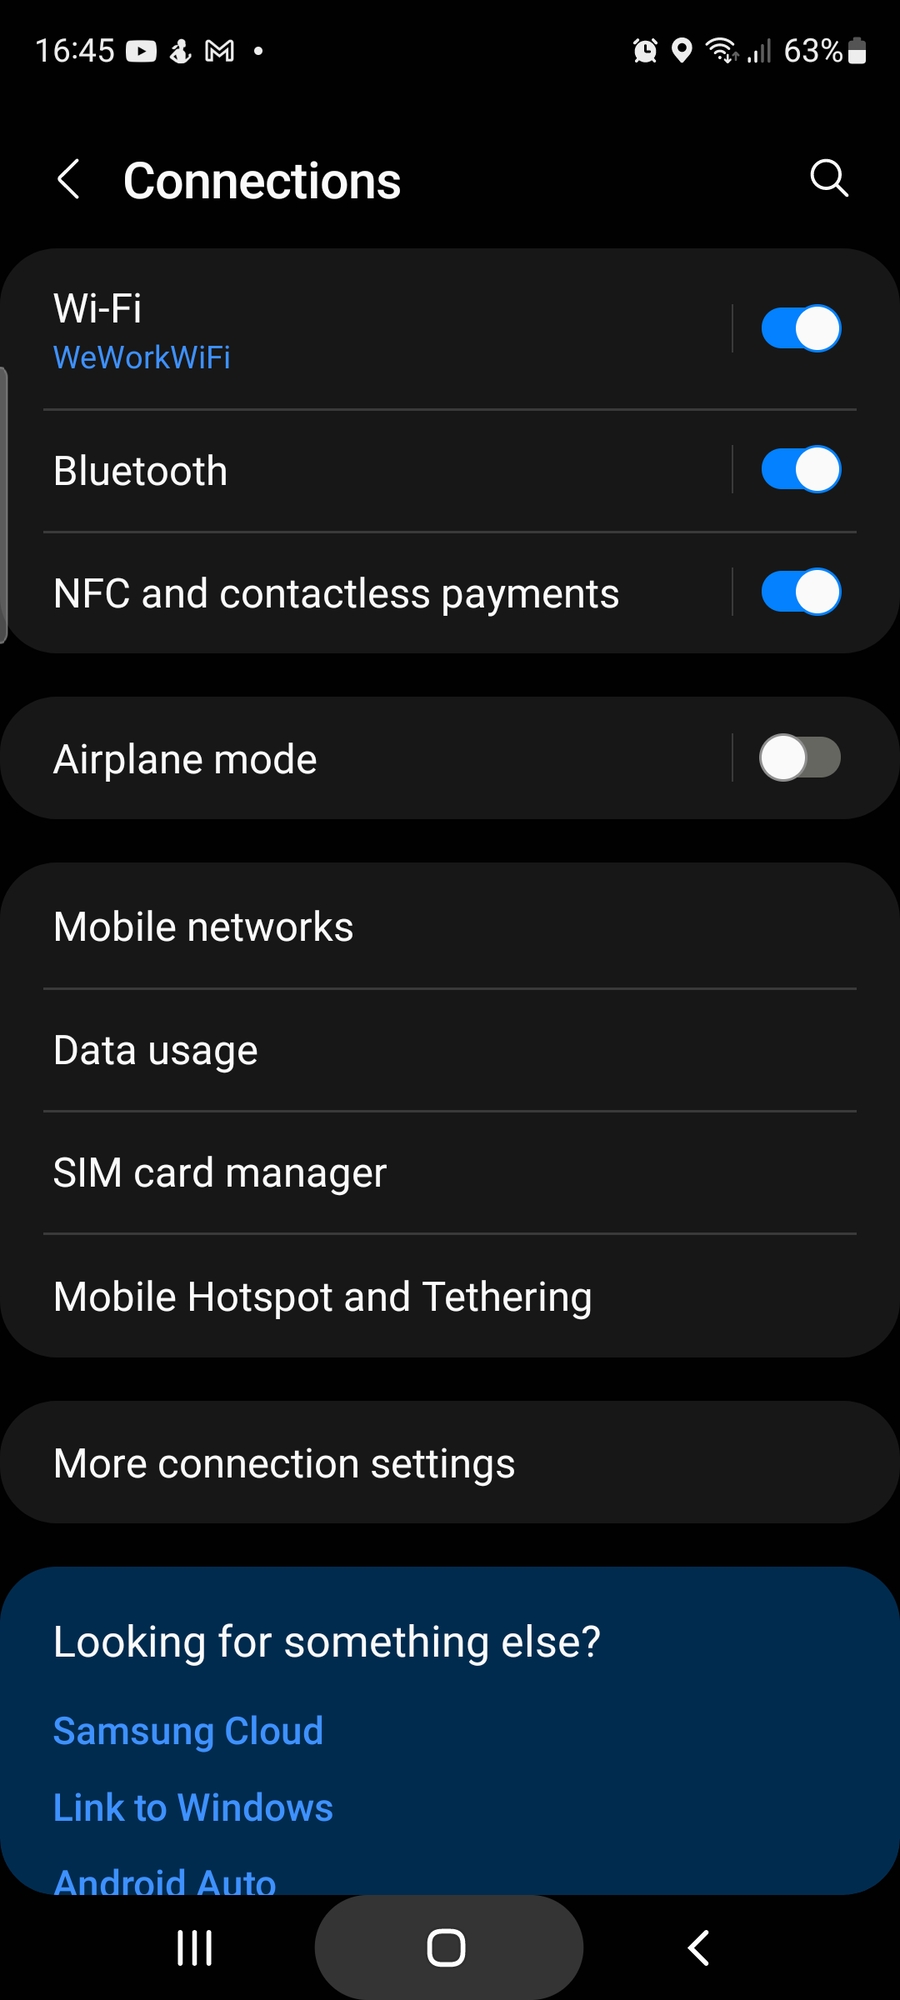
Proxy Setup - Cellular
Open your device's settings, and then click on Mobile Networks.
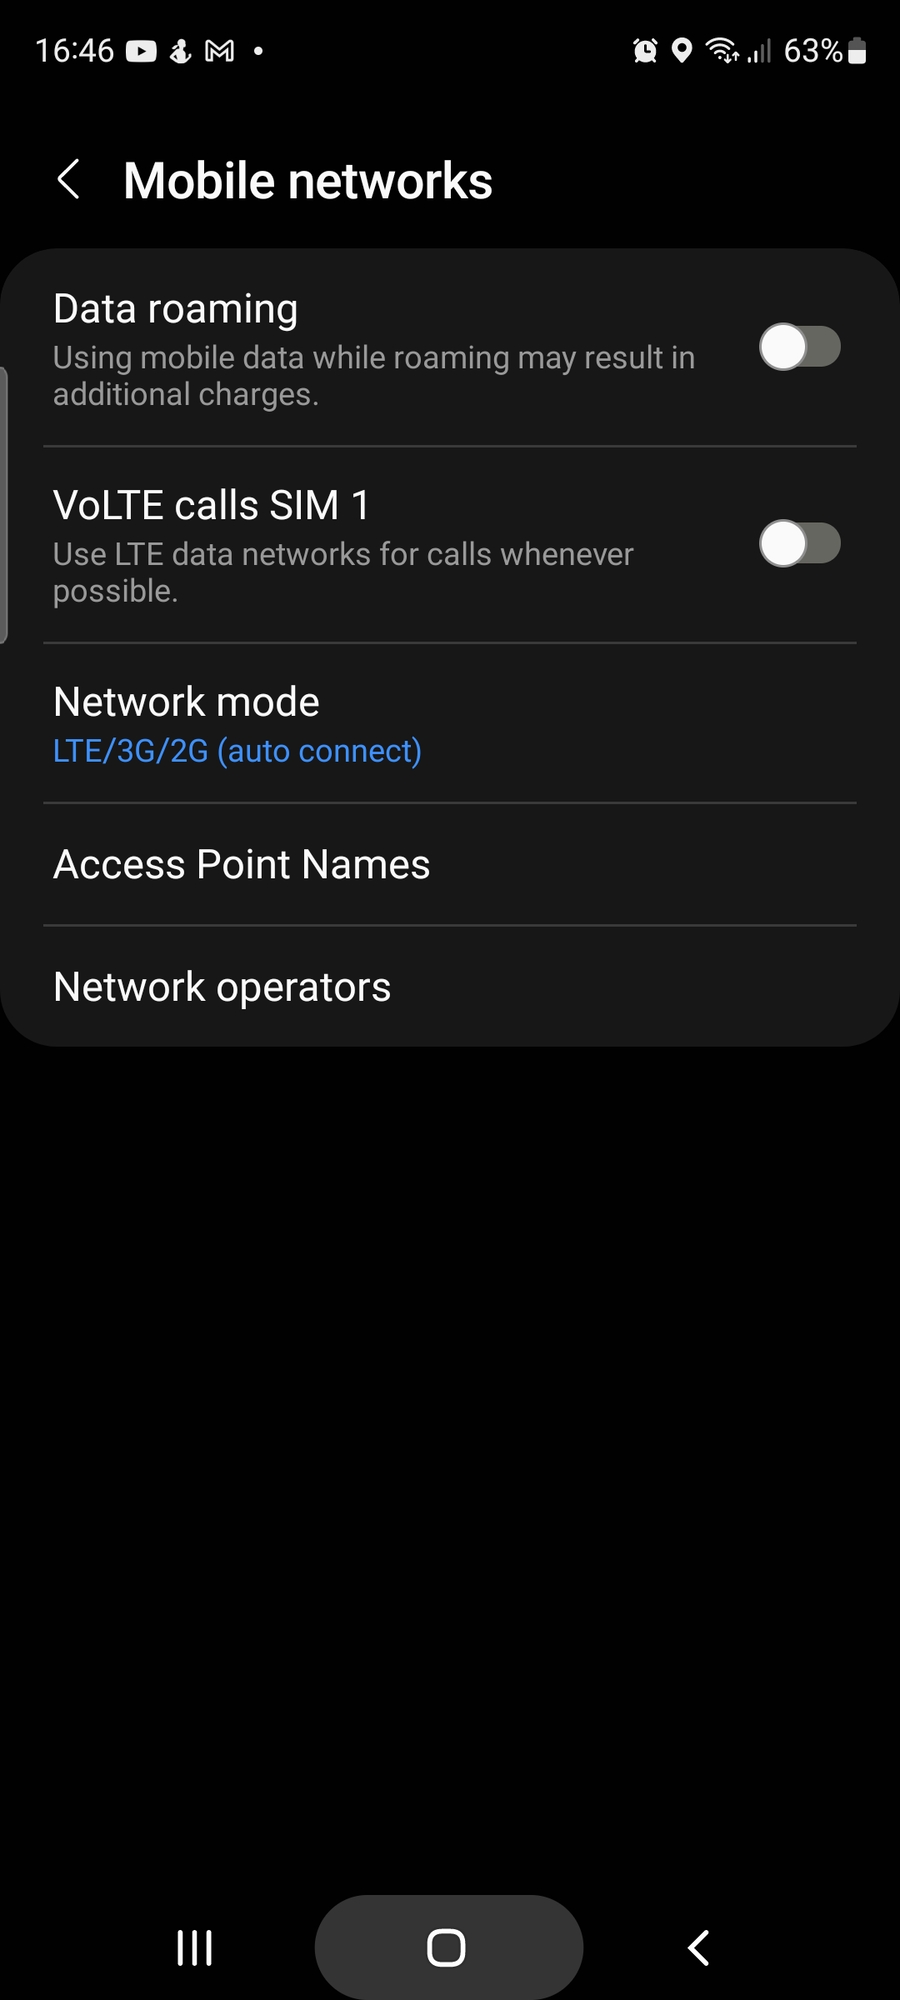
2. Next, click on “Access Point Names”, or on some devices APNs.
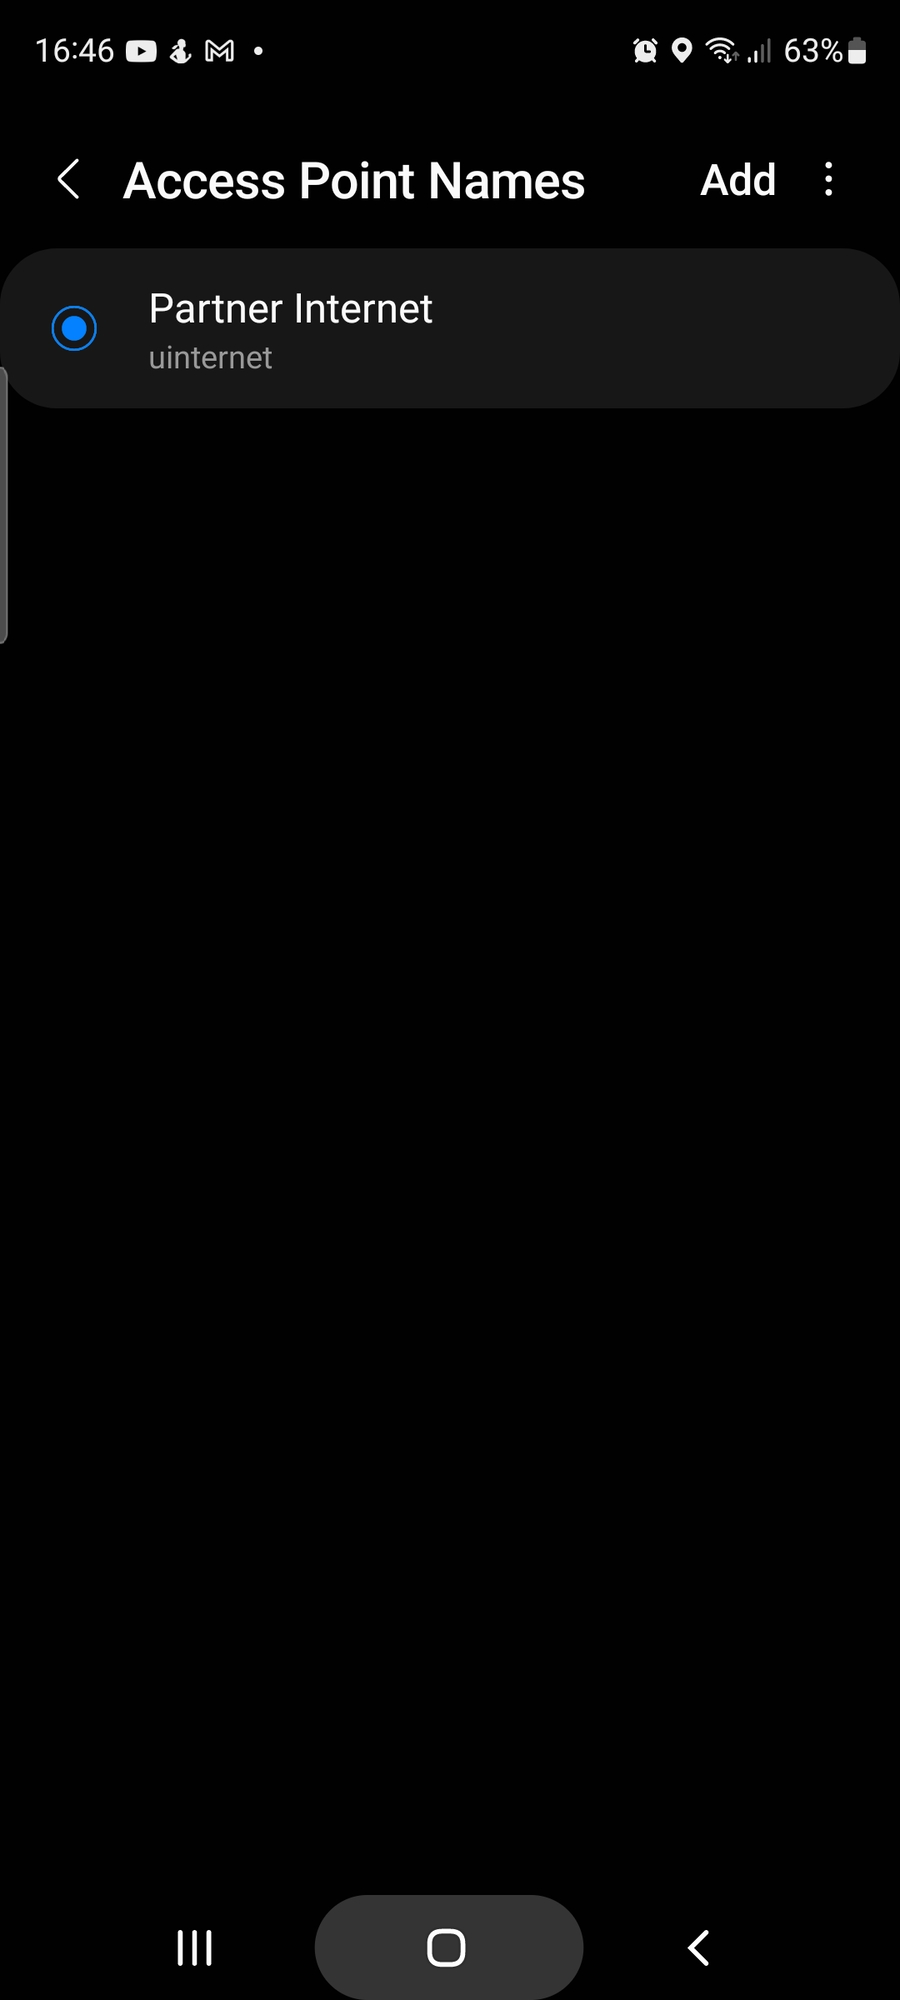
3. Click on the currently active APN.
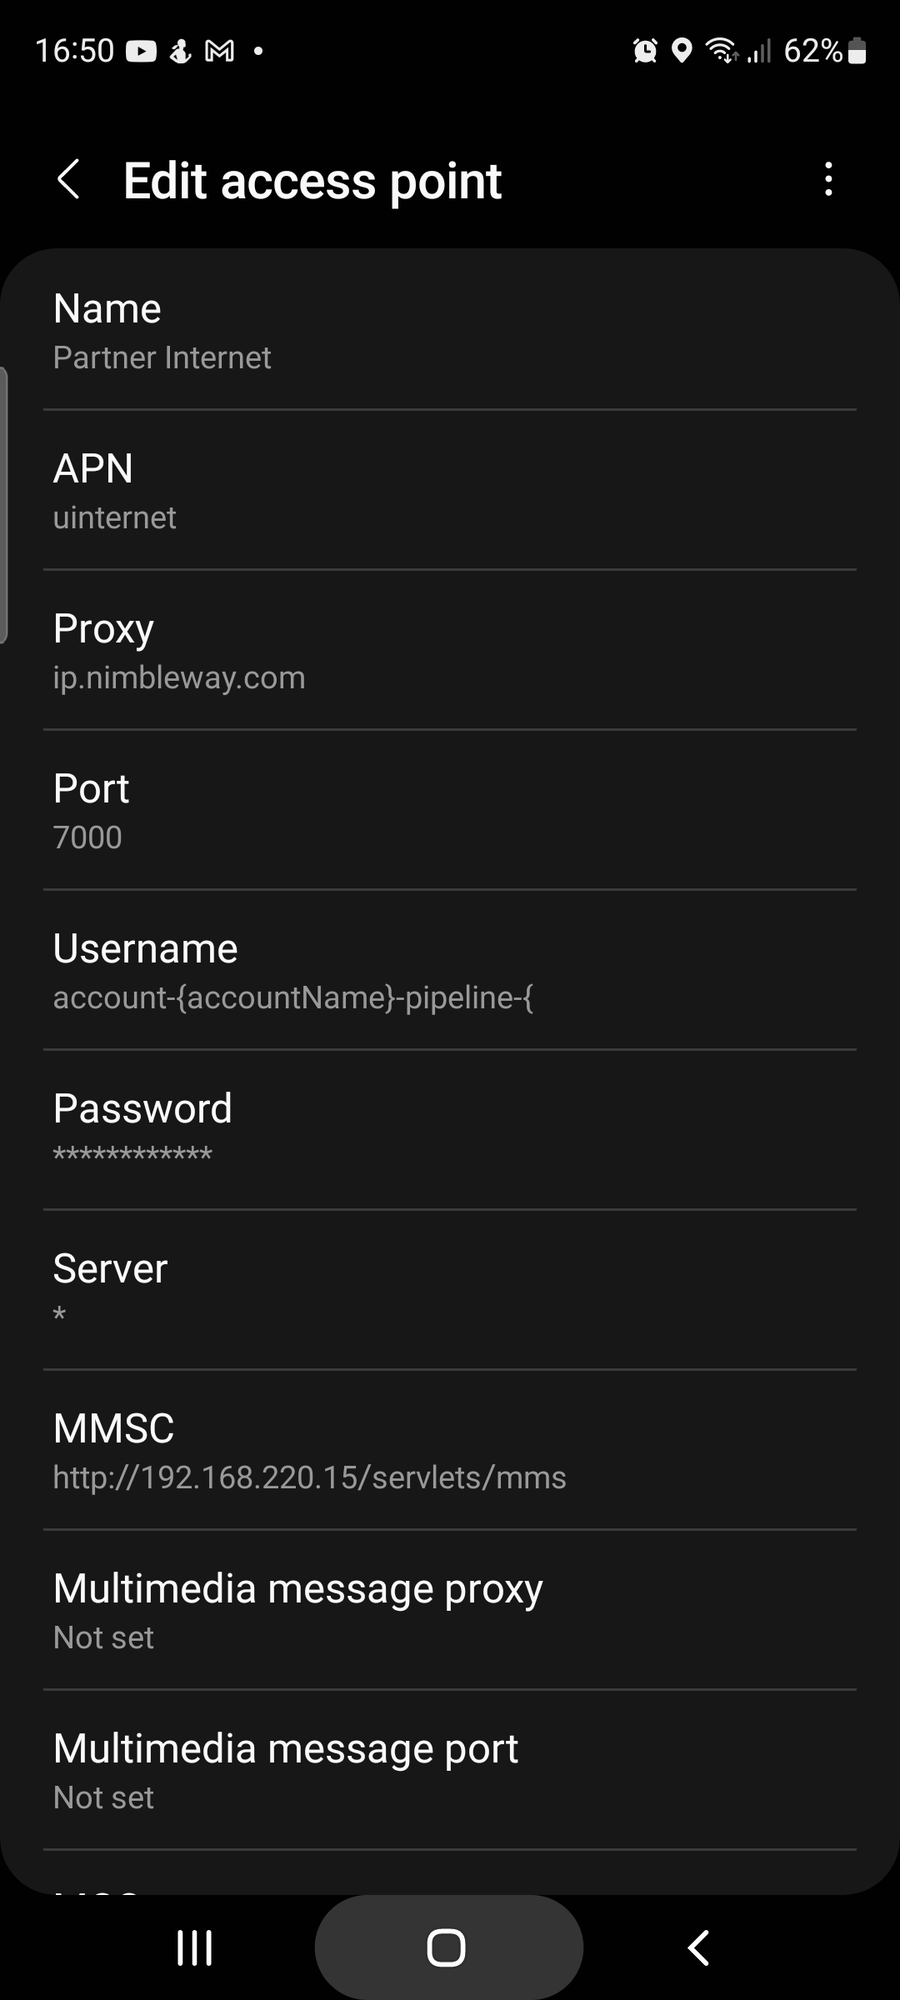
4. Enter in the following details:
Proxy ⇒ ip.nimbleway.com
Port ⇒ 7000
Username ⇒ Nimble’s pipeline username string
Password ⇒ Nimble’s pipeline password
Congratulations! You’ve connected your Android device, and requests will now be routed through Nimble IP.