
Incogniton
Incogniton is a multi-session browser that helps you manage multiple online accounts from a single interface while maintaining your privacy and security.
Using Incogniton, you can create multiple virtual browser profiles that act as separate users, each with its own unique digital fingerprint. This allows you to access multiple accounts from a single device without compromising your data or leaving a trace.
In this guide, we’ll demonstrate step-by-step how to connect Incogniton’s virtual profiles with Nimble IP Pipelines for full proxy support.
Follow these steps to integrate Nimble with Incogniton
Sign up for a free account at incogniton.com.
Download and install the Incogniton software here.
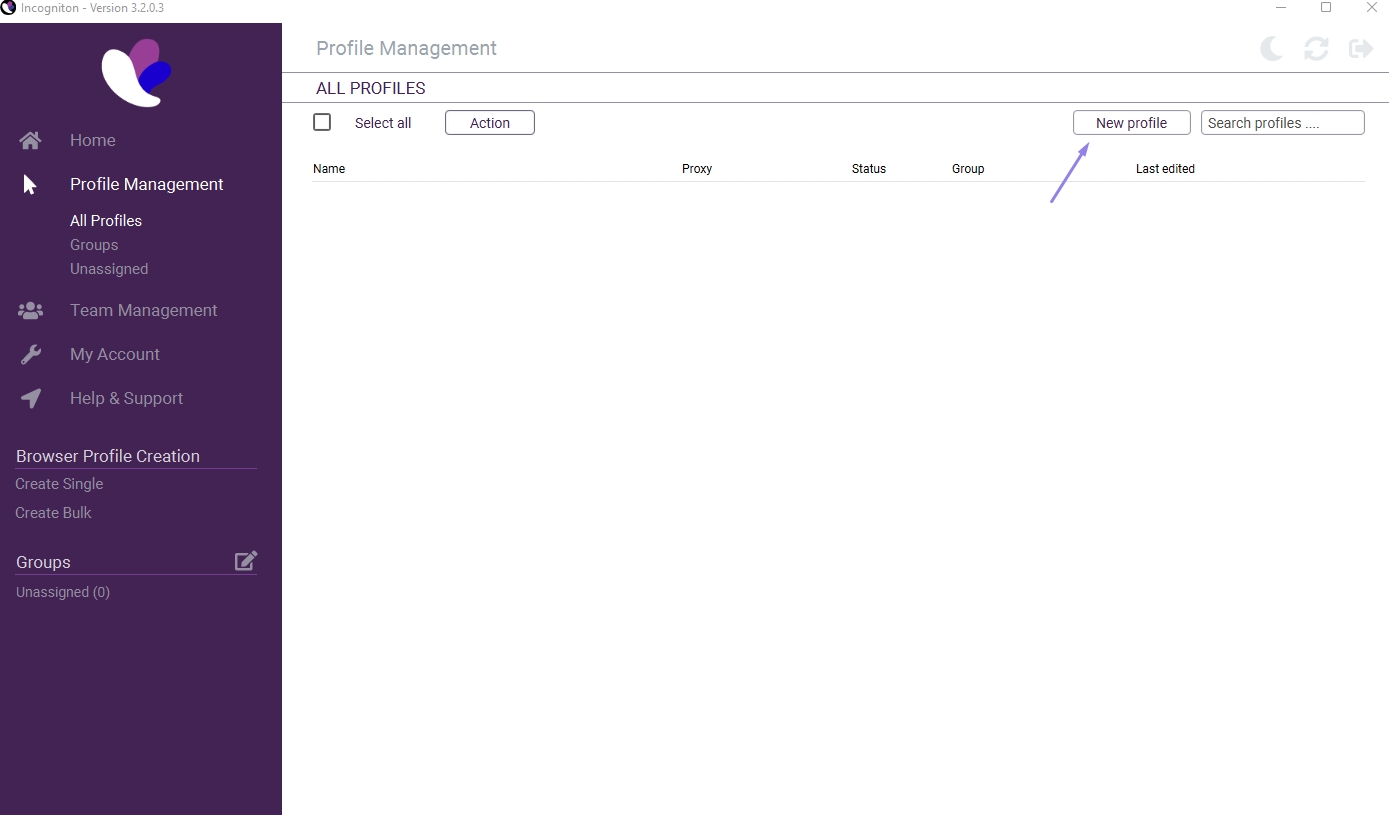
Navigate to the "Profile Management" option on the left side of the screen.
Click the "New profile" button in the top right corner.
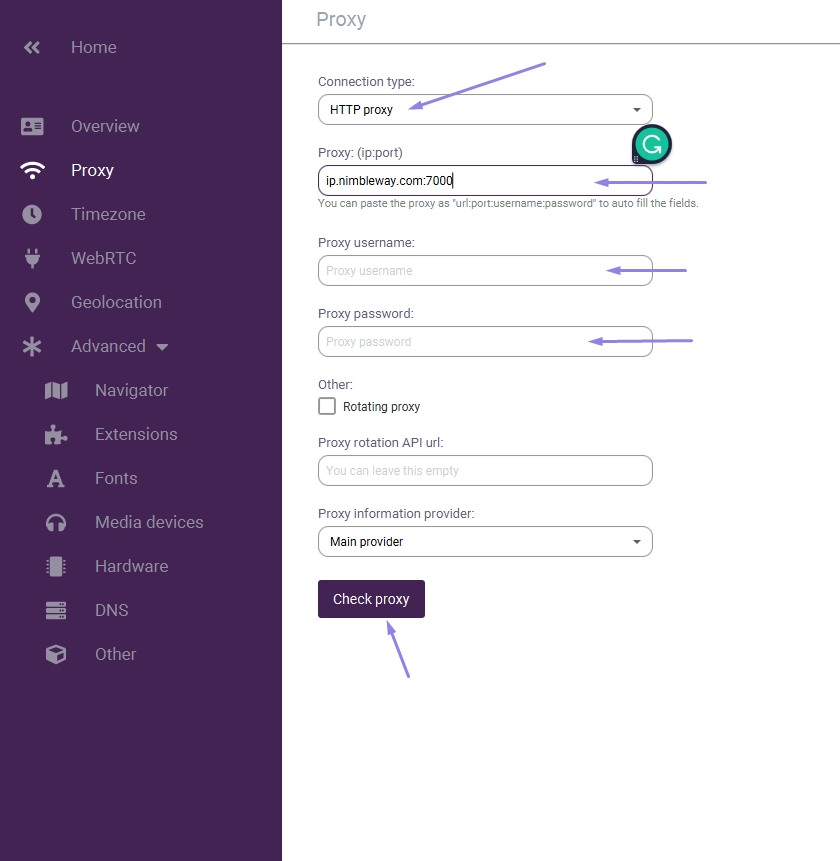
2. From the left navigation, select "Proxy" and choose the "Proxy type" from the options provided (HTTP, SOCK4, or SOCK5). HTTP is available with the Nimble IP.
In the Nimble User Dashboard, navigate to the Nimble IP page and click “add pipeline” to get your pipeline's proxy connection details.
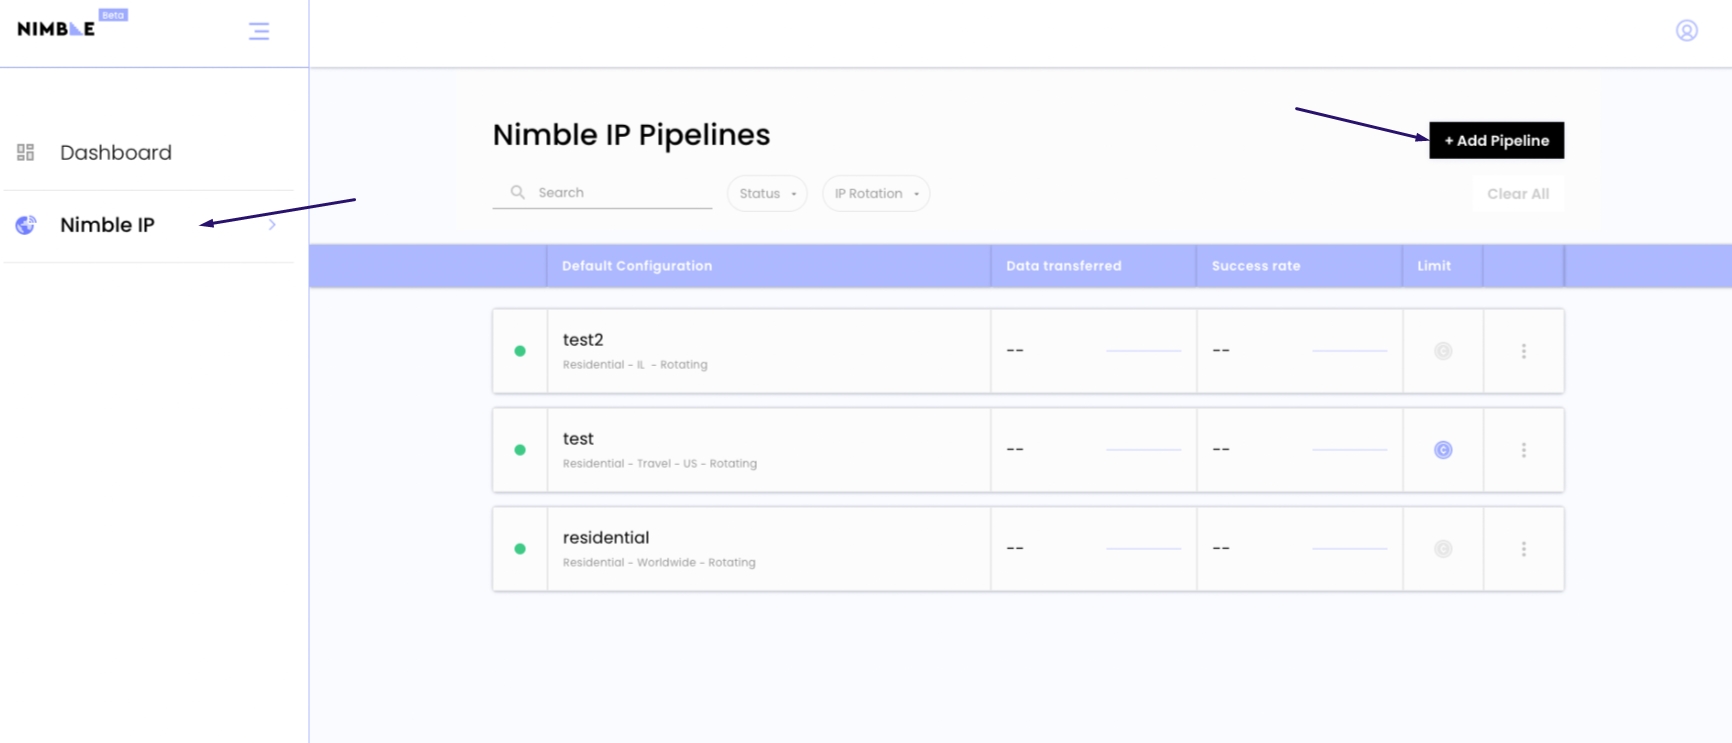
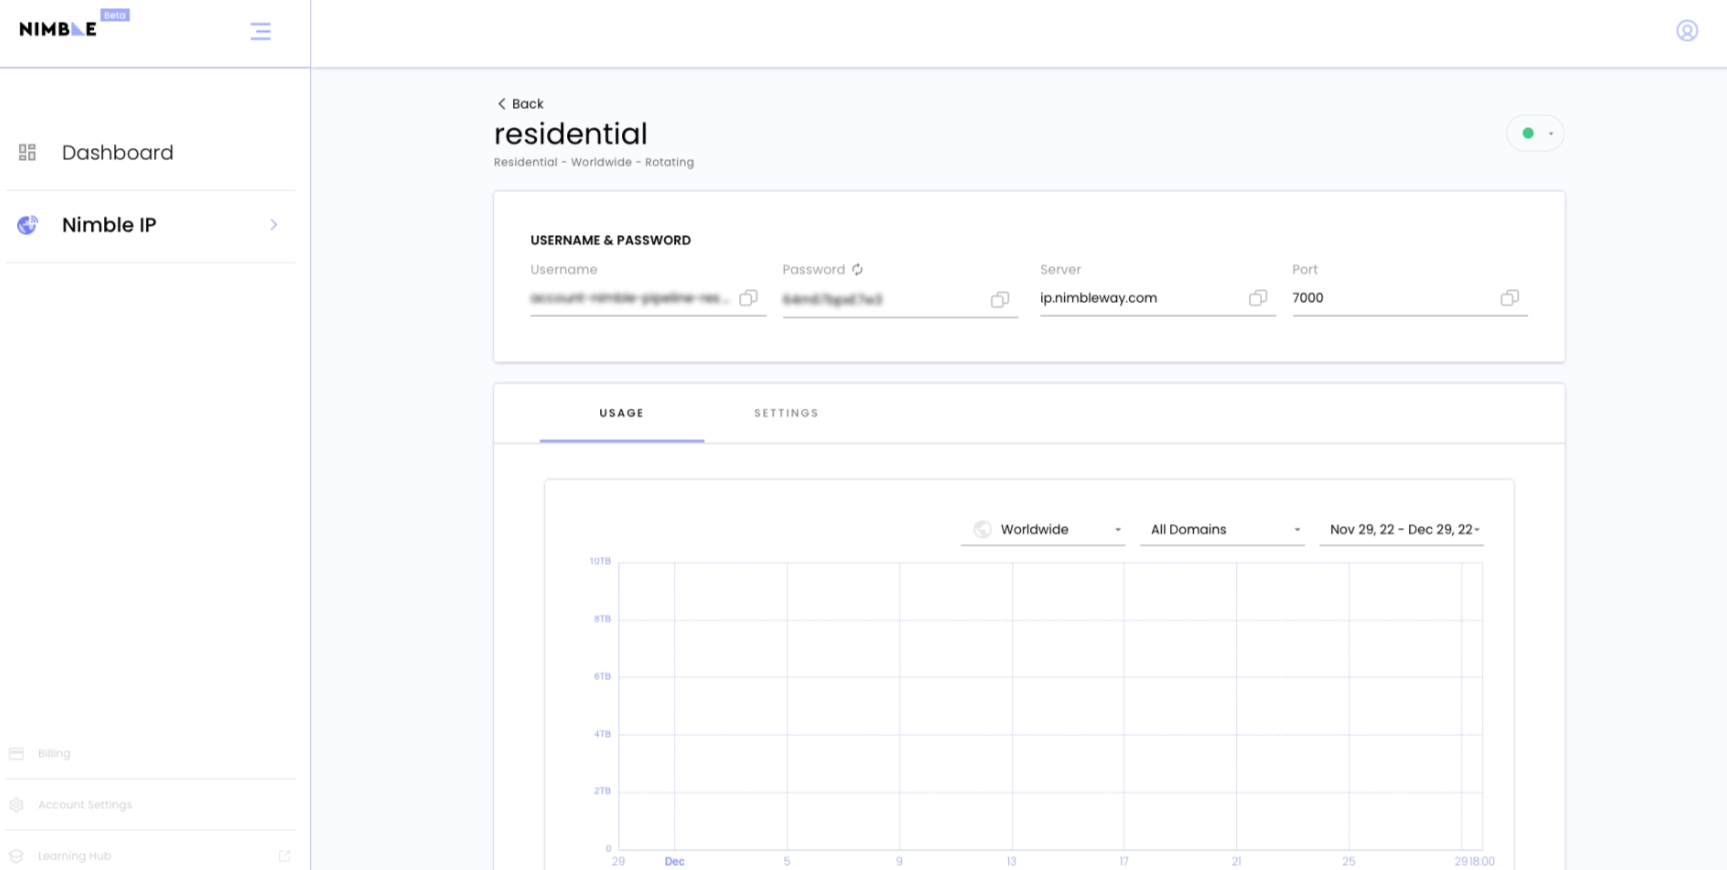
In your new pipeline, you will find the IP address, port, username, and password.
To set up and test the proxy in the Incogniton dashboard:
3. Copy the proxy connection details from the Nimble user dashboard to the Incogniton platform.
4. Configure the proxy using the following information:
Proxy type: HTTP
IP address: ip.nimbleway.com
Port: 7000
Username: your pipeline username
Password: your pipeline password
That's all! Your Incogniton browser will now use proxies from Nimble IP. To learn more about Nimble IP and open an account, visit our website!
Last updated