
macOS
MacOS natively supports proxy servers like Nimble IP, and allows installed applications to use the proxy connection for their communications over the internet. Although some applications (like Firefox) use an internal proxy configuration, most applications will use the macOS settings.
MacOS supports a variety of different proxy protocols, and flexibly allows for different proxies to be configured for different network connections.
Configuring proxy settings
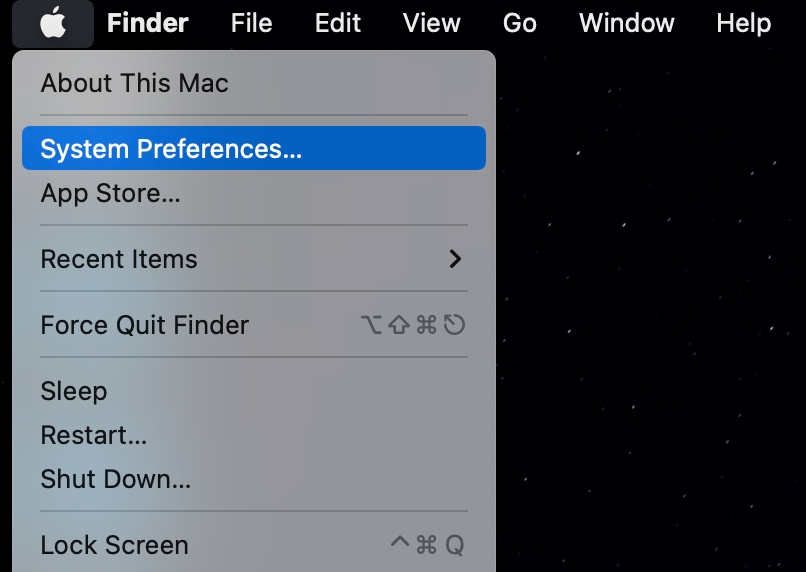
To get started, open your System Preferences by clicking on the Apple menu → System Preferences.
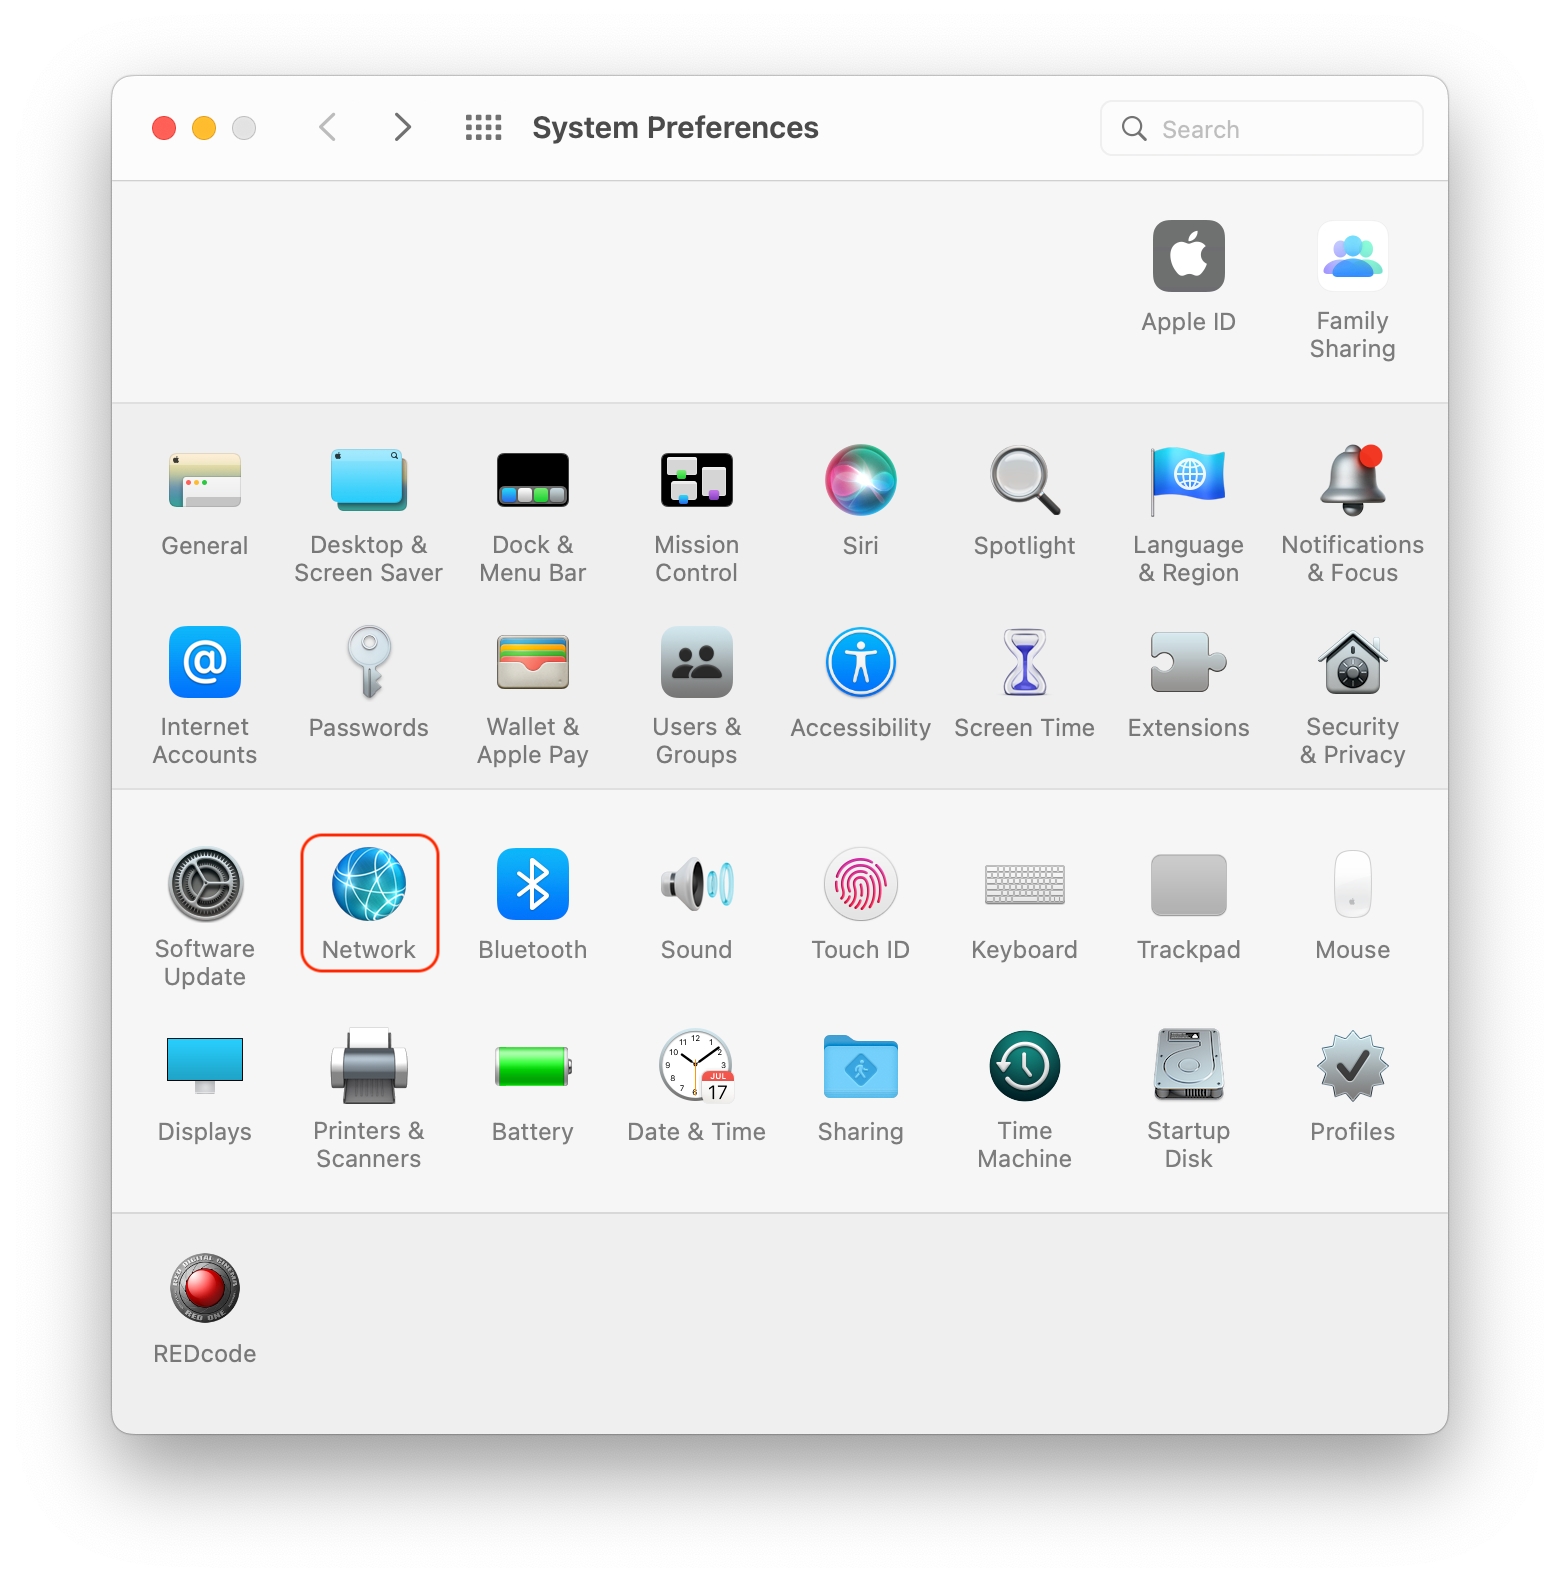
2. Next, click on “Network” to open your network settings.
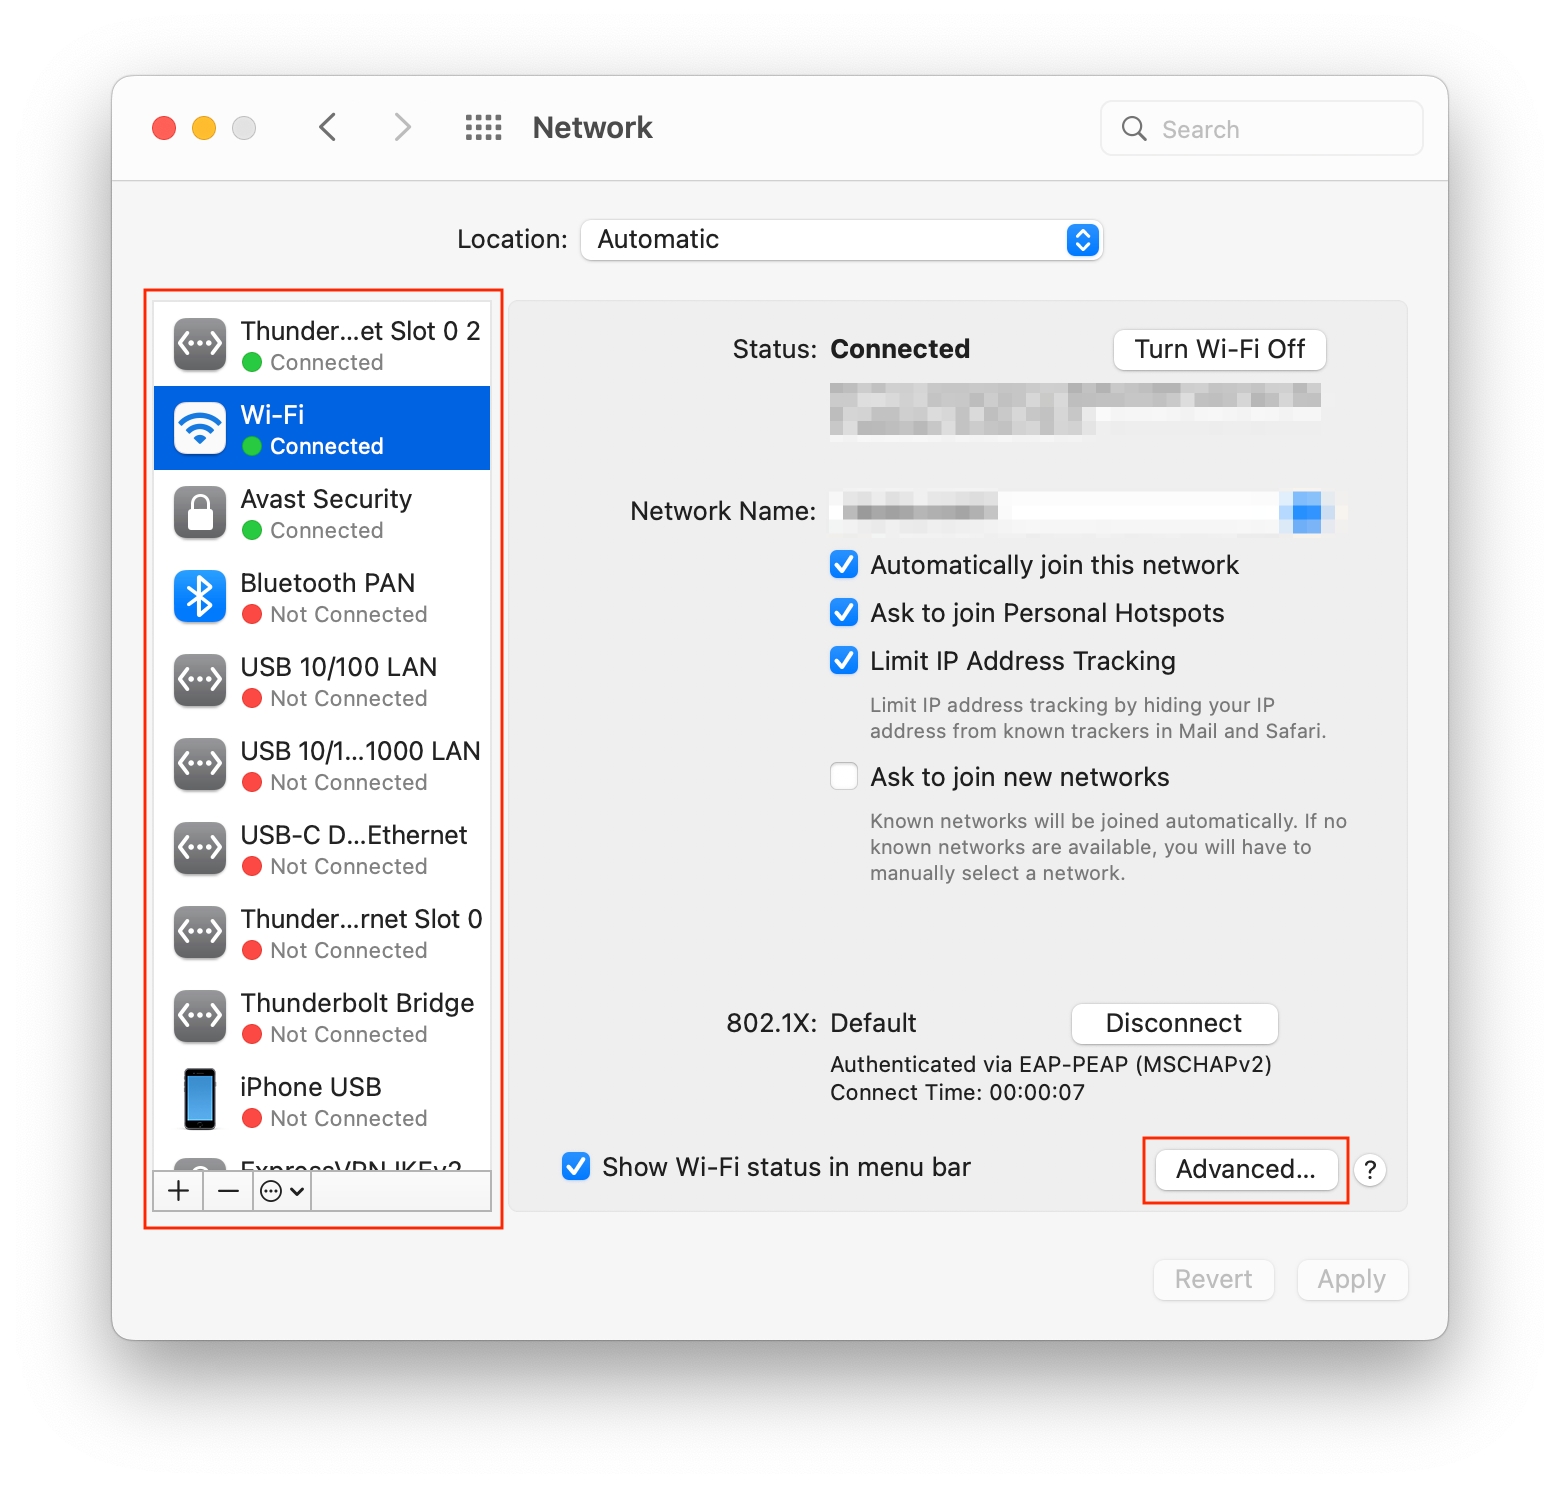
3. From the list on the left-hand side, select the network connection you’d like to connect to Nimble IP. In this example, we’ll be configuring the Wi-Fi connection. Once you have made a selection, click on the “Advanced...” button.
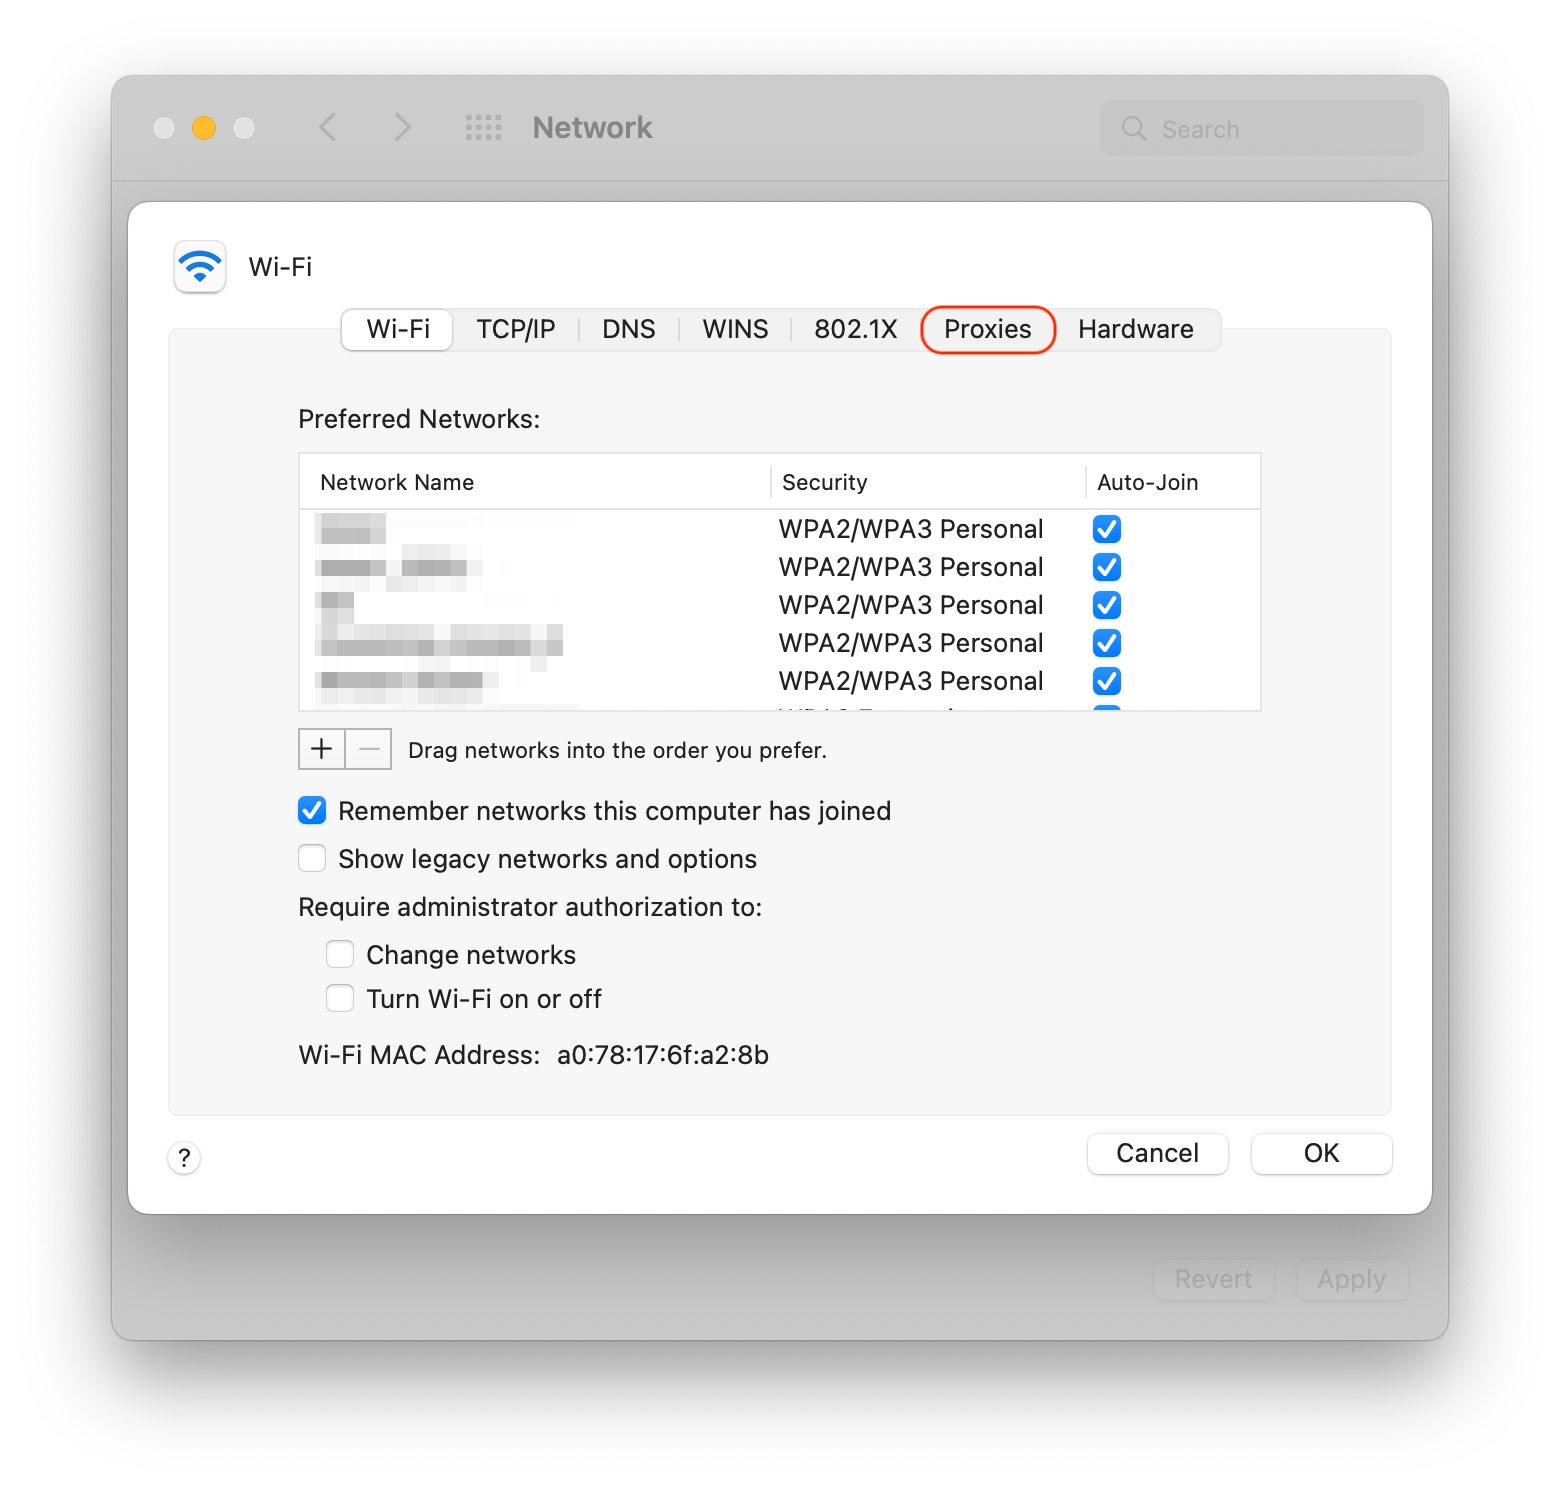
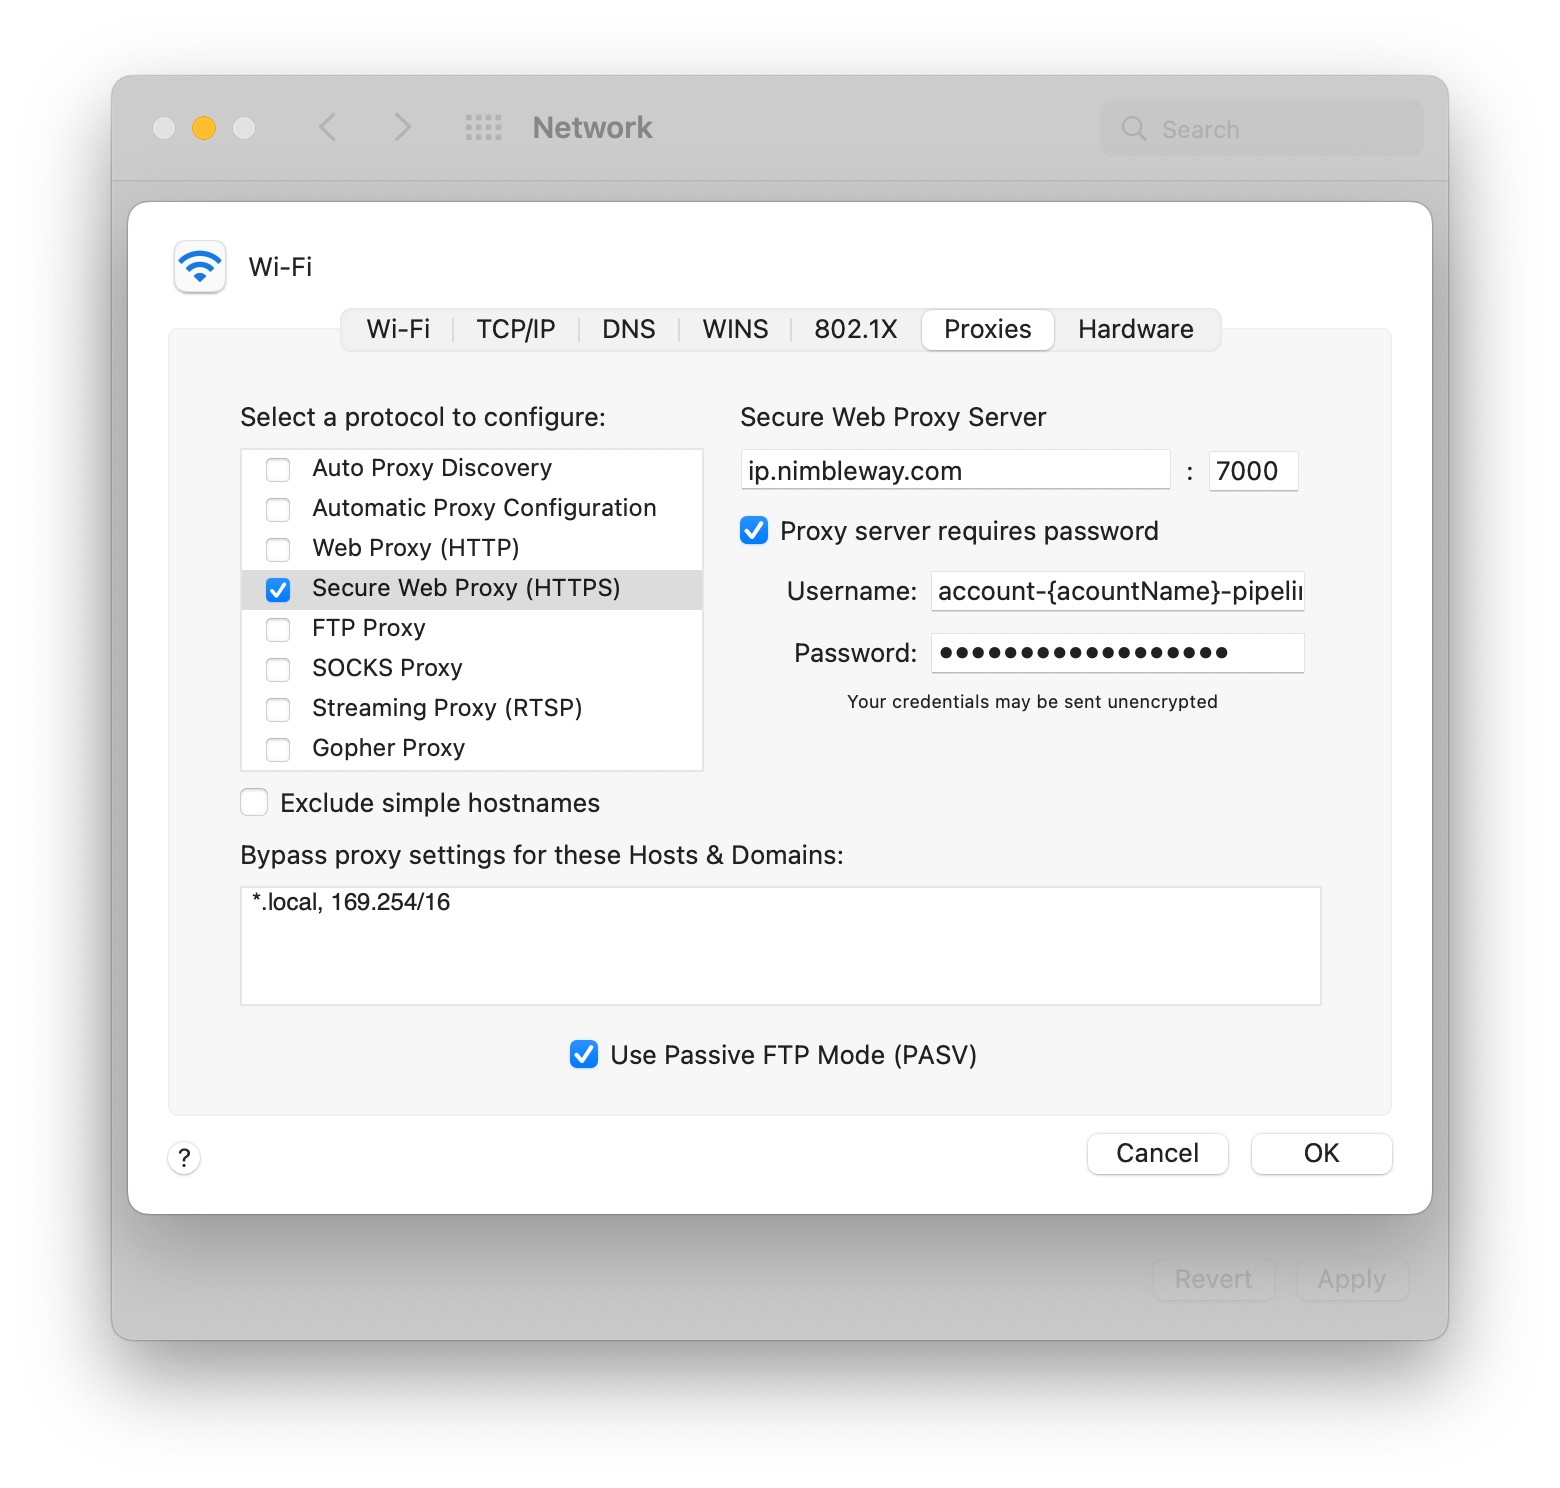
4. In the advanced configuration window, select the “Proxies” tab from the top menu.
5. In the protocol selection list, check “Secure Web Proxy (HTTPS)”. Next, under “Secure Web Proxy Server”, enter “ip.nimbleway.com”, and in the adjacent box separated by a colon (:) enter “7000”. These are Nimble’s host and port settings. Check “Proxy server requires password”, and in the username and password field enter your Nimble pipeline username string and pipeline password.
Your Nimble account manager will provide you with the username and password for your pipeline.
6. Press “OK” in the Wi-Fi settings window, and then “Apply” in the Network settings window to save and apply your proxy settings.
Congratulations!
You’ve successfully connected your macOS computer to Nimble’s IP Infrastructure. Your secure web traffic will now be routed through Nimble.
Last updated