
SwitchyOmega
About SwitchyOmega
SwitchyOmega is a free browser extension that lets users manage and switch between multiple proxies quickly and easily. SwitchyOmega supports both Chrome and Firefox, and sports an easy-to-use interface while also offering some advanced switching tools.
Installing SwitchyOmega
Installing SwitchyOmega is very straightforward. Simply follow the steps on your browser of choice:
Proxy setup
This guide uses SwitchyOmege for Google Chrome, but the steps and interface are identical across both browsers.
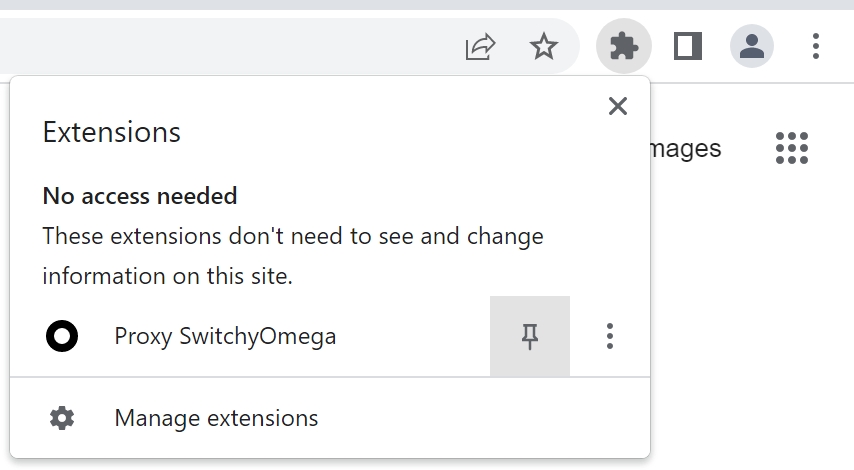
After installing the extension, pin it to your toolbar by clicking on the Extensions shortcut and then on the pin icon next to SwitchyOmega. If you’re using Firefox, you can skip this step as Firefox will pin it for you automatically.
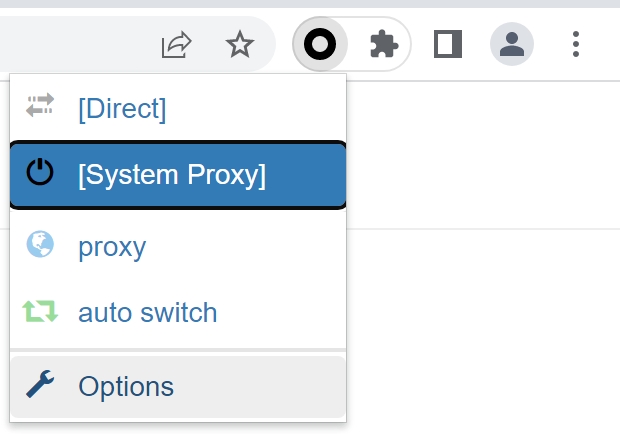
2. Next, click on SwitchyOmega to open the quick activation menu, then click “Options” to open the main SwitchyOmega interface.
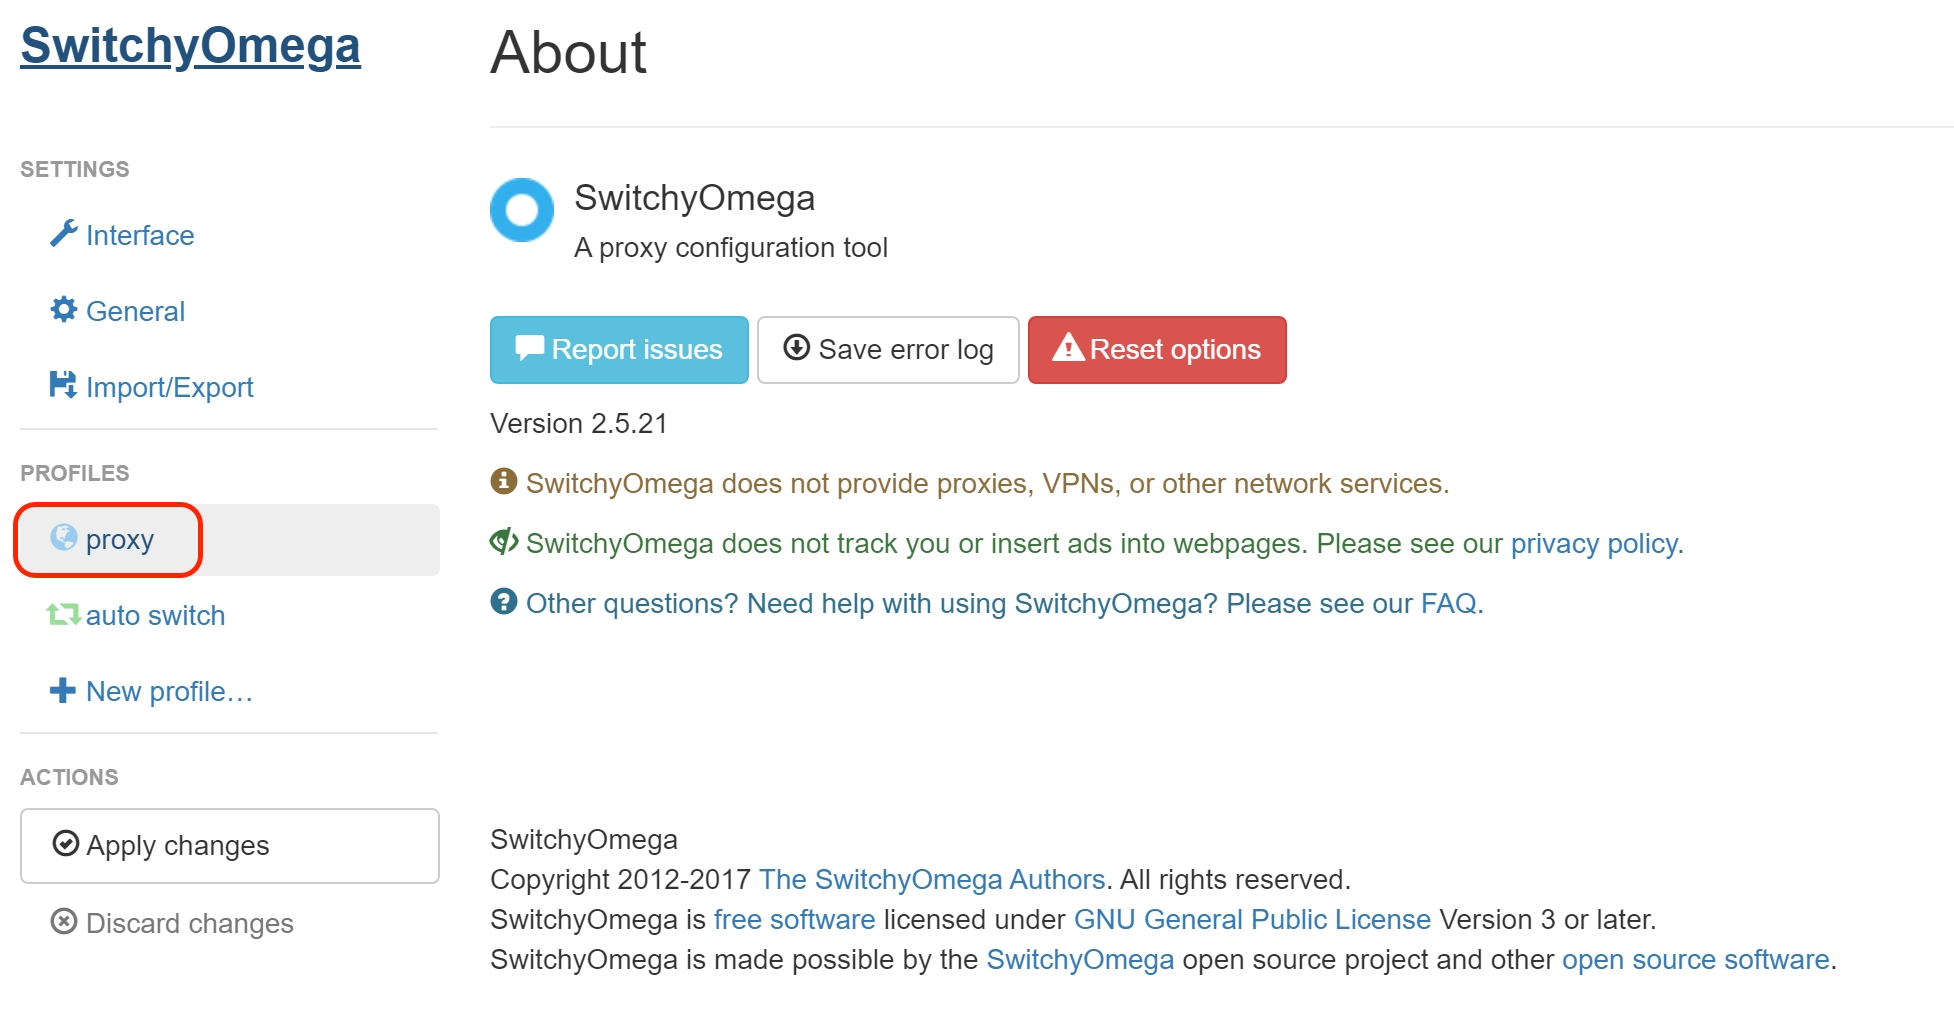
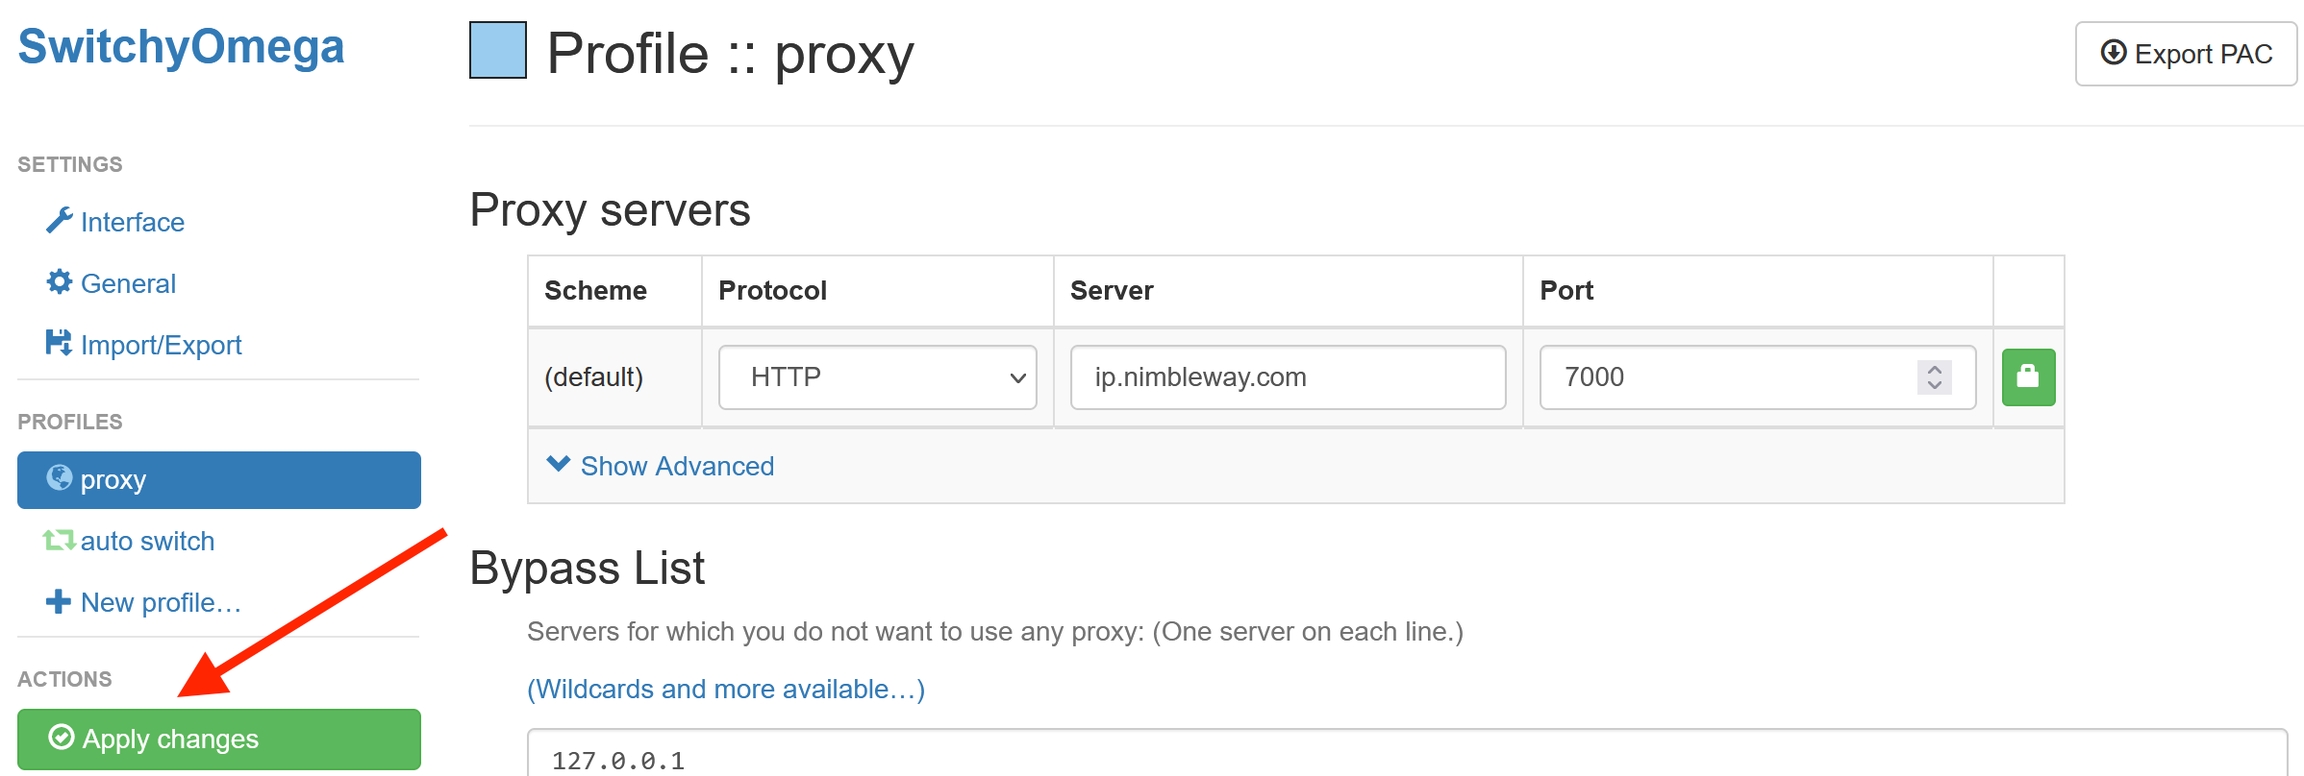
3. From the navigation menu on the left-hand side, under “Profiles”, click on “proxy” to setup a proxy connection.
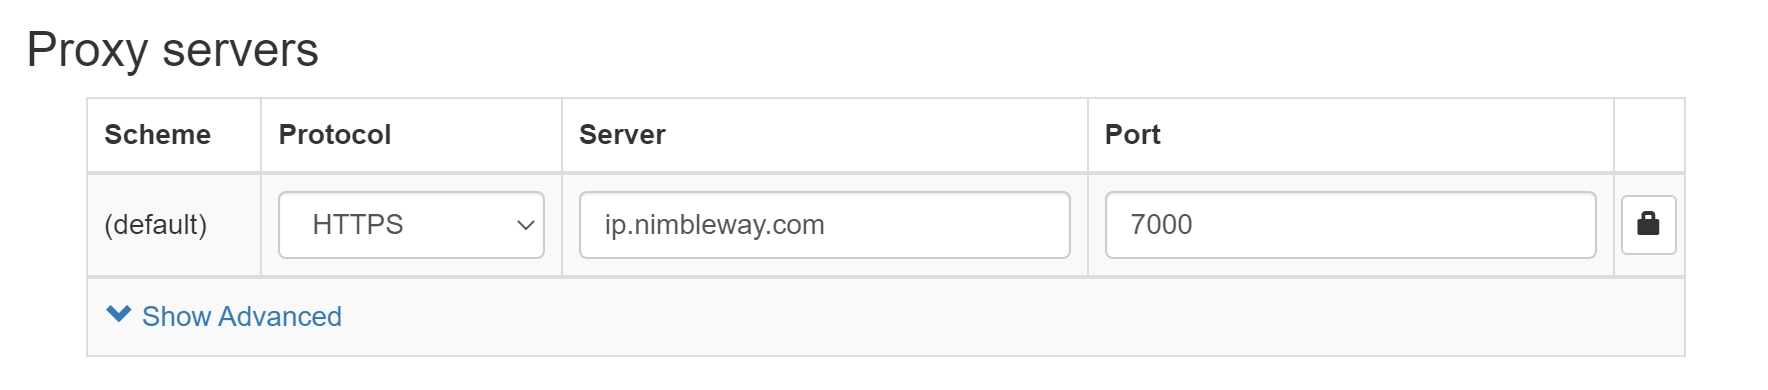
4. In the Proxy servers window that opens, enter the following credentials:
Protocol ⇒ HTTPS
Server ⇒ ip.nimbleway.com
Port ⇒ 7000
Then press on the lock icon and enter your credentials;
Username ⇒ Nimble’s pipeline username string
Password ⇒ Nimble’s pipeline password
5. Finally, click on “Apply changes” to save your proxy connection settings.
6. You are now ready to start browsing through Nimble IP. To enable the proxy connection, simply click on SwitchyOmega in the toolbar, and click on your desired profile. Once enabled, the SwitchyOmega icon will be highlighted with the color of the selected profile.

Auto switch
SwitchyOmega allows users to set up special conditions under which different proxies are used in accordance with the address of the website being visited. For example, you can configure SwitchyOmega to route all requests sent to Google through one proxy, while any other request should use a different proxy, or no proxy at all.
This is especially useful when combined with Nimble’s pipelines, which allow you to configure base settings such as geolocation and IP rotation behavior on the pipeline level. You can also track proxy usage per pipeline, allowing for more nuanced reporting and expense monitoring.
Setting up auto switch
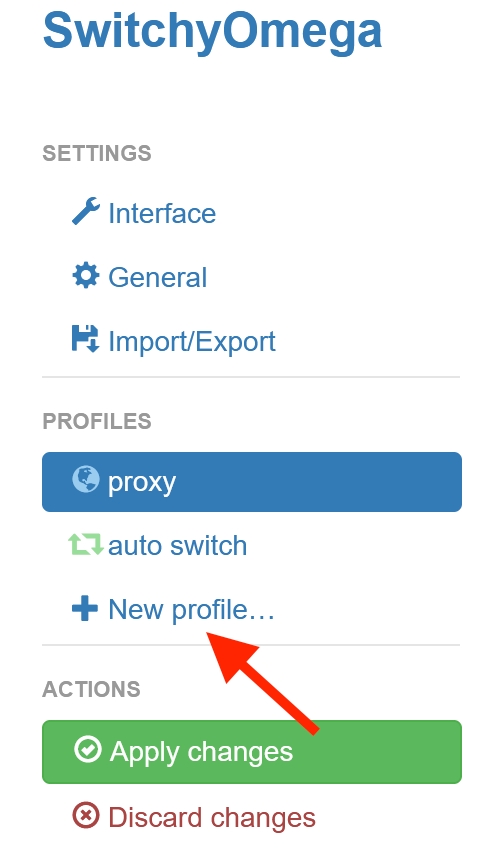
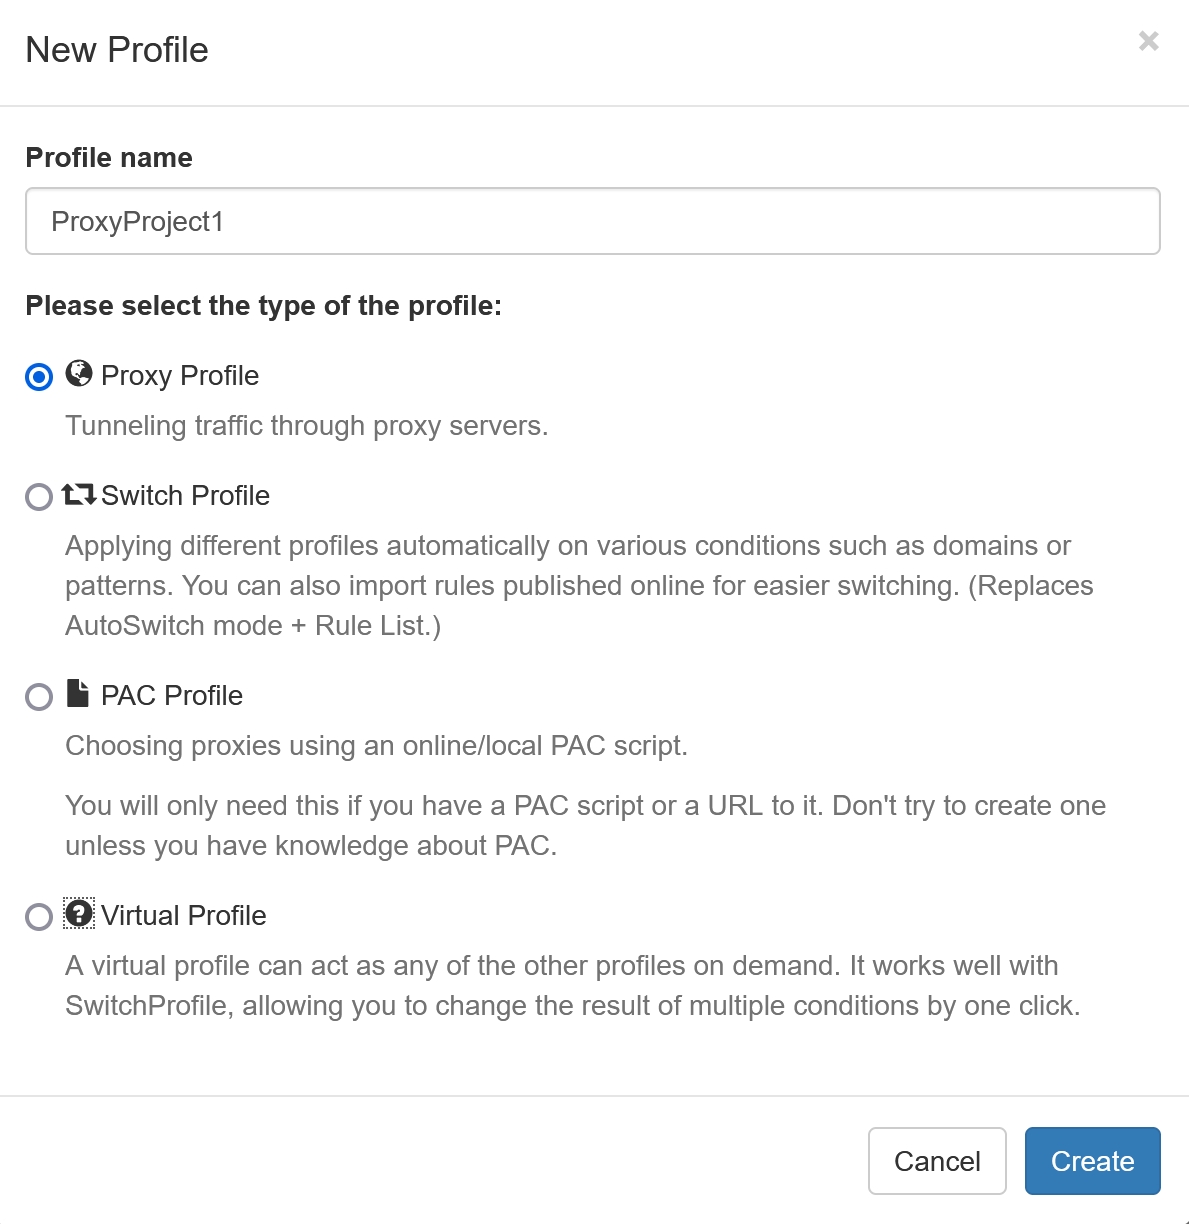
To use auto-switching, you first need to create proxy profiles to switch between. Click on “+ New Profile”, from the Profiles menu, enter a name for your profile, and select “Proxy Profile” in the New Profile window. Then click Create.
2. For this example, we’ve created two proxy profiles named “NimblePipeline1” and “NimblePipeline2”. Our two profiles use the same basic settings, with a big exception being their credentials. By changing the username string, we can connect each profile to a separate Nimble pipeline. If you’d like to learn more about using Pipelines, check out our Getting Start Guide.
3. Now click on “auto switch” from the profiles menu to begin setting up auto switching. By default, you’ll have two switching rules already created with “example.com” conditions.
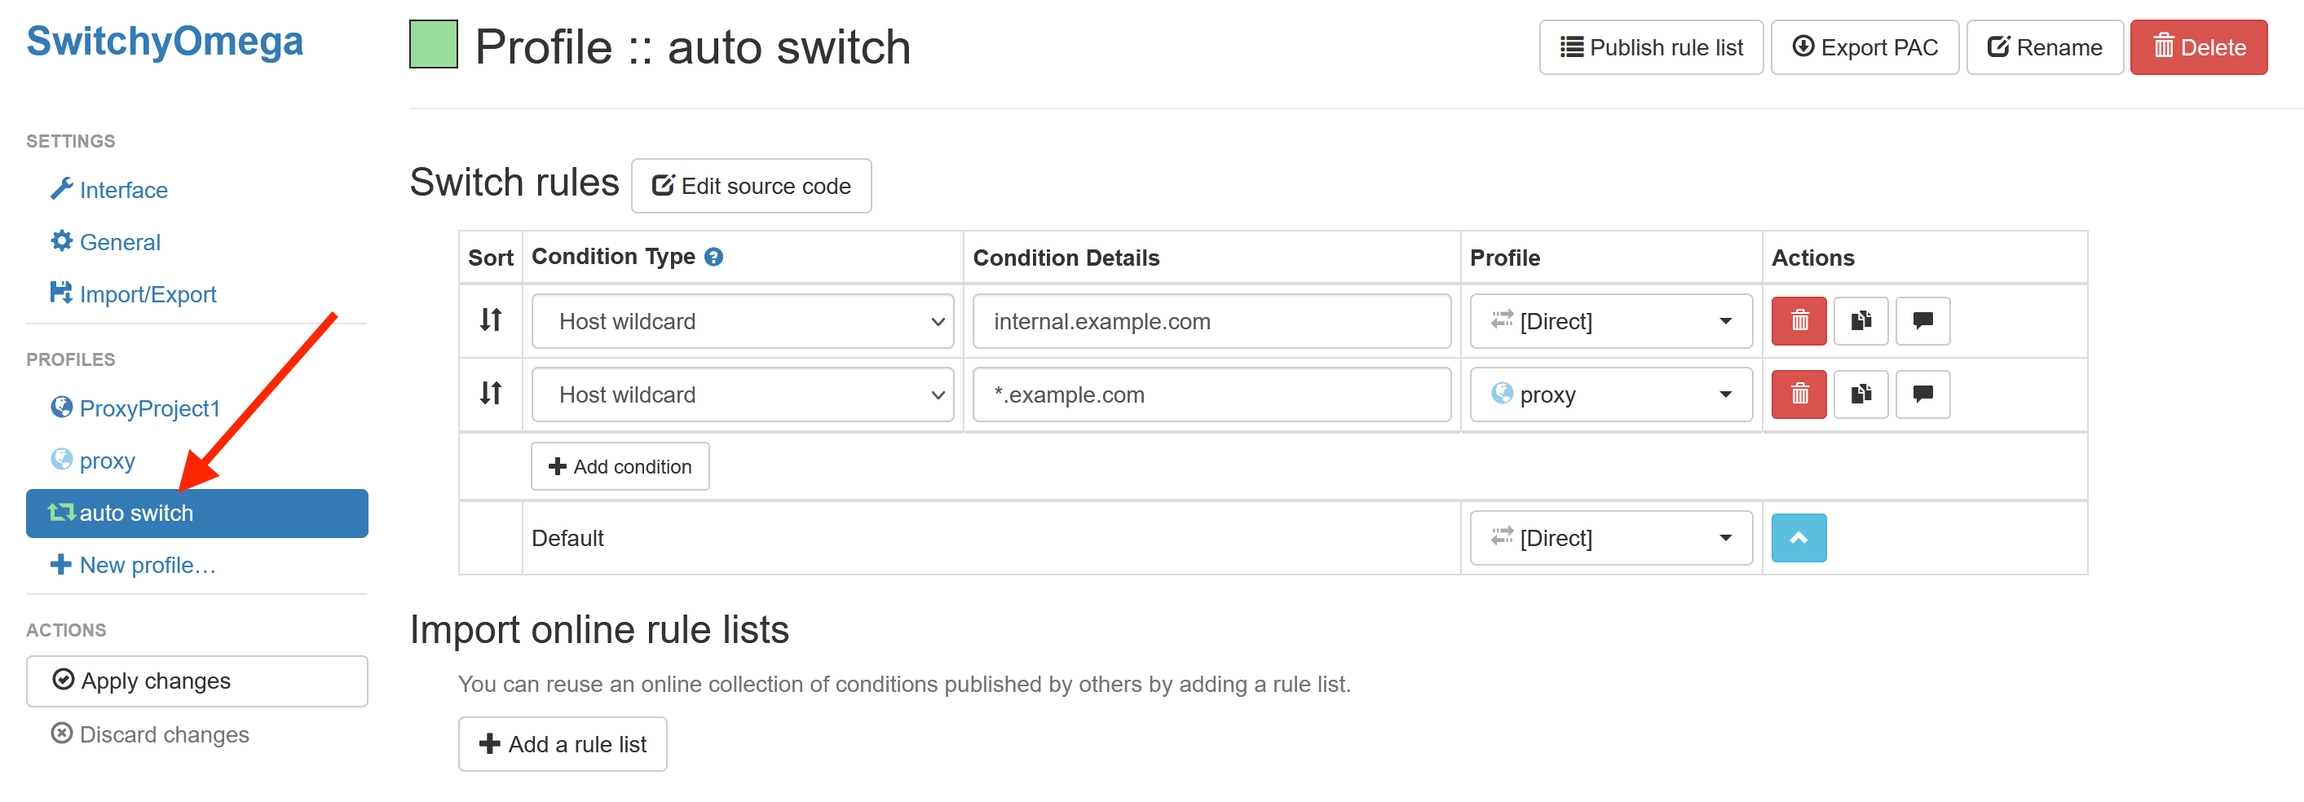
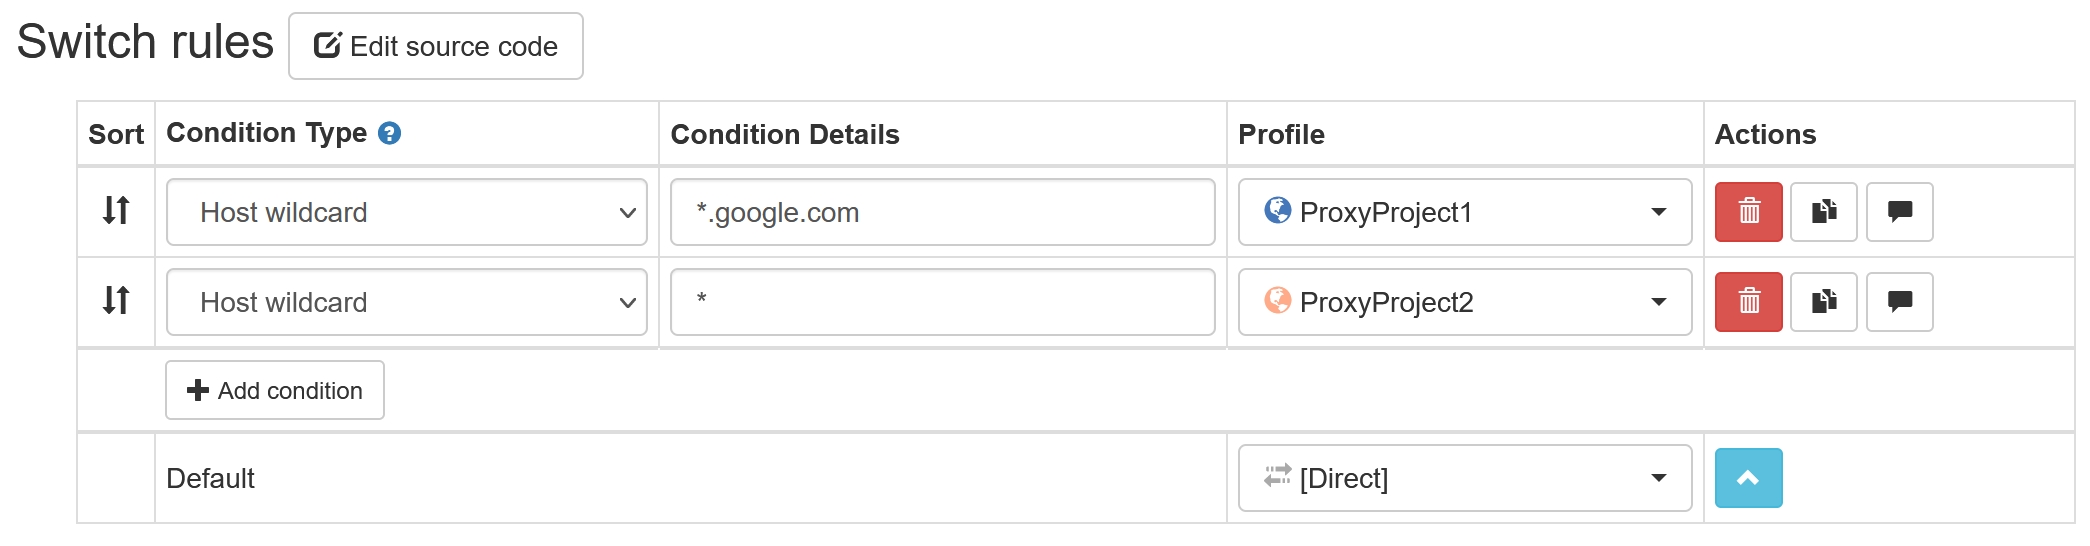
4. Under condition type, you’ll see the two switching rules have “Host wildcard”. This allows you to select which proxy is used according to which domain name is requested. For our example, we’ll be routing all requests to google.com through NimblePipeline1, and any other request through NimblePipeline2.
5. First, enter “*.google.com” under condition details and “NimblePipeline1” under profile for the top rule. This will match with google.com and any of its subdomains. Since rules are applied from the top down, any hosts not matched by the first rule will be checked again with the next rule. Then, enter “*” under the condition details for the bottom rule, and set its profile to “NimblePipeline2”. This will match any request. When you’re finished, your switch rules table should look like this:
6. You’re almost finished! Now click on “Apply changes” on the left-hand side to save your switching rules. To enable them, click on the SwitchyOmega quick menu in your browser toolbar, and select “auto switch”.
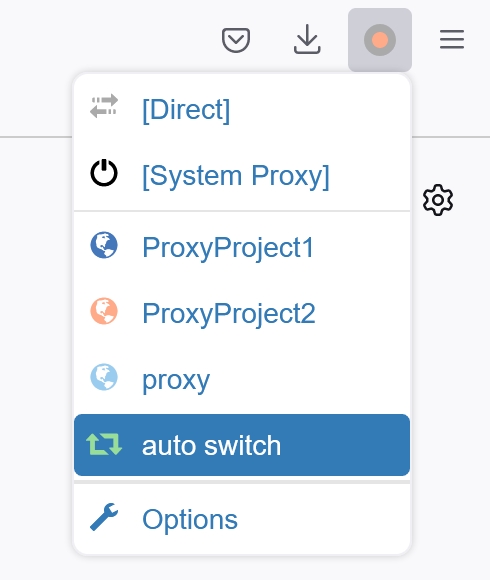
That’s it! Your requests will now be switched automatically by SwitchyOmega, with requests to Google or any of its subdomains being channeled through NimblePipeline1, and all other requests through NimblePipeline2.
Last updated