
VMLogin
With VMLogin's virtual browsing profiles, you can use physical devices to access and manage multiple online accounts while also benefiting from features like anti-association and fingerprint protection. These virtual profiles help you protect your online identity and enhance the security of your online accounts.
Follow these steps to integrate Nimble IP with VMLogin
Sign up for an account at VMLogin
Download and install the VMLogin software here.
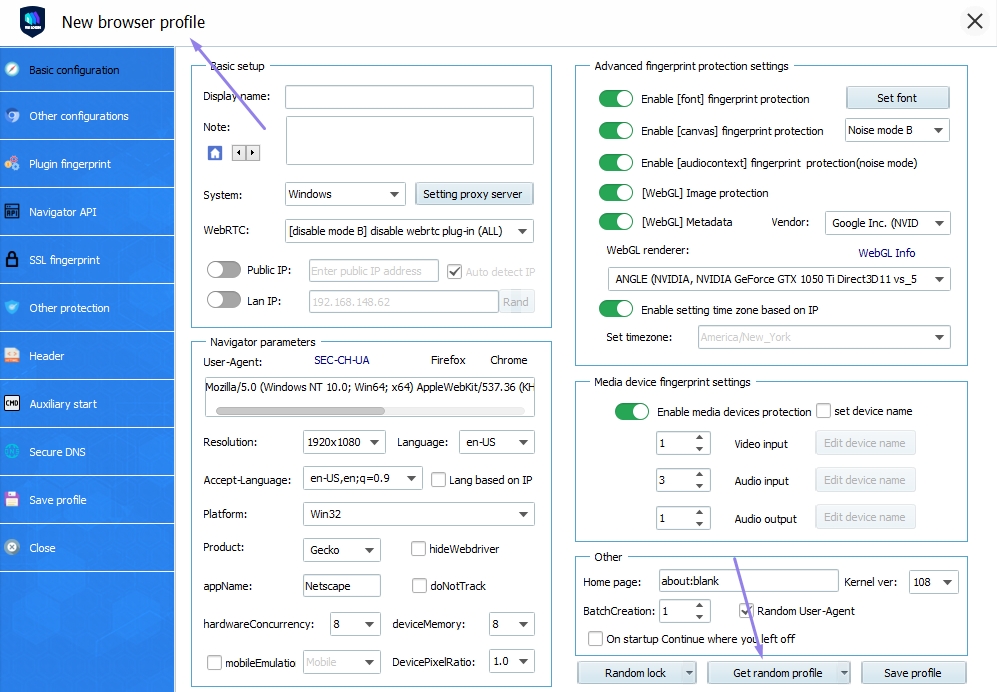
Launch VMLogin and create a new browser profile.
Click "Get random profile" to generate a new virtual browsing profile.
Customize your profile by selecting the settings that best suit you, including the operating system, screen resolution, language, WebGL vendor, time zone, and media device fingerprint.
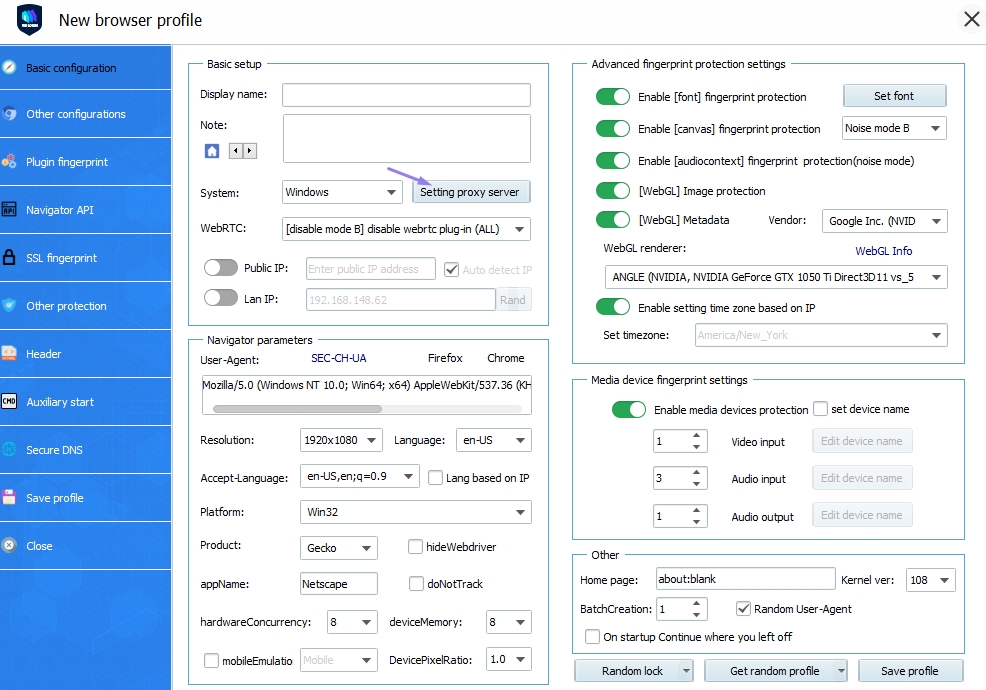
2. Click "setting proxy server" to configure to proxy.
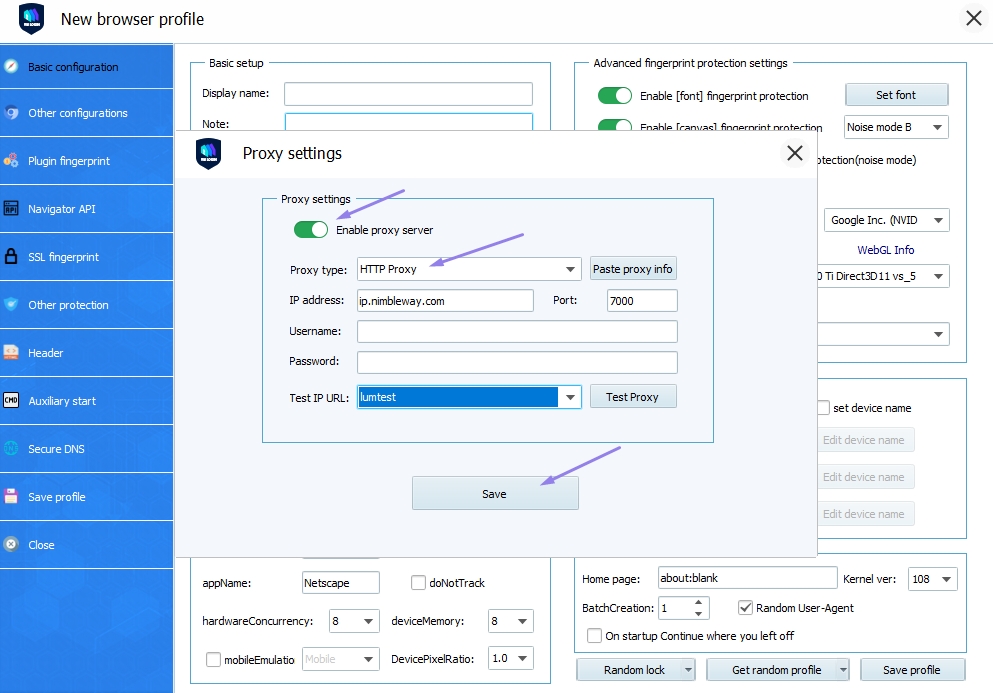
Fill in the Nimble IP proxy info in the setting proxy server window (don't forget to check "enable proxy server").
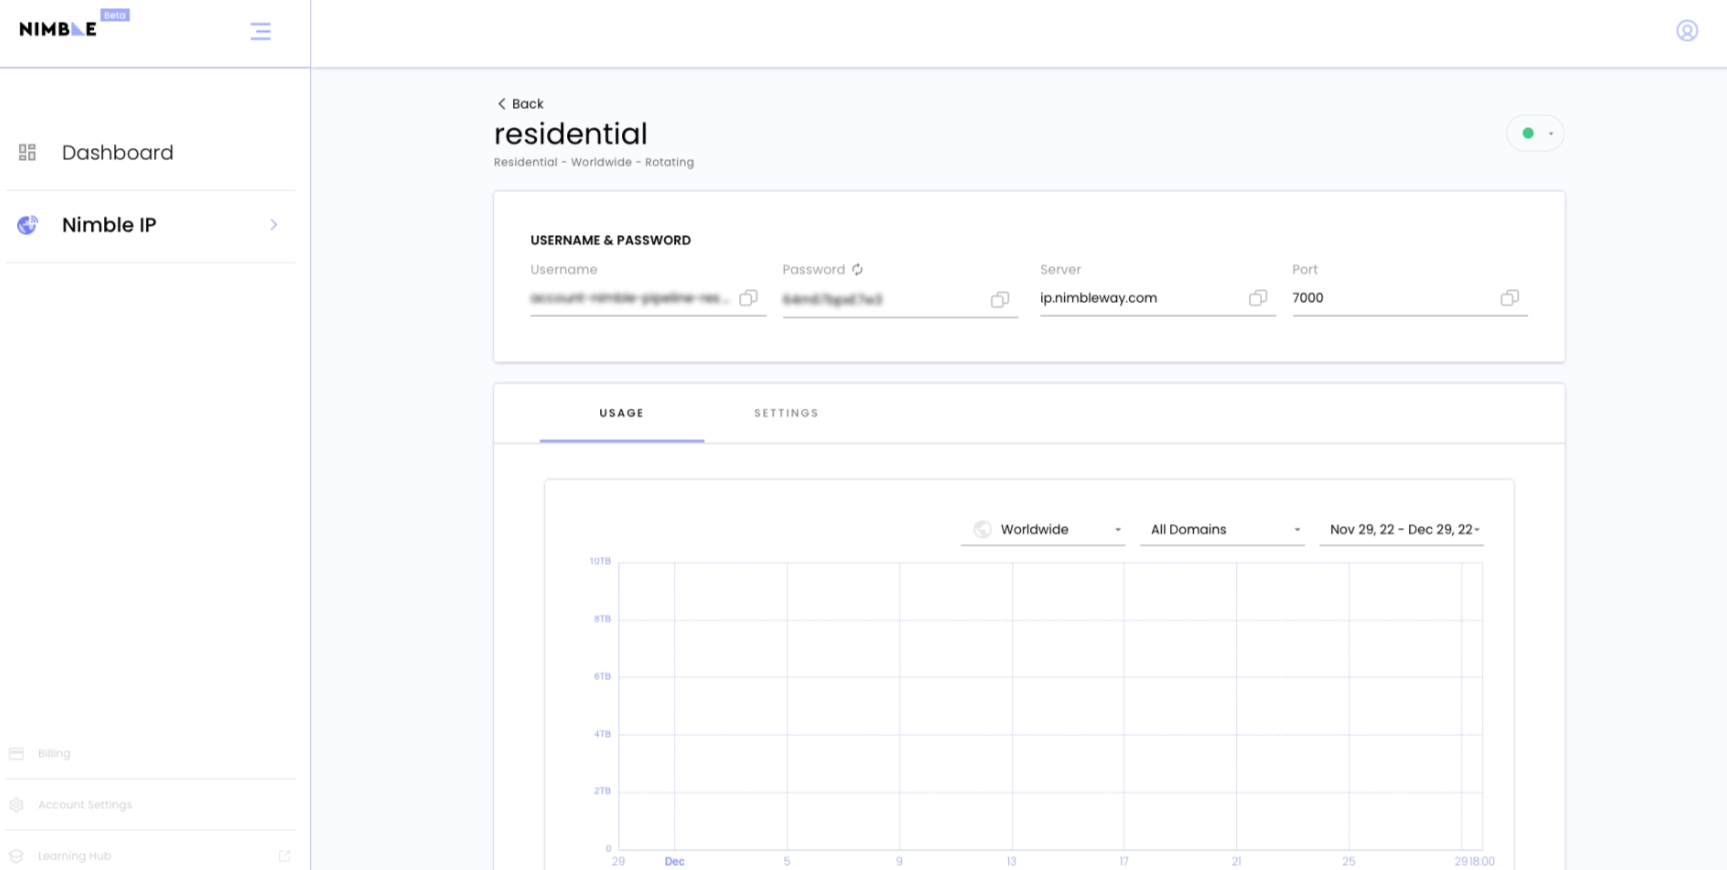
In the Nimble User Dashboard, navigate to the Nimble IP page and click “add pipeline” to get your pipeline's proxy connection details.
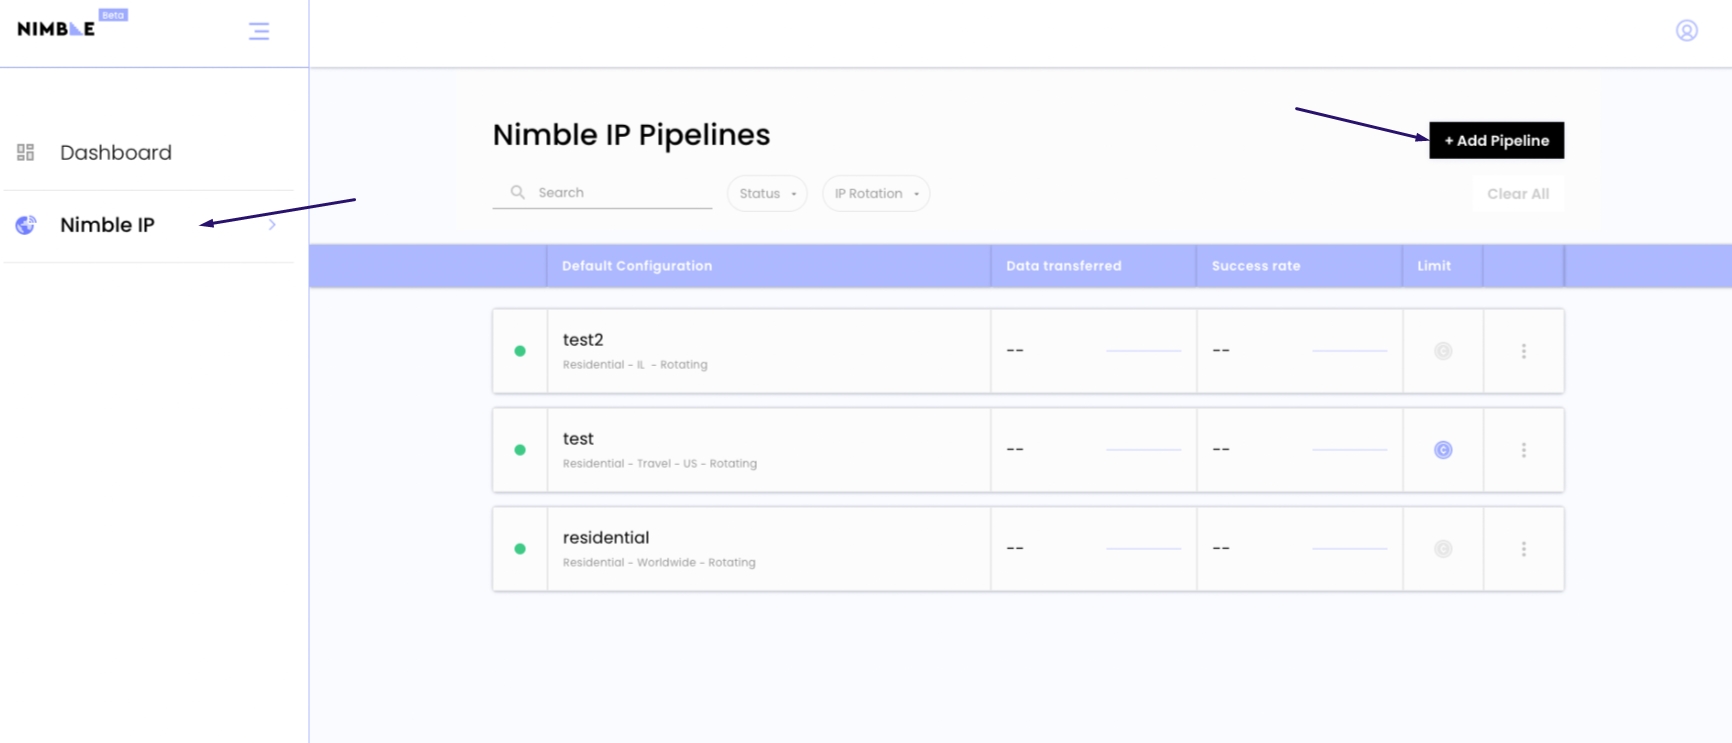
In your new pipeline, you will find the IP address, port, username, and password.
To set up and test the proxy in the VMLogin dashboard:
3. Copy the proxy info from the Nimble user dashboard to the VMLogin platform.
4. Configure the proxy using the following information:
Proxy type: HTTP
IP address: ip.nimbleway.com
Port: 7000
Username: your pipeline username
Password: your pipeline password
That's all! VMLogin will now use proxies from Nimble IP. To learn more about Nimble IP and open an account, visit our website!
Last updated